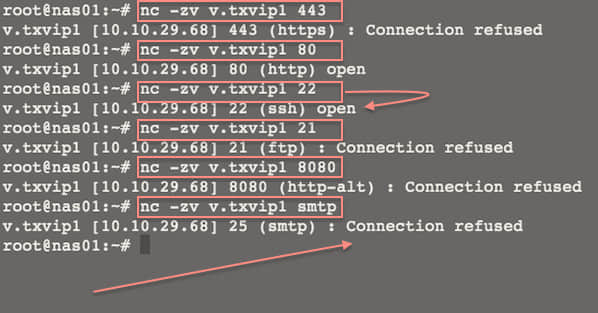
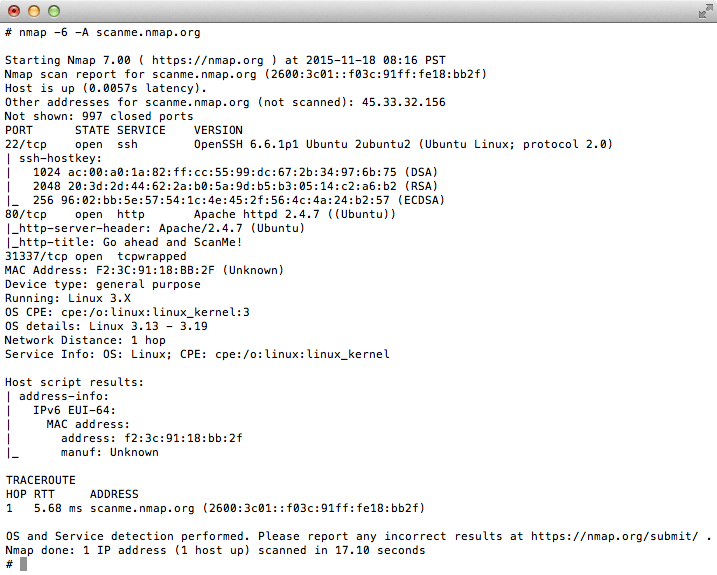
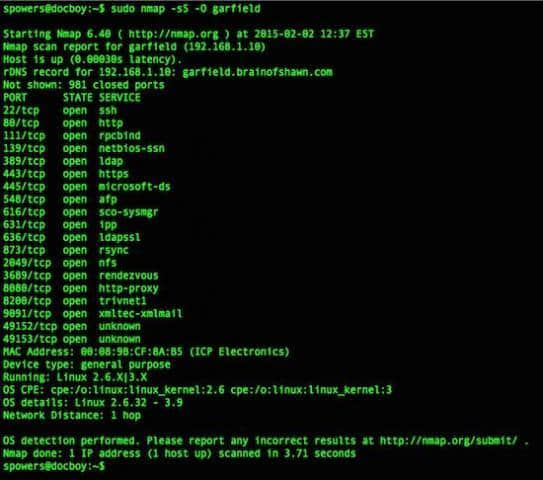
Nmap亦称为Network Mapper(网络映射)是一个开源并且通用的用于Linux系统/网络管理员的工具。nmap用于探查网络、执行安全扫描、网络核查并且在远程机器上找出开放端口。它可以扫描在线的主机、操作系统、包过滤器和远程主机上的开放端口。

Nmap 命令和示例
我会分两个章节讲述NMAP的常见的使用方法,这篇是nmap系列的第一部分(译注:原文为I’ll be covering most of NMAP usage in two different parts and this is the first part of nmap serious,这里serious可能为笔误,应该为series)。在这个步骤里,我用两个没有防火墙的服务器来测试nmap命令的工作。
- 192.168.0.100 – server1.tecmint.com
- 192.168.0.101 – server2.tecmint.com
Nmap 命令使用
# nmap [Scan Type(s)] [Options] {target specification}
如何在Linux上安装nmap
如今大部分Linux发行版像Red Hat, CentOS, Fedoro, Debian 和 Ubuntu已经在它们默认的包管理仓库中包含了nmap,可以通过Yum 和 APT安装、管理和更新软件包。在这些发行版上安装nmap,可以使用下面的命令。
# yum install nmap      [基于 Red Hat 的发行版]
$ sudo apt-get install nmap [基于 Debian 的发行版]
安装了最新的nmap程序之后,你就可以跟着这篇文章中的示例指令来学习了。
1. 带主机名和IP地址扫描系统
nmap工具提供了不同的方法来扫描一个系统。在这个例子中,我使用主机名为server2.tecmint.com的机器执行扫描来找出所有开放端口,服务和系统上的MAC地址。
使用主机名扫描
[root@server1 ~]# nmap server2.tecmint.com

Starting Nmap 4.11 ( http://www.insecure.org/nmap/ ) at 2013-11-11 15:42 EST
Interesting ports on server2.tecmint.com (192.168.0.101):
Not shown: 1674 closed ports
PORT     STATE SERVICE
22/tcp   open  ssh
80/tcp   open  http
111/tcp  open  rpcbind
957/tcp  open  unknown
3306/tcp open  mysql
8888/tcp open  sun-answerbook
MAC Address: 08:00:27:D9:8E:D7 (Cadmus Computer Systems)

Nmap finished: 1 IP address (1 host up) scanned in 0.415 seconds
You have new mail in /var/spool/mail/root
使用IP地址扫描
[root@server1 ~]# nmap 192.168.0.101

Starting Nmap 4.11 ( http://www.insecure.org/nmap/ ) at 2013-11-18 11:04 EST
Interesting ports on server2.tecmint.com (192.168.0.101):
Not shown: 1674 closed ports
PORT     STATE SERVICE
22/tcp   open  ssh
80/tcp   open  http
111/tcp  open  rpcbind
958/tcp  open  unknown
3306/tcp open  mysql
8888/tcp open  sun-answerbook
MAC Address: 08:00:27:D9:8E:D7 (Cadmus Computer Systems)

Nmap finished: 1 IP address (1 host up) scanned in 0.465 seconds
You have new mail in /var/spool/mail/root
2. 使用"-v"选项扫描
你可以看到带"-v"选项的命令给出了关于远程机器的更多信息。
[root@server1 ~]# nmap -v server2.tecmint.com

Starting Nmap 4.11 ( http://www.insecure.org/nmap/ ) at 2013-11-11 15:43 EST
Initiating ARP Ping Scan against 192.168.0.101 [1 port] at 15:43
The ARP Ping Scan took 0.01s to scan 1 total hosts.
Initiating SYN Stealth Scan against server2.tecmint.com (192.168.0.101) [1680 ports] at 15:43
Discovered open port 22/tcp on 192.168.0.101
Discovered open port 80/tcp on 192.168.0.101
Discovered open port 8888/tcp on 192.168.0.101
Discovered open port 111/tcp on 192.168.0.101
Discovered open port 3306/tcp on 192.168.0.101
Discovered open port 957/tcp on 192.168.0.101
The SYN Stealth Scan took 0.30s to scan 1680 total ports.
Host server2.tecmint.com (192.168.0.101) appears to be up ... good.
Interesting ports on server2.tecmint.com (192.168.0.101):
Not shown: 1674 closed ports
PORT     STATE SERVICE
22/tcp   open  ssh
80/tcp   open  http
111/tcp  open  rpcbind
957/tcp  open  unknown
3306/tcp open  mysql
8888/tcp open  sun-answerbook
MAC Address: 08:00:27:D9:8E:D7 (Cadmus Computer Systems)

Nmap finished: 1 IP address (1 host up) scanned in 0.485 seconds
               Raw packets sent: 1681 (73.962KB) | Rcvd: 1681 (77.322KB)
扫描多台主机
你可以简单地通过在namap后写上它们的IP地址或者主机名来扫描多台主机。
[root@server1 ~]# nmap 192.168.0.101 192.168.0.102 192.168.0.103

Starting Nmap 4.11 ( http://www.insecure.org/nmap/ ) at 2013-11-11 16:06 EST
Interesting ports on server2.tecmint.com (192.168.0.101):
Not shown: 1674 closed ports
PORT     STATE SERVICE
22/tcp   open  ssh
80/tcp   open  http
111/tcp  open  rpcbind
957/tcp  open  unknown
3306/tcp open  mysql
8888/tcp open  sun-answerbook
MAC Address: 08:00:27:D9:8E:D7 (Cadmus Computer Systems)
Nmap finished: 3 IP addresses (1 host up) scanned in 0.580 seconds
4. 扫描整个子网
你可以通过通配符来使nmap扫描整个子网或者IP段。
[root@server1 ~]# nmap 192.168.0.*

Starting Nmap 4.11 ( http://www.insecure.org/nmap/ ) at 2013-11-11 16:11 EST
Interesting ports on server1.tecmint.com (192.168.0.100):
Not shown: 1677 closed ports
PORT    STATE SERVICE
22/tcp  open  ssh
111/tcp open  rpcbind
851/tcp open  unknown

Interesting ports on server2.tecmint.com (192.168.0.101):
Not shown: 1674 closed ports
PORT     STATE SERVICE
22/tcp   open  ssh
80/tcp   open  http
111/tcp  open  rpcbind
957/tcp  open  unknown
3306/tcp open  mysql
8888/tcp open  sun-answerbook
MAC Address: 08:00:27:D9:8E:D7 (Cadmus Computer Systems)

Nmap finished: 256 IP addresses (2 hosts up) scanned in 5.550 seconds
You have new mail in /var/spool/mail/root
从上面的输出你可以看到nmap扫描了整个子网,并给出了网络中在线主机的信息。
5. 使用IP地址的最后一段扫描多台主机
你可以简单地通过指定IP地址的最后8位执行扫描多台主机。比如说,这里我在IP地址为192.168.0.101, 192.168.0.102 and 192.168.0.103的机器上执行了扫描。
[root@server1 ~]# nmap 192.168.0.101,102,103

Starting Nmap 4.11 ( http://www.insecure.org/nmap/ ) at 2013-11-11 16:09 EST
Interesting ports on server2.tecmint.com (192.168.0.101):
Not shown: 1674 closed ports
PORT     STATE SERVICE
22/tcp   open  ssh
80/tcp   open  http
111/tcp  open  rpcbind
957/tcp  open  unknown
3306/tcp open  mysql
8888/tcp open  sun-answerbook
MAC Address: 08:00:27:D9:8E:D7 (Cadmus Computer Systems)

Nmap finished: 3 IP addresses (1 host up) scanned in 0.552 seconds
You have new mail in /var/spool/mail/root
6. 从文件中扫描主机列表
如果你有更多的主机要扫描,并且所有的主机都写在一个文件中,你可以直接让namp读取它并执行扫描。让我们看看要怎么做。
创建一个名为“nmaptest.txt”的文本文件,并定义所有你想要扫描的IP地址或者服务器的主机名。
[root@server1 ~]# cat > nmaptest.txt

localhost
server2.tecmint.com
192.168.0.101
接着,带“iL”参数运行nmap命令来扫描文件中所有列出的IP地址。
[root@server1 ~]# nmap -iL nmaptest.txt

Starting Nmap 4.11 ( http://www.insecure.org/nmap/ ) at 2013-11-18 10:58 EST
Interesting ports on localhost.localdomain (127.0.0.1):
Not shown: 1675 closed ports
PORT    STATE SERVICE
22/tcp  open  ssh
25/tcp  open  smtp
111/tcp open  rpcbind
631/tcp open  ipp
857/tcp open  unknown

Interesting ports on server2.tecmint.com (192.168.0.101):
Not shown: 1674 closed ports
PORT     STATE SERVICE
22/tcp   open  ssh
80/tcp   open  http
111/tcp  open  rpcbind
958/tcp  open  unknown
3306/tcp open  mysql
8888/tcp open  sun-answerbook
MAC Address: 08:00:27:D9:8E:D7 (Cadmus Computer Systems)

Interesting ports on server2.tecmint.com (192.168.0.101):
Not shown: 1674 closed ports
PORT     STATE SERVICE
22/tcp   open  ssh
80/tcp   open  http
111/tcp  open  rpcbind
958/tcp  open  unknown
3306/tcp open  mysql
8888/tcp open  sun-answerbook
MAC Address: 08:00:27:D9:8E:D7 (Cadmus Computer Systems)

Nmap finished: 3 IP addresses (3 hosts up) scanned in 2.047 seconds
7. 扫描一个IP范围
在使用nmap扫描时,你可以指定一个IP范围。
[root@server1 ~]# nmap 192.168.0.101-110

Starting Nmap 4.11 ( http://www.insecure.org/nmap/ ) at 2013-11-11 16:09 EST
Interesting ports on server2.tecmint.com (192.168.0.101):
Not shown: 1674 closed ports
PORT     STATE SERVICE
22/tcp   open  ssh
80/tcp   open  http
111/tcp  open  rpcbind
957/tcp  open  unknown
3306/tcp open  mysql
8888/tcp open  sun-answerbook
MAC Address: 08:00:27:D9:8E:D7 (Cadmus Computer Systems)

Nmap finished: 10 IP addresses (1 host up) scanned in 0.542 seconds
8. 扫描网络时排除部分主机
你可以在执行全网扫描的时候排除一些主机,或者在使用通配符扫描时使用“–exclude”选项。
[root@server1 ~]# nmap 192.168.0.* --exclude 192.168.0.100

Starting Nmap 4.11 ( http://www.insecure.org/nmap/ ) at 2013-11-11 16:16 EST
Interesting ports on server2.tecmint.com (192.168.0.101):
Not shown: 1674 closed ports
PORT     STATE SERVICE
22/tcp   open  ssh
80/tcp   open  http
111/tcp  open  rpcbind
957/tcp  open  unknown
3306/tcp open  mysql
8888/tcp open  sun-answerbook
MAC Address: 08:00:27:D9:8E:D7 (Cadmus Computer Systems)

Nmap finished: 255 IP addresses (1 host up) scanned in 5.313 seconds
You have new mail in /var/spool/mail/root
9. 扫描系统信息
(译注:原文这里提到了traceroute,实在并无此内容,删除之)
使用nmap,你可以检测到运行在远程主机上的操作系统和版本。要启用OS及其版本检测,我们可以使用带 “-A” 选项使用nmap。
[root@server1 ~]# nmap -A 192.168.0.101

Starting Nmap 4.11 ( http://www.insecure.org/nmap/ ) at 2013-11-11 16:25 EST
Interesting ports on server2.tecmint.com (192.168.0.101):
Not shown: 1674 closed ports
PORT     STATE SERVICE VERSION
22/tcp   open  ssh     OpenSSH 4.3 (protocol 2.0)
80/tcp   open  http    Apache httpd 2.2.3 ((CentOS))
111/tcp  open  rpcbind  2 (rpc #100000)
957/tcp  open  status   1 (rpc #100024)
3306/tcp open  mysql   MySQL (unauthorized)
8888/tcp open  http    lighttpd 1.4.32
MAC Address: 08:00:27:D9:8E:D7 (Cadmus Computer Systems)
No exact OS matches for host (If you know what OS is running on it, see http://www.insecure.org/cgi-bin/nmap-submit.cgi).
TCP/IP fingerprint:
SInfo(V=4.11%P=i686-redhat-linux-gnu%D=11/11%Tm=52814B66%O=22%C=1%M=080027)
TSeq(Class=TR%IPID=Z%TS=1000HZ)
T1(Resp=Y%DF=Y%W=16A0%ACK=S++%Flags=AS%Ops=MNNTNW)
T2(Resp=N)
T3(Resp=Y%DF=Y%W=16A0%ACK=S++%Flags=AS%Ops=MNNTNW)
T4(Resp=Y%DF=Y%W=0%ACK=O%Flags=R%Ops=)
T5(Resp=Y%DF=Y%W=0%ACK=S++%Flags=AR%Ops=)
T6(Resp=Y%DF=Y%W=0%ACK=O%Flags=R%Ops=)
T7(Resp=Y%DF=Y%W=0%ACK=S++%Flags=AR%Ops=)
PU(Resp=Y%DF=N%TOS=C0%IPLEN=164%RIPTL=148%RID=E%RIPCK=E%UCK=E%ULEN=134%DAT=E)

Uptime 0.169 days (since Mon Nov 11 12:22:15 2013)

Nmap finished: 1 IP address (1 host up) scanned in 22.271 seconds
You have new mail in /var/spool/mail/root
在上面的输出中,你可以看到运行在远程主机上操作系统的TCP/IP指纹和更详细的运行在远程主机上的特定端口和服务。
10. 使用nmap启用系统检测
使用选项“-O”或“-osscan-guess”同样可以发现OS信息。
[root@server1 ~]# nmap -O server2.tecmint.com

Starting Nmap 4.11 ( http://www.insecure.org/nmap/ ) at 2013-11-11 17:40 EST
Interesting ports on server2.tecmint.com (192.168.0.101):
Not shown: 1674 closed ports
PORT     STATE SERVICE
22/tcp   open  ssh
80/tcp   open  http
111/tcp  open  rpcbind
957/tcp  open  unknown
3306/tcp open  mysql
8888/tcp open  sun-answerbook
MAC Address: 08:00:27:D9:8E:D7 (Cadmus Computer Systems)
No exact OS matches for host (If you know what OS is running on it, see http://www.insecure.org/cgi-bin/nmap-submit.cgi).
TCP/IP fingerprint:
SInfo(V=4.11%P=i686-redhat-linux-gnu%D=11/11%Tm=52815CF4%O=22%C=1%M=080027)
TSeq(Class=TR%IPID=Z%TS=1000HZ)
T1(Resp=Y%DF=Y%W=16A0%ACK=S++%Flags=AS%Ops=MNNTNW)
T2(Resp=N)
T3(Resp=Y%DF=Y%W=16A0%ACK=S++%Flags=AS%Ops=MNNTNW)
T4(Resp=Y%DF=Y%W=0%ACK=O%Flags=Option -O and -osscan-guess also helps to discover OSR%Ops=)
T5(Resp=Y%DF=Y%W=0%ACK=S++%Flags=AR%Ops=)
T6(Resp=Y%DF=Y%W=0%ACK=O%Flags=R%Ops=)
T7(Resp=Y%DF=Y%W=0%ACK=S++%Flags=AR%Ops=)
PU(Resp=Y%DF=N%TOS=C0%IPLEN=164%RIPTL=148%RID=E%RIPCK=E%UCK=E%ULEN=134%DAT=E)

Uptime 0.221 days (since Mon Nov 11 12:22:16 2013)

Nmap finished: 1 IP address (1 host up) scanned in 11.064 seconds
You have new mail in /var/spool/mail/root
11. 扫描主机来检测防火墙
下面的命令会在远程主机上执行扫描来检测主机上是否使用了任何包过滤器或者防火墙。
[root@server1 ~]# nmap -sA 192.168.0.101

Starting Nmap 4.11 ( http://www.insecure.org/nmap/ ) at 2013-11-11 16:27 EST
All 1680 scanned ports on server2.tecmint.com (192.168.0.101) are UNfiltered
MAC Address: 08:00:27:D9:8E:D7 (Cadmus Computer Systems)

Nmap finished: 1 IP address (1 host up) scanned in 0.382 seconds
You have new mail in /var/spool/mail/root
12. 扫描主机以检查其受到防火墙保护
扫描检测一个主机是否受到任何包过滤器软件或者防火墙保护。
[root@server1 ~]# nmap -PN 192.168.0.101

Starting Nmap 4.11 ( http://www.insecure.org/nmap/ ) at 2013-11-11 16:30 EST
Interesting ports on server2.tecmint.com (192.168.0.101):
Not shown: 1674 closed ports
PORT     STATE SERVICE
22/tcp   open  ssh
80/tcp   open  http
111/tcp  open  rpcbind
957/tcp  open  unknown
3306/tcp open  mysql
8888/tcp open  sun-answerbook
MAC Address: 08:00:27:D9:8E:D7 (Cadmus Computer Systems)

Nmap finished: 1 IP address (1 host up) scanned in 0.399 seconds
13. 找出网络中在线主机
在“-sP”选项的bang帮助下,我们可以简单地检测网络中的主机是否在线,带这个选项后nmap会跳过端口检测和其他检测。
[root@server1 ~]# nmap -sP 192.168.0.*

Starting Nmap 4.11 ( http://www.insecure.org/nmap/ ) at 2013-11-18 11:01 EST
Host server1.tecmint.com (192.168.0.100) appears to be up.
Host server2.tecmint.com (192.168.0.101) appears to be up.
MAC Address: 08:00:27:D9:8E:D7 (Cadmus Computer Systems)
Nmap finished: 256 IP addresses (2 hosts up) scanned in 5.109 seconds
14. 执行快速扫描
你可以带“-F”选项仅扫描所有列在nmap-services文件中的端口。
[root@server1 ~]# nmap -F 192.168.0.101

Starting Nmap 4.11 ( http://www.insecure.org/nmap/ ) at 2013-11-11 16:47 EST
Interesting ports on server2.tecmint.com (192.168.0.101):
Not shown: 1234 closed ports
PORT     STATE SERVICE
22/tcp   open  ssh
80/tcp   open  http
111/tcp  open  rpcbind
3306/tcp open  mysql
8888/tcp open  sun-answerbook
MAC Address: 08:00:27:D9:8E:D7 (Cadmus Computer Systems)

Nmap finished: 1 IP address (1 host up) scanned in 0.322 seconds
15. 找出nmap版本
你可以使用“-V”选项找出运行在你机器上的nmap版本。
[root@server1 ~]# nmap -V

Nmap version 4.11 ( http://www.insecure.org/nmap/ )
You have new mail in /var/spool/mail/root
16. 连续扫描端口
使用“-r”选项而不随机排列端口的扫描顺序。
[root@server1 ~]# nmap -r 192.168.0.101

Starting Nmap 4.11 ( http://www.insecure.org/nmap/ ) at 2013-11-11 16:52 EST
Interesting ports on server2.tecmint.com (192.168.0.101):
Not shown: 1674 closed ports
PORT     STATE SERVICE
22/tcp   open  ssh
80/tcp   open  http
111/tcp  open  rpcbind
957/tcp  open  unknown
3306/tcp open  mysql
8888/tcp open  sun-answerbook
MAC Address: 08:00:27:D9:8E:D7 (Cadmus Computer Systems)

Nmap finished: 1 IP address (1 host up) scanned in 0.363 seconds
17. 显示主机接口及路由
你可以使用nmap的“–iflist”选项来列出本机的主机接口和路由信息。
[root@server1 ~]# nmap --iflist

Starting Nmap 4.11 ( http://www.insecure.org/nmap/ ) at 2013-11-11 17:07 EST
************************INTERFACES************************
DEV  (SHORT) IP/MASK          TYPE     UP MAC
lo   (lo)    127.0.0.1/8      loopback up
eth0 (eth0)  192.168.0.100/24 ethernet up 08:00:27:11:C7:89

**************************ROUTES**************************
DST/MASK      DEV  GATEWAY
192.168.0.0/0 eth0
169.254.0.0/0 eth0
在上面的输出中,你可以看到上述清单列出了你系统中的已经启用的接口及它们相应的路由。(译注:这样你就知道可以通过这些接口扫描哪些网络了)
18. 扫描特定端口
nmap使用不同的选项来发现远程机器上的端口。你可以用“-p”选项指定你想扫描的TCP端口。默认上,nmap只会扫描TCP端口。
[root@server1 ~]# nmap -p 80 server2.tecmint.com

Starting Nmap 4.11 ( http://www.insecure.org/nmap/ ) at 2013-11-11 17:12 EST
Interesting ports on server2.tecmint.com (192.168.0.101):
PORT   STATE SERVICE
80/tcp open  http
MAC Address: 08:00:27:D9:8E:D7 (Cadmus Computer Systems)

Nmap finished: 1 IP address (1 host up) sca
19. 扫描TCP端口
当然,你可以指定nmap扫描的端口类型(TCP或UDP)和端口号。
[root@server1 ~]# nmap -p T:8888,80 server2.tecmint.com

Starting Nmap 4.11 ( http://www.insecure.org/nmap/ ) at 2013-11-11 17:15 EST
Interesting ports on server2.tecmint.com (192.168.0.101):
PORT     STATE SERVICE
80/tcp   open  http
8888/tcp open  sun-answerbook
MAC Address: 08:00:27:D9:8E:D7 (Cadmus Computer Systems)

Nmap finished: 1 IP address (1 host up) scanned in 0.157 seconds
20. 扫描UDP端口
[root@server1 ~]# nmap -sU 53 server2.tecmint.com

Starting Nmap 4.11 ( http://www.insecure.org/nmap/ ) at 2013-11-11 17:15 EST
Interesting ports on server2.tecmint.com (192.168.0.101):
PORT     STATE SERVICE
53/udp   open  http
8888/udp open  sun-answerbook
MAC Address: 08:00:27:D9:8E:D7 (Cadmus Computer Systems)

Nmap finished: 1 IP address (1 host up) scanned in 0.157 seconds
21. 扫描多个端口
你可以使用“-p”选项来指定多个要扫描的端口。
[root@server1 ~]# nmap -p 80,443 192.168.0.101

Starting Nmap 4.11 ( http://www.insecure.org/nmap/ ) at 2013-11-18 10:56 EST
Interesting ports on server2.tecmint.com (192.168.0.101):
PORT    STATE  SERVICE
80/tcp  open   http
443/tcp closed https
MAC Address: 08:00:27:D9:8E:D7 (Cadmus Computer Systems)

Nmap finished: 1 IP address (1 host up) scanned in 0.190 seconds
22. 扫描网络的端口范围
你也可以使用表达式指定扫描端口的范围。
[root@server1 ~]# nmap -p 80-160 192.168.0.101
23. 找出主机服务版本号
我们可以使用“-sV”选项找出远程主机上运行的服务及其版本号。
[root@server1 ~]# nmap -sV 192.168.0.101

Starting Nmap 4.11 ( http://www.insecure.org/nmap/ ) at 2013-11-11 17:48 EST
Interesting ports on server2.tecmint.com (192.168.0.101):
Not shown: 1674 closed ports
PORT     STATE SERVICE VERSION
22/tcp   open  ssh     OpenSSH 4.3 (protocol 2.0)
80/tcp   open  http    Apache httpd 2.2.3 ((CentOS))
111/tcp  open  rpcbind  2 (rpc #100000)
957/tcp  open  status   1 (rpc #100024)
3306/tcp open  mysql   MySQL (unauthorized)
8888/tcp open  http    lighttpd 1.4.32
MAC Address: 08:00:27:D9:8E:D7 (Cadmus Computer Systems)

Nmap finished: 1 IP address (1 host up) scanned in 12.624 seconds
24. 使用 TCP ACK (PA) 和 TCP Syn (PS) 扫描远程主机
有时包过滤防火墙阻止了标准ICMPping请求,在这个情况下,我们可以使用TCP ACK和TCP Syn方法来扫描远程主机。
[root@server1 ~]# nmap -PS 192.168.0.101

Starting Nmap 4.11 ( http://www.insecure.org/nmap/ ) at 2013-11-11 17:51 EST
Interesting ports on server2.tecmint.com (192.168.0.101):
Not shown: 1674 closed ports
PORT     STATE SERVICE
22/tcp   open  ssh
80/tcp   open  http
111/tcp  open  rpcbind
957/tcp  open  unknown
3306/tcp open  mysql
8888/tcp open  sun-answerbook
MAC Address: 08:00:27:D9:8E:D7 (Cadmus Computer Systems)

Nmap finished: 1 IP address (1 host up) scanned in 0.360 seconds
You have new mail in /var/spool/mail/root
25. 用TCP ACK扫描远程主机的特定端口
[root@server1 ~]# nmap -PA -p 22,80 192.168.0.101

Starting Nmap 4.11 ( http://www.insecure.org/nmap/ ) at 2013-11-11 18:02 EST
Interesting ports on server2.tecmint.com (192.168.0.101):
PORT   STATE SERVICE
22/tcp open  ssh
80/tcp open  http
MAC Address: 08:00:27:D9:8E:D7 (Cadmus Computer Systems)

Nmap finished: 1 IP address (1 host up) scanned in 0.166 seconds
You have new mail in /var/spool/mail/root
26. 用TCP SYN扫描远程主机的特定端口
[root@server1 ~]# nmap -PS -p 22,80 192.168.0.101

Starting Nmap 4.11 ( http://www.insecure.org/nmap/ ) at 2013-11-11 18:08 EST
Interesting ports on server2.tecmint.com (192.168.0.101):
PORT   STATE SERVICE
22/tcp open  ssh
80/tcp open  http
MAC Address: 08:00:27:D9:8E:D7 (Cadmus Computer Systems)

Nmap finished: 1 IP address (1 host up) scanned in 0.165 seconds
You have new mail in /var/spool/mail/root
27. 执行隐秘扫描
[root@server1 ~]# nmap -sS 192.168.0.101

Starting Nmap 4.11 ( http://www.insecure.org/nmap/ ) at 2013-11-11 18:10 EST
Interesting ports on server2.tecmint.com (192.168.0.101):
Not shown: 1674 closed ports
PORT     STATE SERVICE
22/tcp   open  ssh
80/tcp   open  http
111/tcp  open  rpcbind
957/tcp  open  unknown
3306/tcp open  mysql
8888/tcp open  sun-answerbook
MAC Address: 08:00:27:D9:8E:D7 (Cadmus Computer Systems)

Nmap finished: 1 IP address (1 host up) scanned in 0.383 seconds
You have new mail in /var/spool/mail/root
28. 用TCP SYN扫描最常用的端口
[root@server1 ~]# nmap -sT 192.168.0.101

Starting Nmap 4.11 ( http://www.insecure.org/nmap/ ) at 2013-11-11 18:12 EST
Interesting ports on server2.tecmint.com (192.168.0.101):
Not shown: 1674 closed ports
PORT     STATE SERVICE
22/tcp   open  ssh
80/tcp   open  http
111/tcp  open  rpcbind
957/tcp  open  unknown
3306/tcp open  mysql
8888/tcp open  sun-answerbook
MAC Address: 08:00:27:D9:8E:D7 (Cadmus Computer Systems)

Nmap finished: 1 IP address (1 host up) scanned in 0.406 seconds
You have new mail in /var/spool/mail/root
29. 执行tcp空扫描来愚弄防火墙
[root@server1 ~]# nmap -sN 192.168.0.101

Starting Nmap 4.11 ( http://www.insecure.org/nmap/ ) at 2013-11-11 19:01 EST
Interesting ports on server2.tecmint.com (192.168.0.101):
Not shown: 1674 closed ports
PORT     STATE         SERVICE
22/tcp   open|filtered ssh
80/tcp   open|filtered http
111/tcp  open|filtered rpcbind
957/tcp  open|filtered unknown
3306/tcp open|filtered mysql
8888/tcp open|filtered sun-answerbook
MAC Address: 08:00:27:D9:8E:D7 (Cadmus Computer Systems)

Nmap finished: 1 IP address (1 host up) scanned in 1.584 seconds
You have new mail in /var/spool/mail/root
这些就是目前NMAP 的用法,我会写出更有创造性的NMAP的第二部分(译注:原文为 I’ll be coming up more creative options of NMAP in our second part of this serious,这里serious可能为笔误,应该为series)。接着,不要走开也别忘了分享你们有价值的评论。
via: http://www.tecmint.com/nmap-command-examples/
译者:geekpi 校对:wxy
本文由 LCTT 原创翻译,Linux中国 荣誉推出


