标签 Pelican 下的文章

使用 Pelican 创建博客,这是一个基于 Python 的平台,与 GitHub 配合的不错。

GitHub 是一个非常流行的用于源代码控制的 Web 服务,它使用 Git 同步本地文件和 GitHub 服务器上保留的副本,这样你就可以轻松地共享和备份你的工作。

除了为代码仓库提供用户界面之外,GitHub 还运允许用户直接从仓库发布网页。GitHub 推荐的网站生成软件包是 Jekll,是使用 Ruby 编写的。因为我是 Python 的忠实粉丝,所以我更喜欢 Pelican,这是一个基于 Python 的博客平台,可与 GitHub 很好地协同工作。

Pelican 和 Jekll 都可以将 MarkdownreStructuredText 中编写的内容转换为 HTML 以生成静态网站,并且两个生成器都支持定制的主题。

在本文中,我将介绍如何安装 Pelican、设置 GitHub 仓库、运行快速入门帮助、编写一些 Markdown 文件以及发布第一篇博客。我假设你有一个 GitHub 账户,熟悉基础的 Git 命令,并且想使用 Pelican 发布博客。

安装 Pelican 并创建仓库

首先,你必须在本地计算机上安装 Pelican 和 ghp-import。使用 Python 软件包安装工具 pip(你有,对吧?),这非常容易:

$ pip install pelican ghp-import Markdown

然后,打开浏览器并在 GitHub 上为你新鲜出炉的博客创建一个新仓库,命名如下(在此处以及整个教程中,用 GitHub 用户名替换 username):

https://GitHub.com/username/username.github.io

让它保持为空,稍后我们用引人注目的博客内容来填充它。

使用命令行(确保正确),将这个空 Git 仓库克隆到本地计算机:

$ git clone <https://GitHub.com/username/username.github.io> blog
$ cd blog

奇怪的把戏…

在 GitHub 上发布 Web 内容有一个不太引入注意的技巧,对于托管在名为 username.github.io 的仓库的用户页面,其内容由 master 分支提供服务。

我强烈建议所有的 Pelican 配置文件和原始的 Markdown 文件都不要保留在 master 中,master 中只保留 Web 内容。因此,我将 Pelican 配置和原始内容保留在一个我喜欢称为 content 的单独分支中。(你可以随意创建一个分支,但以下内容沿用 content。)我喜欢这种结构,因为我可以放弃掉 master 中的所有文件,然后用 content 分支重新填充它。

$ git checkout -b content
Switched to a new branch 'content'

配置 Pelican

现在该进行内容配置了。Pelican 提供了一个很棒的初始化工具 pelican-quickstart,它会询问你有关博客的一系列问题。

$ pelican-quickstart
Welcome to pelican-quickstart v3.7.1.

This script will help you create a new Pelican-based website.

Please answer the following questions so this script can generate the files
needed by Pelican.

> Where do you want to create your new web site? [.]  
> What will be the title of this web site? Super blog
> Who will be the author of this web site? username
> What will be the default language of this web site? [en]
> Do you want to specify a URL prefix? e.g., http://example.com   (Y/n) n
> Do you want to enable article pagination? (Y/n)
> How many articles per page do you want? [10]
> What is your time zone? [Europe/Paris] US/Central
> Do you want to generate a Fabfile/Makefile to automate generation and publishing? (Y/n) y
> Do you want an auto-reload & simpleHTTP script to assist with theme and site development? (Y/n) y
> Do you want to upload your website using FTP? (y/N) n
> Do you want to upload your website using SSH? (y/N) n
> Do you want to upload your website using Dropbox? (y/N) n
> Do you want to upload your website using S3? (y/N) n
> Do you want to upload your website using Rackspace Cloud Files? (y/N) n
> Do you want to upload your website using GitHub Pages? (y/N) y
> Is this your personal page (username.github.io)? (y/N) y
Done. Your new project is available at /Users/username/blog

你可以对每个问题都采用默认值,但除了以下这些问题:

  • 网站标题,应该唯一且特殊
  • 网站作者,可以是个人用户名或你的全名
  • 时区,可能你不在巴黎
  • 上传到 GitHub 页面,我们选择 y

回答完所有问题后,Pelican 会在当前目录中留下以下内容:

$ ls
Makefile      content/     develop_server.sh*
fabfile.py    output/      pelicanconf.py
publishconf.py

你可以查看 Pelican 文档来了解如何使用这些文件,但现在我们要做的是完成手头的工作。说实话,我也没有阅读文档。

继续

将所有 Pelican 生成的文件添加到本地 Git 仓库的 content 分支,提交更改,然后将本地更改推送到 Github 上托管的远程仓库:

$ git add .
$ git commit -m 'initial pelican commit to content'
$ git push origin content

这件事情并不是特别令人兴奋,但是如果我们需要撤销这些文件之一的修改时,这将非常方便。

终于

终于,现在你得到一个博客了!你所有的博客文章、照片、图像、PDF 等都将位于 content 目录中,它最初是空的。要开始创建第一篇博客和关于页面,输入:

$ cd content
$ mkdir pages images
$ cp /Users/username/SecretStash/HotPhotoOfMe.jpg images
$ touch first-post.md
$ touch pages/about.md

接下来,在你喜欢的文本编辑器中打开 first-post.md,并添加以下内容:

title: First Post on My Sweet New Blog
date: <today's date>
author: Your Name Here

# I am On My Way To Internet Fame and Fortune!

This is my first post on my new blog. While not super informative it
should convey my sense of excitement and eagerness to engage with you,
the reader!

前三行是 Pelican 用于组织内容的元数据。有很多不同的元数据可供你选择。再说一次,文档是你了解更多选项的最佳选择。

现在,打开空白文件 pages/about.md 并添加以下文本:

title: About
date: <today's date>

![So Schmexy][my_sweet_photo]

Hi, I am <username> and I wrote this epic collection of Interweb
wisdom. In days of yore, much of this would have been deemed sorcery
and I would probably have been burned at the stake.

?

现在,content 目录中将包含三个新的 Web 内容,在 content 分支中还有很多内容。

发布

不要急,马上要见到成果了!

剩下要做的就是:

  • 运行 Pelican 以在 output 中生成静态 HTML 文件:
$ pelican content -o output -s publishconf.py
  • 使用 ghp-importoutput 目录的内容添加到 master 分支中:
$ ghp-import -m "Generate Pelican site" --no-jekyll -b master output
  • 将本地 master 分支推送到远程仓库:
$ git push origin master
  • 提交新内容并将其推送到 content 分支
$ git add content
$ git commit -m 'added a first post, a photo and an about page'
$ git push origin content

OMG,我成功了

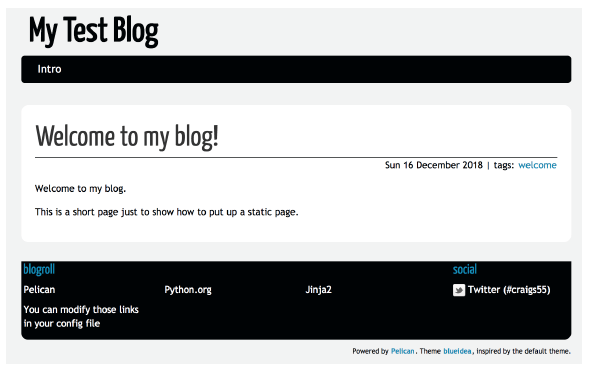
现在最激动的时候到了,当你想要看到你发布给大家的博客内容时,打开浏览器输入:

https://username.github.io

恭喜你可以在 GitHub 上发布自己的博客了!当你想添加更多页面或文章时,都可以按照上面的步骤来。希望你可以愉快地发布博客。


via: https://opensource.com/article/19/5/run-your-blog-github-pages-python

作者:Erik O'Shaughnessy 选题:lujun9972 译者:MjSeven 校对:wxy

本文由 LCTT 原创编译,Linux中国 荣誉推出

Pelican 是那些想要自我托管简单网站或博客的 Python 用户的绝佳选择。

如果你想创建一个自定义网站或博客,有很多选择。许多提供商可以托管你的网站并为你完成大部分工作。(WordPress 是一个非常受欢迎的选项。)但是使用托管方式,你会失去一些灵活性。作为一名软件开发人员,我更喜欢管理我自己的服务器,并在我的网站如何运行方面保持更多的自由。

然而,管理 Web 服务器需要大量的工作。安装它并获得一个简单的应用程序来提供内容是非常容易的。但是,维护安全补丁和更新是非常耗时得。如果你只想提供静态网页,那么拥有一个 Web 服务器和一系列应用程序可能会得不偿失。手动创建 HTML 页面也不是一个好选择。

这是静态网站生成器的用武之地。这些应用程序使用模板来创建所需的静态页面,并将它们与关联的元数据交叉链接。(例如,所有显示的页面都带有公共标签或关键词。)静态网站生成器可以帮助你使用导航区域、页眉和页脚等元素创建一个具有公共外观的网站。

我使用 Pyhton 已经很多年了,所以,当我第一次开始寻找生成静态 HTML 页面的东西时,我想要用 Python 编写的东西。主要原因是我经常想要了解应用程序如何工作的内部细节,而使用一种我已经了解的语言使这一点更容易。(如果这对你不重要或者你不使用 Python,那么还有一些其他很棒的静态网站生成器,它们使用 Ruby、JavaScript 和其它语言。)

我决定试试 Pelican。它是一个用 Python 编写的常用静态网站生成器。它支持 reStructuredText(LCTT 译注:这是一种用于文本数据的文件格式,主要用于 Python 社区的技术文档),并且也支持 Markdown,这需要通过安装必需的包来完成。所有任务都是通过命令行界面(CLI)工具执行的,这使得熟悉命令行的任何人都可以轻松完成。它简单的 quickstart CLI 工具使得创建一个网站非常容易。

在本文中,我将介绍如何安装 Pelican 4,添加一篇文章以及更改默认主题。(注意:我是在 MacOS 上开发的,使用其它 Unix/Linux 实验结果都将相同,但我没有 Windows 主机可以测试。)

安装和配置

第一步是创建一个虚拟环境,在虚拟环境中安装 Pelican。

$ mkdir test-site
$ cd test-site
$ python3 -m venv venv
$ ./venv/bin/pip install --upgrade pip
...
Successfully installed pip-18.1
$ ./venv/bin/pip install pelican
Collecting pelican
...
Successfully installed MarkupSafe-1.1.0 blinker-1.4 docutils-0.14 feedgenerator-1.9 jinja2-2.10 pelican-4.0.1 pygments-2.3.1 python-dateutil-2.7.5 pytz-2018.7 six-1.12.0 unidecode-1.0.23

Pelican 的 quickstart CLI 工具将创建基本布局和一些文件来帮助你开始,运行 pelican-quickstart 命令。为了简单起见,我输入了网站标题作者的名字,并对 URL 前缀和文章分页选择了 “N”。(对于其它选项,我使用了默认值。)稍后在配置文件中更改这些设置非常容易。

$ ./venv/bin/pelicanquickstart
Welcome to pelicanquickstart v4.0.1.

This script will help you create a new Pelican-based website.

Please answer the following questions so this script can generate the files needed by Pelican.

> Where do you want to create your new web site? [.]
> What will be the title of this web site? My Test Blog
> Who will be the author of this web site? Craig
> What will be the default language of this web site? [en]
> Do you want to specify a URL prefix? e.g., https://example.com (Y/n) n
> Do you want to enable article pagination? (Y/n) n
> What is your time zone? [Europe/Paris]
> Do you want to generate a tasks.py/Makefile to automate generation and publishing? (Y/n)
> Do you want to upload your website using FTP? (y/N)
> Do you want to upload your website using SSH? (y/N)
> Do you want to upload your website using Dropbox? (y/N)
> Do you want to upload your website using S3? (y/N)
> Do you want to upload your website using Rackspace Cloud Files? (y/N)
> Do you want to upload your website using GitHub Pages? (y/N)
Done. Your new project is available at /Users/craig/tmp/pelican/test-site

你需要启动的所有文件都准备好了。

quickstart 默认为欧洲/巴黎时区,所以在继续之前更改一下。在你喜欢的文本编辑器中打开 pelicanconf.py 文件,寻找 TIMEZONE 变量。

TIMEZONE = 'Europe/Paris'

将其改为 UTC

TIMEZONE = 'UTC'

要更新公共设置,在 pelicanconf.py 中查找 SOCIAL 变量。

SOCIAL = (('You can add links in your config file', '#'),
          ('Another social link', '#'),)

我将添加一个我的 Twitter 账户链接。

SOCIAL = (('Twitter (#craigs55)', 'https://twitter.com/craigs55'),)

注意末尾的逗号,它很重要。这个逗号将帮助 Python 识别变量实际上是一个集合。确保你没有删除这个逗号。

现在你已经有了网站的基本知识。quickstart 创建了一个包含许多目标的 Makefile。将 devserver 传给 make 命令将在你的计算机上启动一个开发服务器,以便你可以预览所有内容。Makefile 中使用的 CLI 命令假定放在 PATH 搜索路径中,因此你需要首先激活该虚拟环境。

$ source ./venv/bin/activate
$ make devserver
pelican -lr /Users/craig/tmp/pelican/test-site/content o
/Users/craig/tmp/pelican/test-site/output -s /Users/craig/tmp/pelican/test-site/pelicanconf.py

-> Modified: theme, settings. regenerating...
WARNING: No valid files found in content for the active readers:
   | BaseReader (static)
   | HTMLReader (htm, html)
   | RstReader (rst)
Done: Processed 0 articles, 0 drafts, 0 pages, 0 hidden pages and 0 draft pages in 0.18 seconds.

在你最喜欢的浏览器中打开 http://localhost:8000 来查看你的简单测试博客。

你可以在右侧看到 Twitter 链接,左侧有 Pelican、Python 和 Jinja 的一些链接。(Jinja 是 Pelican 可以使用的一种很棒的模板语言。你可以在 Jinja 的文档中了解更多相关信息。)

添加内容

现在你又了一个基本的网站,试着添加一些内容。首先,将名为 welcome.rst 的文件添加到网站的 content 目录中。在你喜欢的文本编辑器中,使用以下文本创建一个文件:

$ pwd
/Users/craig/tmp/pelican/test-site
$ cat content/welcome.rst

Welcome to my blog!
###################

:date: 20181216 08:30
:tags: welcome
:category: Intro
:slug: welcome
:author: Craig
:summary: Welcome document

Welcome to my blog.
This is a short page just to show how to put up a static page.

Pelican 会自动解析元数据行,包括日期、标签等。

编写完文件后,开发服务器应该输出以下内容:

-> Modified: content. regenerating...
Done: Processed 1 article, 0 drafts, 0 pages, 0 hidden pages and 0 draft pages in 0.10 seconds.

在浏览器中刷新你的测试网站来查看更改。

元数据(例如日期和标签)会自动添加到页面中。此外,Pelican 会自动检测到 intro 栏目,并将该部分添加到顶部导航中。

更改主题

使用像 Pelican 这样流行的开源软件的好处之一是,非常多的用户会做出更改并将其贡献给项目。许多都是以主题形式贡献的。

网站的主题会设置颜色、布局选项等。尝试一个新主题非常容易,你可以在 Pelican 主题中预览其中的许多内容。

首先,克隆 GitHub 仓库:

$ cd ..
$ git clone --recursive https://github.com/getpelican/pelicanthemes
Cloning into 'pelicanthemes'...

我喜欢蓝色,那么试试 blueidea

编辑 pelicanconf.py,添加以下行:

THEME = '/Users/craig/tmp/pelican/pelican-themes/blueidea/'

开发服务器将重新生成你的输出。在浏览器中刷新网页来查看新主题。

主题控制布局的方方面面。例如,在默认主题中,你可以看到文章旁边带有元标记的栏目(Intro),但这个栏目并未显示在 blueidea 主题中。

其他考虑因素

本文是对 Pelican 的快速介绍,所以我并没有涉及一些重要的主题。

首先,我对迁移到静态站点犹豫不决的一个原因是它无法对文章评论。幸运的是,有一些第三方服务商将为你提供评论功能。我目前正在关注的是 Disqus

接下来,上面的所有内容都是在我的本地机器上完成的。如果我希望其他人查看我的网站,我将不得不将预先生成的 HTML 文件上传到某个地方。如果你查看 pelican-quickstart 输出,你将看到使用 FTP、 SSH、S3 甚至 GitHub 页面的选项,每个选项都有其优点和缺点。但是,如果我必须选择一个,那么我可能会选择发布到 GitHub 页面。

Pelican 还有许多其他功能,我每天都在学习它。如果你想自托管一个网站或博客,内容简单并且是静态内容,同时你想使用 Python,那么 Pelican 是一个很好的选择。它有一个活跃的用户社区,可以修复 bug,添加特性,而且还会创建新的和有趣的主题。试试看吧!


via: https://opensource.com/article/19/1/getting-started-pelican

作者:Craig Sebenik 选题:lujun9972 译者:MjSeven 校对:wxy

本文由 LCTT 原创编译,Linux中国 荣誉推出