UKTools:安装最新 Linux 内核的简便方法

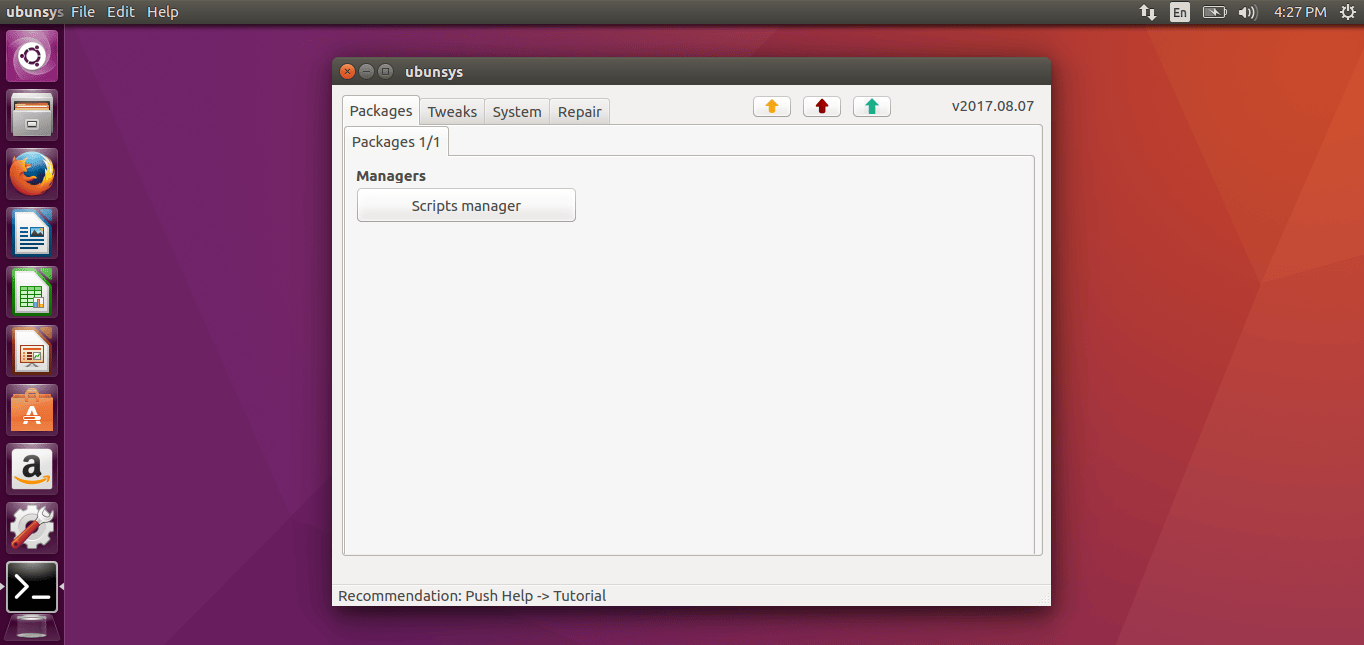
Ubuntu 中有许多实用程序可以将 Linux 内核升级到最新的稳定版本。我们之前已经写过关于这些实用程序的文章,例如 Linux Kernel Utilities (LKU)、 Ubuntu Kernel Upgrade Utility (UKUU) 和 Ubunsys。
另外还有一些其它实用程序可供使用。我们计划在其它文章中包含这些,例如 ubuntu-mainline-kernel.sh 和从主线内核手动安装的方式。
今天我们还会教你类似的使用工具 —— UKTools。你可以尝试使用这些实用程序中的任何一个来将 Linux 内核升级至最新版本。
最新的内核版本附带了安全漏洞修复和一些改进,因此,最好保持最新的内核版本以获得可靠、安全和更好的硬件性能。
有时候最新的内核版本可能会有一些漏洞,并且会导致系统崩溃,这是你的风险。我建议你不要在生产环境中安装它。
建议阅读:
- Linux 内核实用程序(LKU)- 在 Ubuntu/LinuxMint 中编译,安装和更新最新内核的一组 Shell 脚本
- Ukuu - 在基于 Ubuntu 的系统中安装或升级 Linux 内核的简便方法
- 6 种检查系统上正在运行的 Linux 内核版本的方法
什么是 UKTools
UKTools 意思是 Ubuntu 内核工具,它包含两个 shell 脚本 ukupgrade 和 ukpurge。
ukupgrade 意思是 “Ubuntu Kernel Upgrade”,它允许用户将 Linux 内核升级到 Ubuntu/Mint 的最新稳定版本以及基于 kernel.ubuntu.com 的衍生版本。
ukpurge 意思是 “Ubuntu Kernel Purge”,它允许用户在机器中删除旧的 Linux 内核镜像或头文件,用于 Ubuntu/Mint 和其衍生版本。它将只保留三个内核版本。
此实用程序没有 GUI,但它看起来非常简单直接,因此,新手可以在没有任何问题的情况下进行升级。
我正在运行 Ubuntu 17.10,目前的内核版本如下:
$ uname -a
Linux ubuntu 4.13.0-39-generic #44-Ubuntu SMP Thu Apr 5 14:25:01 UTC 2018 x86_64 x86_64 x86_64 GNU/Linux
运行以下命令来获取系统上已安装内核的列表(Ubuntu 及其衍生产品)。目前我持有 7 个内核。
$ dpkg --list | grep linux-image
ii linux-image-4.13.0-16-generic 4.13.0-16.19 amd64 Linux kernel image for version 4.13.0 on 64 bit x86 SMP
ii linux-image-4.13.0-17-generic 4.13.0-17.20 amd64 Linux kernel image for version 4.13.0 on 64 bit x86 SMP
ii linux-image-4.13.0-32-generic 4.13.0-32.35 amd64 Linux kernel image for version 4.13.0 on 64 bit x86 SMP
ii linux-image-4.13.0-36-generic 4.13.0-36.40 amd64 Linux kernel image for version 4.13.0 on 64 bit x86 SMP
ii linux-image-4.13.0-37-generic 4.13.0-37.42 amd64 Linux kernel image for version 4.13.0 on 64 bit x86 SMP
ii linux-image-4.13.0-38-generic 4.13.0-38.43 amd64 Linux kernel image for version 4.13.0 on 64 bit x86 SMP
ii linux-image-4.13.0-39-generic 4.13.0-39.44 amd64 Linux kernel image for version 4.13.0 on 64 bit x86 SMP
ii linux-image-extra-4.13.0-16-generic 4.13.0-16.19 amd64 Linux kernel extra modules for version 4.13.0 on 64 bit x86 SMP
ii linux-image-extra-4.13.0-17-generic 4.13.0-17.20 amd64 Linux kernel extra modules for version 4.13.0 on 64 bit x86 SMP
ii linux-image-extra-4.13.0-32-generic 4.13.0-32.35 amd64 Linux kernel extra modules for version 4.13.0 on 64 bit x86 SMP
ii linux-image-extra-4.13.0-36-generic 4.13.0-36.40 amd64 Linux kernel extra modules for version 4.13.0 on 64 bit x86 SMP
ii linux-image-extra-4.13.0-37-generic 4.13.0-37.42 amd64 Linux kernel extra modules for version 4.13.0 on 64 bit x86 SMP
ii linux-image-extra-4.13.0-38-generic 4.13.0-38.43 amd64 Linux kernel extra modules for version 4.13.0 on 64 bit x86 SMP
ii linux-image-extra-4.13.0-39-generic 4.13.0-39.44 amd64 Linux kernel extra modules for version 4.13.0 on 64 bit x86 SMP
ii linux-image-generic 4.13.0.39.42 amd64 Generic Linux kernel image
如何安装 UKTools
在 Ubuntu 及其衍生产品上,只需运行以下命令来安装 UKTools 即可。
在你的系统上运行以下命令来克隆 UKTools 仓库:
$ git clone https://github.com/usbkey9/uktools
进入 uktools 目录:
$ cd uktools
运行 Makefile 以生成必要的文件。此外,这将自动安装最新的可用内核。只需重新启动系统即可使用最新的内核。
$ sudo make
[sudo] password for daygeek:
Creating the directories if neccessary
Linking profile.d file for reboot message
Linking files to global sbin directory
Ubuntu Kernel Upgrade - by Mustafa Hasturk
------------------------------------------
This script is based on the work of Mustafa Hasturk and was reworked by
Caio Oliveira and modified and fixed by Christoph Kepler

Current Development and Maintenance by Christoph Kepler

Do you want the Stable Release (if not sure, press y)? (y/n): y
Do you want the Generic kernel? (y/n): y
Do you want to autoremove old kernel? (y/n): y
no crontab for root
Do you want to update the kernel automatically? (y/n): y
Setup complete. Update the kernel right now? (y/n): y
Reading package lists... Done
Building dependency tree
Reading state information... Done
The following packages were automatically installed and are no longer required:
 linux-headers-4.13.0-16 linux-headers-4.13.0-16-generic linux-headers-4.13.0-17 linux-headers-4.13.0-17-generic linux-headers-4.13.0-32 linux-headers-4.13.0-32-generic linux-headers-4.13.0-36
 linux-headers-4.13.0-36-generic linux-headers-4.13.0-37 linux-headers-4.13.0-37-generic linux-image-4.13.0-16-generic linux-image-4.13.0-17-generic linux-image-4.13.0-32-generic linux-image-4.13.0-36-generic
 linux-image-4.13.0-37-generic linux-image-extra-4.13.0-16-generic linux-image-extra-4.13.0-17-generic linux-image-extra-4.13.0-32-generic linux-image-extra-4.13.0-36-generic
 linux-image-extra-4.13.0-37-generic
Use 'sudo apt autoremove' to remove them.
The following additional packages will be installed:
 lynx-common
The following NEW packages will be installed:
 lynx lynx-common
0 upgraded, 2 newly installed, 0 to remove and 71 not upgraded.
Need to get 1,498 kB of archives.
After this operation, 5,418 kB of additional disk space will be used.
Get:1 http://in.archive.ubuntu.com/ubuntu artful/universe amd64 lynx-common all 2.8.9dev16-1 [873 kB]
Get:2 http://in.archive.ubuntu.com/ubuntu artful/universe amd64 lynx amd64 2.8.9dev16-1 [625 kB]
Fetched 1,498 kB in 12s (120 kB/s)
Selecting previously unselected package lynx-common.
(Reading database ... 441037 files and directories currently installed.)
Preparing to unpack .../lynx-common_2.8.9dev16-1_all.deb ...
Unpacking lynx-common (2.8.9dev16-1) ...
Selecting previously unselected package lynx.
Preparing to unpack .../lynx_2.8.9dev16-1_amd64.deb ...
Unpacking lynx (2.8.9dev16-1) ...
Processing triggers for mime-support (3.60ubuntu1) ...
Processing triggers for doc-base (0.10.7) ...
Processing 1 added doc-base file...
Processing triggers for man-db (2.7.6.1-2) ...
Setting up lynx-common (2.8.9dev16-1) ...
Setting up lynx (2.8.9dev16-1) ...
update-alternatives: using /usr/bin/lynx to provide /usr/bin/www-browser (www-browser) in auto mode

Cleaning old downloads in /tmp

Downloading the kernel's components...
Checksum for linux-headers-4.16.7-041607-generic_4.16.7-041607.201805021131_amd64.deb succeed
Checksum for linux-image-unsigned-4.16.7-041607-generic_4.16.7-041607.201805021131_amd64.deb succeed
Checksum for linux-modules-4.16.7-041607-generic_4.16.7-041607.201805021131_amd64.deb succeed

Downloading the shared kernel header...
Checksum for linux-headers-4.16.7-041607_4.16.7-041607.201805021131_all.deb succeed

Installing Kernel and Headers...
Selecting previously unselected package linux-headers-4.16.7-041607.
(Reading database ... 441141 files and directories currently installed.)
Preparing to unpack .../linux-headers-4.16.7-041607_4.16.7-041607.201805021131_all.deb ...
Unpacking linux-headers-4.16.7-041607 (4.16.7-041607.201805021131) ...
Selecting previously unselected package linux-headers-4.16.7-041607-generic.
Preparing to unpack .../linux-headers-4.16.7-041607-generic_4.16.7-041607.201805021131_amd64.deb ...
Unpacking linux-headers-4.16.7-041607-generic (4.16.7-041607.201805021131) ...
Selecting previously unselected package linux-image-unsigned-4.16.7-041607-generic.
Preparing to unpack .../linux-image-unsigned-4.16.7-041607-generic_4.16.7-041607.201805021131_amd64.deb ...
Unpacking linux-image-unsigned-4.16.7-041607-generic (4.16.7-041607.201805021131) ...
Selecting previously unselected package linux-modules-4.16.7-041607-generic.
Preparing to unpack .../linux-modules-4.16.7-041607-generic_4.16.7-041607.201805021131_amd64.deb ...
Unpacking linux-modules-4.16.7-041607-generic (4.16.7-041607.201805021131) ...
Setting up linux-headers-4.16.7-041607 (4.16.7-041607.201805021131) ...
dpkg: dependency problems prevent configuration of linux-headers-4.16.7-041607-generic:
 linux-headers-4.16.7-041607-generic depends on libssl1.1 (>= 1.1.0); however:
 Package libssl1.1 is not installed.

Setting up linux-modules-4.16.7-041607-generic (4.16.7-041607.201805021131) ...
Setting up linux-image-unsigned-4.16.7-041607-generic (4.16.7-041607.201805021131) ...
I: /vmlinuz.old is now a symlink to boot/vmlinuz-4.13.0-39-generic
I: /initrd.img.old is now a symlink to boot/initrd.img-4.13.0-39-generic
I: /vmlinuz is now a symlink to boot/vmlinuz-4.16.7-041607-generic
I: /initrd.img is now a symlink to boot/initrd.img-4.16.7-041607-generic
Processing triggers for linux-image-unsigned-4.16.7-041607-generic (4.16.7-041607.201805021131) ...
/etc/kernel/postinst.d/initramfs-tools:
update-initramfs: Generating /boot/initrd.img-4.16.7-041607-generic
/etc/kernel/postinst.d/zz-update-grub:
Generating grub configuration file ...
Warning: Setting GRUB_TIMEOUT to a non-zero value when GRUB_HIDDEN_TIMEOUT is set is no longer supported.
Found linux image: /boot/vmlinuz-4.16.7-041607-generic
Found initrd image: /boot/initrd.img-4.16.7-041607-generic
Found linux image: /boot/vmlinuz-4.13.0-39-generic
Found initrd image: /boot/initrd.img-4.13.0-39-generic
Found linux image: /boot/vmlinuz-4.13.0-38-generic
Found initrd image: /boot/initrd.img-4.13.0-38-generic
Found linux image: /boot/vmlinuz-4.13.0-37-generic
Found initrd image: /boot/initrd.img-4.13.0-37-generic
Found linux image: /boot/vmlinuz-4.13.0-36-generic
Found initrd image: /boot/initrd.img-4.13.0-36-generic
Found linux image: /boot/vmlinuz-4.13.0-32-generic
Found initrd image: /boot/initrd.img-4.13.0-32-generic
Found linux image: /boot/vmlinuz-4.13.0-17-generic
Found initrd image: /boot/initrd.img-4.13.0-17-generic
Found linux image: /boot/vmlinuz-4.13.0-16-generic
Found initrd image: /boot/initrd.img-4.13.0-16-generic
Found memtest86+ image: /boot/memtest86+.elf
Found memtest86+ image: /boot/memtest86+.bin
done

Thanks for using this script! Hope it helped.
Give it a star: https://github.com/MarauderXtreme/uktools
重新启动系统以激活最新的内核。
$ sudo shutdown -r now
一旦系统重新启动,重新检查内核版本。
$ uname -a
Linux ubuntu 4.16.7-041607-generic #201805021131 SMP Wed May 2 15:34:55 UTC 2018 x86_64 x86_64 x86_64 GNU/Linux
此 make 命令会将下面的文件放到 /usr/local/bin 目录中。
do-kernel-upgrade
do-kernel-purge
要移除旧内核,运行以下命令:
$ do-kernel-purge

Ubuntu Kernel Purge - by Caio Oliveira

This script will only keep three versions: the first and the last two, others will be purge

---Current version:
Linux Kernel 4.16.7-041607 Generic (linux-image-4.16.7-041607-generic)

---Versions to remove:
4.13.0-16
4.13.0-17
4.13.0-32
4.13.0-36
4.13.0-37

---Do you want to remove the old kernels/headers versions? (Y/n): y
Reading package lists... Done
Building dependency tree
Reading state information... Done
The following packages were automatically installed and are no longer required:
 linux-headers-4.13.0-17 linux-headers-4.13.0-17-generic linux-headers-4.13.0-32 linux-headers-4.13.0-32-generic linux-headers-4.13.0-36 linux-headers-4.13.0-36-generic linux-headers-4.13.0-37
 linux-headers-4.13.0-37-generic linux-image-4.13.0-17-generic linux-image-4.13.0-32-generic linux-image-4.13.0-36-generic linux-image-4.13.0-37-generic linux-image-extra-4.13.0-17-generic
 linux-image-extra-4.13.0-32-generic linux-image-extra-4.13.0-36-generic linux-image-extra-4.13.0-37-generic
Use 'sudo apt autoremove' to remove them.
The following packages will be REMOVED:
 linux-headers-4.13.0-16* linux-headers-4.13.0-16-generic* linux-image-4.13.0-16-generic* linux-image-extra-4.13.0-16-generic*
0 upgraded, 0 newly installed, 4 to remove and 71 not upgraded.
After this operation, 318 MB disk space will be freed.
(Reading database ... 465582 files and directories currently installed.)
Removing linux-headers-4.13.0-16-generic (4.13.0-16.19) ...
Removing linux-headers-4.13.0-16 (4.13.0-16.19) ...
Removing linux-image-extra-4.13.0-16-generic (4.13.0-16.19) ...
run-parts: executing /etc/kernel/postinst.d/apt-auto-removal 4.13.0-16-generic /boot/vmlinuz-4.13.0-16-generic
run-parts: executing /etc/kernel/postinst.d/initramfs-tools 4.13.0-16-generic /boot/vmlinuz-4.13.0-16-generic
update-initramfs: Generating /boot/initrd.img-4.13.0-16-generic
run-parts: executing /etc/kernel/postinst.d/unattended-upgrades 4.13.0-16-generic /boot/vmlinuz-4.13.0-16-generic
run-parts: executing /etc/kernel/postinst.d/update-notifier 4.13.0-16-generic /boot/vmlinuz-4.13.0-16-generic
run-parts: executing /etc/kernel/postinst.d/zz-update-grub 4.13.0-16-generic /boot/vmlinuz-4.13.0-16-generic
Generating grub configuration file ...
Warning: Setting GRUB_TIMEOUT to a non-zero value when GRUB_HIDDEN_TIMEOUT is set is no longer supported.
Found linux image: /boot/vmlinuz-4.16.7-041607-generic
Found initrd image: /boot/initrd.img-4.16.7-041607-generic
Found linux image: /boot/vmlinuz-4.13.0-39-generic
Found initrd image: /boot/initrd.img-4.13.0-39-generic
Found linux image: /boot/vmlinuz-4.13.0-38-generic
Found initrd image: /boot/initrd.img-4.13.0-38-generic
Found linux image: /boot/vmlinuz-4.13.0-37-generic
Found initrd image: /boot/initrd.img-4.13.0-37-generic
Found linux image: /boot/vmlinuz-4.13.0-36-generic
Found initrd image: /boot/initrd.img-4.13.0-36-generic
Found linux image: /boot/vmlinuz-4.13.0-32-generic
Found initrd image: /boot/initrd.img-4.13.0-32-generic
Found linux image: /boot/vmlinuz-4.13.0-17-generic
Found initrd image: /boot/initrd.img-4.13.0-17-generic
Found linux image: /boot/vmlinuz-4.13.0-16-generic
Found initrd image: /boot/initrd.img-4.13.0-16-generic
Found memtest86+ image: /boot/memtest86+.elf
Found memtest86+ image: /boot/memtest86+.bin
done
Removing linux-image-4.13.0-16-generic (4.13.0-16.19) ...
Examining /etc/kernel/postrm.d .
run-parts: executing /etc/kernel/postrm.d/initramfs-tools 4.13.0-16-generic /boot/vmlinuz-4.13.0-16-generic
update-initramfs: Deleting /boot/initrd.img-4.13.0-16-generic
run-parts: executing /etc/kernel/postrm.d/zz-update-grub 4.13.0-16-generic /boot/vmlinuz-4.13.0-16-generic
Generating grub configuration file ...
Warning: Setting GRUB_TIMEOUT to a non-zero value when GRUB_HIDDEN_TIMEOUT is set is no longer supported.
Found linux image: /boot/vmlinuz-4.16.7-041607-generic
Found initrd image: /boot/initrd.img-4.16.7-041607-generic
Found linux image: /boot/vmlinuz-4.13.0-39-generic
Found initrd image: /boot/initrd.img-4.13.0-39-generic
Found linux image: /boot/vmlinuz-4.13.0-38-generic
Found initrd image: /boot/initrd.img-4.13.0-38-generic
Found linux image: /boot/vmlinuz-4.13.0-37-generic
Found initrd image: /boot/initrd.img-4.13.0-37-generic
Found linux image: /boot/vmlinuz-4.13.0-36-generic
Found initrd image: /boot/initrd.img-4.13.0-36-generic
Found linux image: /boot/vmlinuz-4.13.0-32-generic
Found initrd image: /boot/initrd.img-4.13.0-32-generic
Found linux image: /boot/vmlinuz-4.13.0-17-generic
Found initrd image: /boot/initrd.img-4.13.0-17-generic
Found memtest86+ image: /boot/memtest86+.elf
Found memtest86+ image: /boot/memtest86+.bin
done
(Reading database ... 430635 files and directories currently installed.)
Purging configuration files for linux-image-extra-4.13.0-16-generic (4.13.0-16.19) ...
Purging configuration files for linux-image-4.13.0-16-generic (4.13.0-16.19) ...
Examining /etc/kernel/postrm.d .
run-parts: executing /etc/kernel/postrm.d/initramfs-tools 4.13.0-16-generic /boot/vmlinuz-4.13.0-16-generic
run-parts: executing /etc/kernel/postrm.d/zz-update-grub 4.13.0-16-generic /boot/vmlinuz-4.13.0-16-generic
Reading package lists... Done
Building dependency tree
Reading state information... Done
.
.
.
.
Reading package lists... Done
Building dependency tree
Reading state information... Done
The following packages will be REMOVED:
 linux-headers-4.13.0-37* linux-headers-4.13.0-37-generic* linux-image-4.13.0-37-generic* linux-image-extra-4.13.0-37-generic*
0 upgraded, 0 newly installed, 4 to remove and 71 not upgraded.
After this operation, 321 MB disk space will be freed.
(Reading database ... 325772 files and directories currently installed.)
Removing linux-headers-4.13.0-37-generic (4.13.0-37.42) ...
Removing linux-headers-4.13.0-37 (4.13.0-37.42) ...
Removing linux-image-extra-4.13.0-37-generic (4.13.0-37.42) ...
run-parts: executing /etc/kernel/postinst.d/apt-auto-removal 4.13.0-37-generic /boot/vmlinuz-4.13.0-37-generic
run-parts: executing /etc/kernel/postinst.d/initramfs-tools 4.13.0-37-generic /boot/vmlinuz-4.13.0-37-generic
update-initramfs: Generating /boot/initrd.img-4.13.0-37-generic
run-parts: executing /etc/kernel/postinst.d/unattended-upgrades 4.13.0-37-generic /boot/vmlinuz-4.13.0-37-generic
run-parts: executing /etc/kernel/postinst.d/update-notifier 4.13.0-37-generic /boot/vmlinuz-4.13.0-37-generic
run-parts: executing /etc/kernel/postinst.d/zz-update-grub 4.13.0-37-generic /boot/vmlinuz-4.13.0-37-generic
Generating grub configuration file ...
Warning: Setting GRUB_TIMEOUT to a non-zero value when GRUB_HIDDEN_TIMEOUT is set is no longer supported.
Found linux image: /boot/vmlinuz-4.16.7-041607-generic
Found initrd image: /boot/initrd.img-4.16.7-041607-generic
Found linux image: /boot/vmlinuz-4.13.0-39-generic
Found initrd image: /boot/initrd.img-4.13.0-39-generic
Found linux image: /boot/vmlinuz-4.13.0-38-generic
Found initrd image: /boot/initrd.img-4.13.0-38-generic
Found linux image: /boot/vmlinuz-4.13.0-37-generic
Found initrd image: /boot/initrd.img-4.13.0-37-generic
Found memtest86+ image: /boot/memtest86+.elf
Found memtest86+ image: /boot/memtest86+.bin
done
Removing linux-image-4.13.0-37-generic (4.13.0-37.42) ...
Examining /etc/kernel/postrm.d .
run-parts: executing /etc/kernel/postrm.d/initramfs-tools 4.13.0-37-generic /boot/vmlinuz-4.13.0-37-generic
update-initramfs: Deleting /boot/initrd.img-4.13.0-37-generic
run-parts: executing /etc/kernel/postrm.d/zz-update-grub 4.13.0-37-generic /boot/vmlinuz-4.13.0-37-generic
Generating grub configuration file ...
Warning: Setting GRUB_TIMEOUT to a non-zero value when GRUB_HIDDEN_TIMEOUT is set is no longer supported.
Found linux image: /boot/vmlinuz-4.16.7-041607-generic
Found initrd image: /boot/initrd.img-4.16.7-041607-generic
Found linux image: /boot/vmlinuz-4.13.0-39-generic
Found initrd image: /boot/initrd.img-4.13.0-39-generic
Found linux image: /boot/vmlinuz-4.13.0-38-generic
Found initrd image: /boot/initrd.img-4.13.0-38-generic
Found memtest86+ image: /boot/memtest86+.elf
Found memtest86+ image: /boot/memtest86+.bin
done
(Reading database ... 290810 files and directories currently installed.)
Purging configuration files for linux-image-extra-4.13.0-37-generic (4.13.0-37.42) ...
Purging configuration files for linux-image-4.13.0-37-generic (4.13.0-37.42) ...
Examining /etc/kernel/postrm.d .
run-parts: executing /etc/kernel/postrm.d/initramfs-tools 4.13.0-37-generic /boot/vmlinuz-4.13.0-37-generic
run-parts: executing /etc/kernel/postrm.d/zz-update-grub 4.13.0-37-generic /boot/vmlinuz-4.13.0-37-generic

Thanks for using this script!!!
使用以下命令重新检查已安装内核的列表。它将只保留三个旧的内核。
$ dpkg --list | grep linux-image
ii linux-image-4.13.0-38-generic 4.13.0-38.43 amd64 Linux kernel image for version 4.13.0 on 64 bit x86 SMP
ii linux-image-4.13.0-39-generic 4.13.0-39.44 amd64 Linux kernel image for version 4.13.0 on 64 bit x86 SMP
ii linux-image-extra-4.13.0-38-generic 4.13.0-38.43 amd64 Linux kernel extra modules for version 4.13.0 on 64 bit x86 SMP
ii linux-image-extra-4.13.0-39-generic 4.13.0-39.44 amd64 Linux kernel extra modules for version 4.13.0 on 64 bit x86 SMP
ii linux-image-generic 4.13.0.39.42 amd64 Generic Linux kernel image
ii linux-image-unsigned-4.16.7-041607-generic 4.16.7-041607.201805021131 amd64 Linux kernel image for version 4.16.7 on 64 bit x86 SMP
下次你可以调用 do-kernel-upgrade 实用程序来安装新的内核。如果有任何新内核可用,那么它将安装。如果没有,它将报告当前没有可用的内核更新。
$ do-kernel-upgrade
Kernel up to date. Finishing
再次运行 do-kernel-purge 命令以确认。如果发现超过三个内核,那么它将移除。如果不是,它将报告没有删除消息。
$ do-kernel-purge

Ubuntu Kernel Purge - by Caio Oliveira

This script will only keep three versions: the first and the last two, others will be purge

---Current version:
Linux Kernel 4.16.7-041607 Generic (linux-image-4.16.7-041607-generic)
Nothing to remove!

Thanks for using this script!!!
作者:Prakash Subramanian 选题:lujun9972 译者:MjSeven 校对:wxy


