标签 LAMP 下的文章

LAMP 套件是一种流行的开源 Web 开发平台,可用于运行和部署动态网站和基于 Web 的应用程序。通常,LAMP 套件由 Apache Web 服务器、MariaDB/MySQL 数据库、PHP/Python/Perl 程序设计(脚本)语言组成。 LAMP 是 Linux,MariaDB/MYSQL,PHP/Python/Perl 的缩写。 本教程描述了如何在 Ubuntu 18.04 LTS 服务器中安装 Apache、MySQL、PHP(LAMP 套件)。

就本教程而言,我们将使用以下 Ubuntu 测试。

  • 操作系统:Ubuntu 18.04.1 LTS Server Edition
  • IP 地址 :192.168.225.22/24

1. 安装 Apache Web 服务器

首先,利用下面命令更新 Ubuntu 服务器:

$ sudo apt update
$ sudo apt upgrade

然后,安装 Apache Web 服务器(命令如下):

$ sudo apt install apache2

检查 Apache Web 服务器是否已经运行:

$ sudo systemctl status apache2

输出结果大概是这样的:

● apache2.service - The Apache HTTP Server
 Loaded: loaded (/lib/systemd/system/apache2.service; enabled; vendor preset: en
 Drop-In: /lib/systemd/system/apache2.service.d
 └─apache2-systemd.conf
 Active: active (running) since Tue 2019-02-05 10:48:03 UTC; 1min 5s ago
 Main PID: 2025 (apache2)
 Tasks: 55 (limit: 2320)
 CGroup: /system.slice/apache2.service
 ├─2025 /usr/sbin/apache2 -k start
 ├─2027 /usr/sbin/apache2 -k start
 └─2028 /usr/sbin/apache2 -k start

Feb 05 10:48:02 ubuntuserver systemd[1]: Starting The Apache HTTP Server...
Feb 05 10:48:03 ubuntuserver apachectl[2003]: AH00558: apache2: Could not reliably
Feb 05 10:48:03 ubuntuserver systemd[1]: Started The Apache HTTP Server.

祝贺你! Apache 服务已经启动并运行了!!

1.1 调整防火墙允许 Apache Web 服务器

默认情况下,如果你已在 Ubuntu 中启用 UFW 防火墙,则无法从远程系统访问 Apache Web 服务器。 必须按照以下步骤开启 httphttps 端口。

首先,使用以下命令列出 Ubuntu 系统上可用的应用程序配置文件:

$ sudo ufw app list

输出结果:

Available applications:
Apache
Apache Full
Apache Secure
OpenSSH

如你所见,Apache 和 OpenSSH 应用程序已安装 UFW 配置文件。你可以使用 ufw app info "Profile Name" 命令列出有关每个配置文件及其包含的规则的信息。

让我们研究一下 “Apache Full” 配置文件。 为此,请运行:

$ sudo ufw app info "Apache Full"

输出结果:

Profile: Apache Full
Title: Web Server (HTTP,HTTPS)
Description: Apache v2 is the next generation of the omnipresent Apache web
server.

Ports:
80,443/tcp

如你所见,“Apache Full” 配置文件包含了启用经由端口 80443 的传输规则:

现在,运行以下命令配置允许 HTTP 和 HTTPS 传入通信:

$ sudo ufw allow in "Apache Full"
Rules updated
Rules updated (v6)

如果你不想允许 HTTP 通信,而只允许 HTTP(80) 通信,请运行:

$ sudo ufw app info "Apache"

1.2 测试 Apache Web 服务器

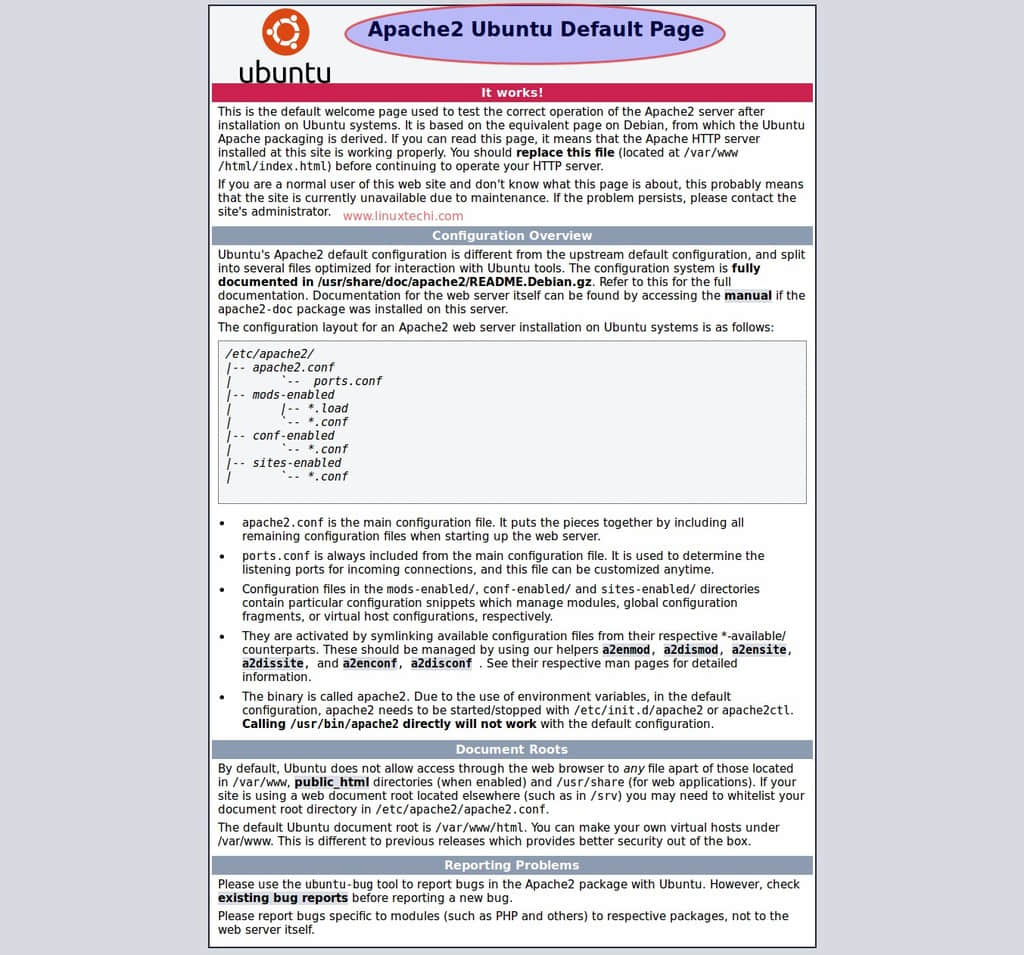
现在,打开 Web 浏览器并导航到 http://localhost/或http://IP-Address/ 来访问 Apache 测试页。
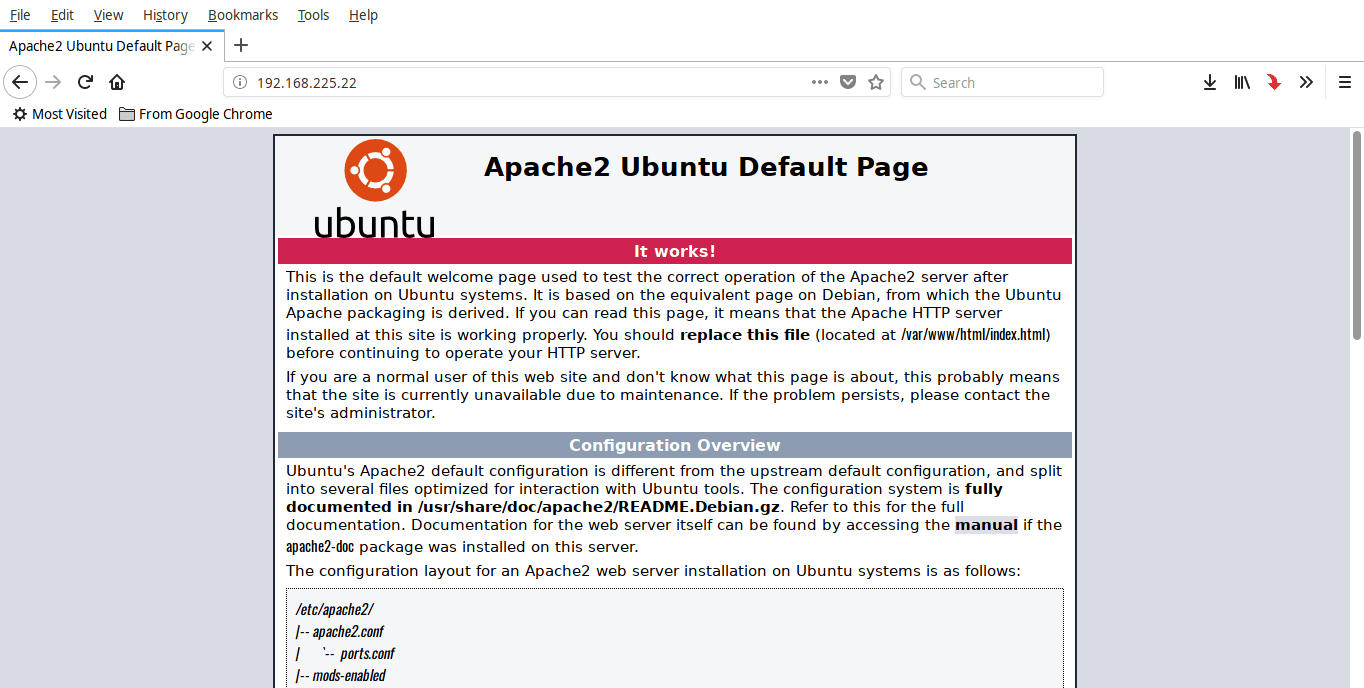
如果看到上面类似的显示内容,那就成功了。 Apache 服务器正在工作!

2. 安装 MySQL

在 Ubuntu 安装 MySQL 请运行:

$ sudo apt install mysql-server

使用以下命令验证 MySQL 服务是否正在运行:

$ sudo systemctl status mysql

输出结果:

● mysql.service - MySQL Community Server
Loaded: loaded (/lib/systemd/system/mysql.service; enabled; vendor preset: enab
Active: active (running) since Tue 2019-02-05 11:07:50 UTC; 17s ago
Main PID: 3423 (mysqld)
Tasks: 27 (limit: 2320)
CGroup: /system.slice/mysql.service
└─3423 /usr/sbin/mysqld --daemonize --pid-file=/run/mysqld/mysqld.pid

Feb 05 11:07:49 ubuntuserver systemd[1]: Starting MySQL Community Server...
Feb 05 11:07:50 ubuntuserver systemd[1]: Started MySQL Community Server.

MySQL 正在运行!

2.1 配置数据库管理用户(root)密码

默认情况下,MySQL root 用户密码为空。你需要通过运行以下脚本使你的 MySQL 服务器安全:

$ sudo mysql_secure_installation

系统将询问你是否要安装 “VALIDATE PASSWORD plugin(密码验证插件)”。该插件允许用户为数据库配置强密码凭据。如果启用,它将自动检查密码的强度并强制用户设置足够安全的密码。禁用此插件是安全的。但是,必须为数据库使用唯一的强密码凭据。如果不想启用此插件,只需按任意键即可跳过密码验证部分,然后继续其余步骤。

如果回答是 y,则会要求你选择密码验证级别。

Securing the MySQL server deployment.

Connecting to MySQL using a blank password.

VALIDATE PASSWORD PLUGIN can be used to test passwords
and improve security. It checks the strength of password
and allows the users to set only those passwords which are
secure enough. Would you like to setup VALIDATE PASSWORD plugin?

Press y|Y for Yes, any other key for No y

可用的密码验证有 “low(低)”、 “medium(中)” 和 “strong(强)”。只需输入适当的数字(0 表示低,1 表示中,2 表示强密码)并按回车键。

There are three levels of password validation policy:

LOW Length >= 8
MEDIUM Length >= 8, numeric, mixed case, and special characters
STRONG Length >= 8, numeric, mixed case, special characters and dictionary file

Please enter 0 = LOW, 1 = MEDIUM and 2 = STRONG:

现在,输入 MySQL root 用户的密码。请注意,必须根据上一步中选择的密码策略,为 MySQL root 用户使用密码。如果你未启用该插件,则只需使用你选择的任意强度且唯一的密码即可。

Please set the password for root here.

New password:

Re-enter new password:

Estimated strength of the password: 50
Do you wish to continue with the password provided?(Press y|Y for Yes, any other key for No) : y

两次输入密码后,你将看到密码强度(在此示例情况下为 50)。如果你确定可以,请按 y 继续提供的密码。如果对密码长度不满意,请按其他任意键并设置一个强密码。我现在的密码可以,所以我选择了y

对于其余的问题,只需键入 y 并按回车键。这将删除匿名用户、禁止 root 用户远程登录并删除 test(测试)数据库。

Remove anonymous users? (Press y|Y for Yes, any other key for No) : y
Success.

Normally, root should only be allowed to connect from
'localhost'. This ensures that someone cannot guess at
the root password from the network.

Disallow root login remotely? (Press y|Y for Yes, any other key for No) : y
Success.

By default, MySQL comes with a database named 'test' that
anyone can access. This is also intended only for testing,
and should be removed before moving into a production
environment.

Remove test database and access to it? (Press y|Y for Yes, any other key for No) : y
- Dropping test database...
Success.

- Removing privileges on test database...
Success.

Reloading the privilege tables will ensure that all changes
made so far will take effect immediately.

Reload privilege tables now? (Press y|Y for Yes, any other key for No) : y
Success.

All done!

以上就是为 MySQL root 用户设置密码。

2.2 更改 MySQL 超级用户的身份验证方法

默认情况下,Ubuntu 系统的 MySQL root 用户为 MySQL 5.7 版本及更新的版本使用插件 auth_socket 设置身份验证。尽管它增强了安全性,但是当你使用任何外部程序(例如 phpMyAdmin)访问数据库服务器时,也会变得更困难。要解决此问题,你需要将身份验证方法从 auth_socket 更改为 mysql_native_password。为此,请使用以下命令登录到你的 MySQL 提示符下:

$ sudo mysql

在 MySQL 提示符下运行以下命令,找到所有 MySQL 当前用户帐户的身份验证方法:

SELECT user,authentication_string,plugin,host FROM mysql.user;

输出结果:

+------------------|-------------------------------------------|-----------------------|-----------+
| user | authentication_string | plugin | host |
+------------------|-------------------------------------------|-----------------------|-----------+
| root | | auth_socket | localhost |
| mysql.session | *THISISNOTAVALIDPASSWORDTHATCANBEUSEDHERE | mysql_native_password | localhost |
| mysql.sys | *THISISNOTAVALIDPASSWORDTHATCANBEUSEDHERE | mysql_native_password | localhost |
| debian-sys-maint | *F126737722832701DD3979741508F05FA71E5BA0 | mysql_native_password | localhost |
+------------------|-------------------------------------------|-----------------------|-----------+
4 rows in set (0.00 sec)

如你所见,Mysql root 用户使用 auth_socket 插件进行身份验证。

要将此身份验证更改为 mysql_native_password 方法,请在 MySQL 提示符下运行以下命令。 别忘了用你选择的强大唯一的密码替换 password。 如果已启用 VALIDATION 插件,请确保已根据当前策略要求使用了强密码。

ALTER USER 'root'@'localhost' IDENTIFIED WITH mysql_native_password BY 'password';

使用以下命令更新数据库:

FLUSH PRIVILEGES;

使用命令再次检查身份验证方法是否已更改:

SELECT user,authentication_string,plugin,host FROM mysql.user;

输出结果:

好!MySQL root 用户就可以使用密码进行身份验证来访问 mysql shell

从 MySQL 提示符下退出:

exit

3. 安装 PHP

安装 PHP 请运行:

$ sudo apt install php libapache2-mod-php php-mysql

安装 PHP 后,在 Apache 文档根目录中创建 info.php 文件。通常,在大多数基于 Debian 的 Linux 发行版中,Apache 文档根目录为 /var/www/html//var/www/。Ubuntu 18.04 LTS 系统下,文档根目录是 /var/www/html/

在 Apache 根目录中创建 info.php 文件:

$ sudo vi /var/www/html/info.php

在此文件中编辑如下内容:

<?php
phpinfo();
?>

然后按下 ESC 键并且输入 :wq 保存并退出此文件。重新启动 Apache 服务使更改生效。

$ sudo systemctl restart apache2

3.1 测试 PHP

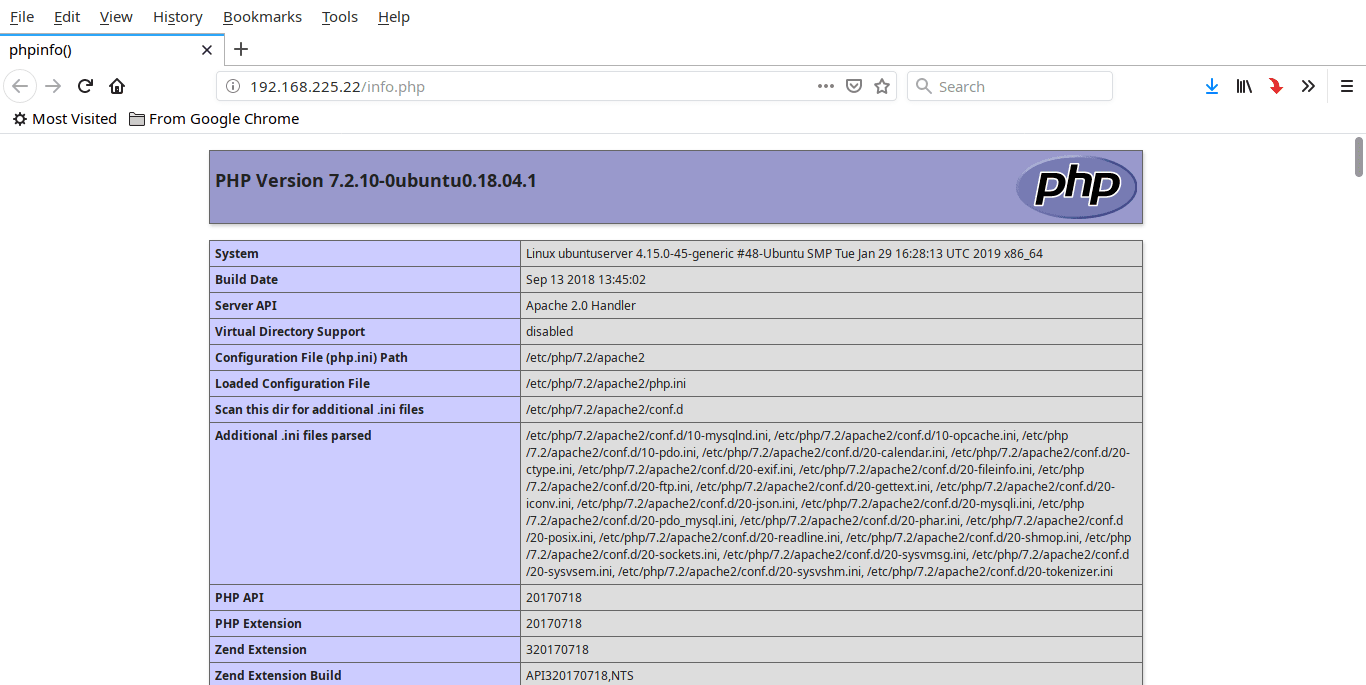
打开 Web 浏览器,然后导航到 URL http://IP地址/info.php

你就将看到 PHP 测试页面。

通常,当用户向 Web 服务器发出请求时,Apache 首先会在文档根目录中查找名为 index.html 的文件。如果你想将 Apache 更改为 php 文件提供服务而不是其他文件,请将 dir.conf 配置文件中的 index.php 移至第一个位置,如下所示:

$ sudo vi /etc/apache2/mods-enabled/dir.conf

上面的配置文件(dir.conf) 内容如下:

<IfModule mod_dir.c>
DirectoryIndex index.html index.cgi index.pl index.php index.xhtml index.htm
</IfModule>

# vim: syntax=apache ts=4 sw=4 sts=4 sr noet

index.php 移动到最前面。更改后,dir.conf 文件内容看起来如下所示。

<IfModule mod_dir.c>
DirectoryIndex index.php index.html index.cgi index.pl index.xhtml index.htm
</IfModule>

# vim: syntax=apache ts=4 sw=4 sts=4 sr noet

然后按下 ESC 键并且输入 :wq 保存并关闭此文件。重新启动 Apache 服务使更改生效。

$ sudo systemctl restart apache2

3.2 安装 PHP 模块

为了增加 PHP 的功能,可以安装一些其他的 PHP 模块。

要列出可用的 PHP 模块,请运行:

$ sudo apt-cache search php- | less

输出结果:
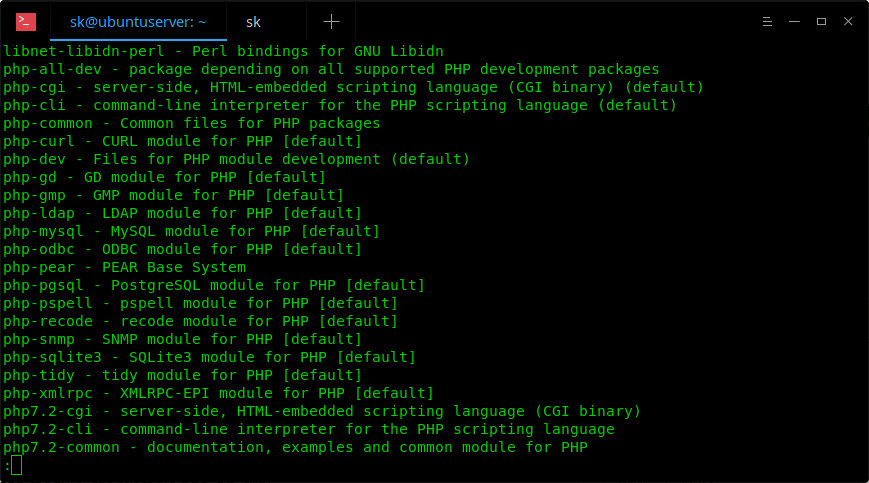
使用方向键浏览结果。要退出,请输入 q 并按下回车键。

要查找任意 php 模块的详细信息,例如 php-gd,请运行:

$ sudo apt-cache show php-gd

安装 PHP 模块请运行:

$ sudo apt install php-gd

安装所有的模块(虽然没有必要),请运行:

$ sudo apt-get install php*

安装任何 php 模块后,请不要忘记重新启动 Apache 服务。要检查模块是否已加载,请在浏览器中打开 info.php 文件并检查是否存在。

接下来,你可能需要安装数据库管理工具,以通过 Web 浏览器轻松管理数据库。如果是这样,请按照以下链接中的说明安装 phpMyAdmin

祝贺你!我们已经在 Ubuntu 服务器中成功配置了 LAMP 套件。


via: https://www.ostechnix.com/install-apache-mysql-php-lamp-stack-on-ubuntu-18-04-lts/

作者:SK 选题:lujun9972 译者:stevenzdg988 校对:wxy
本文由 LCTT 原创编译,Linux中国 荣誉推出

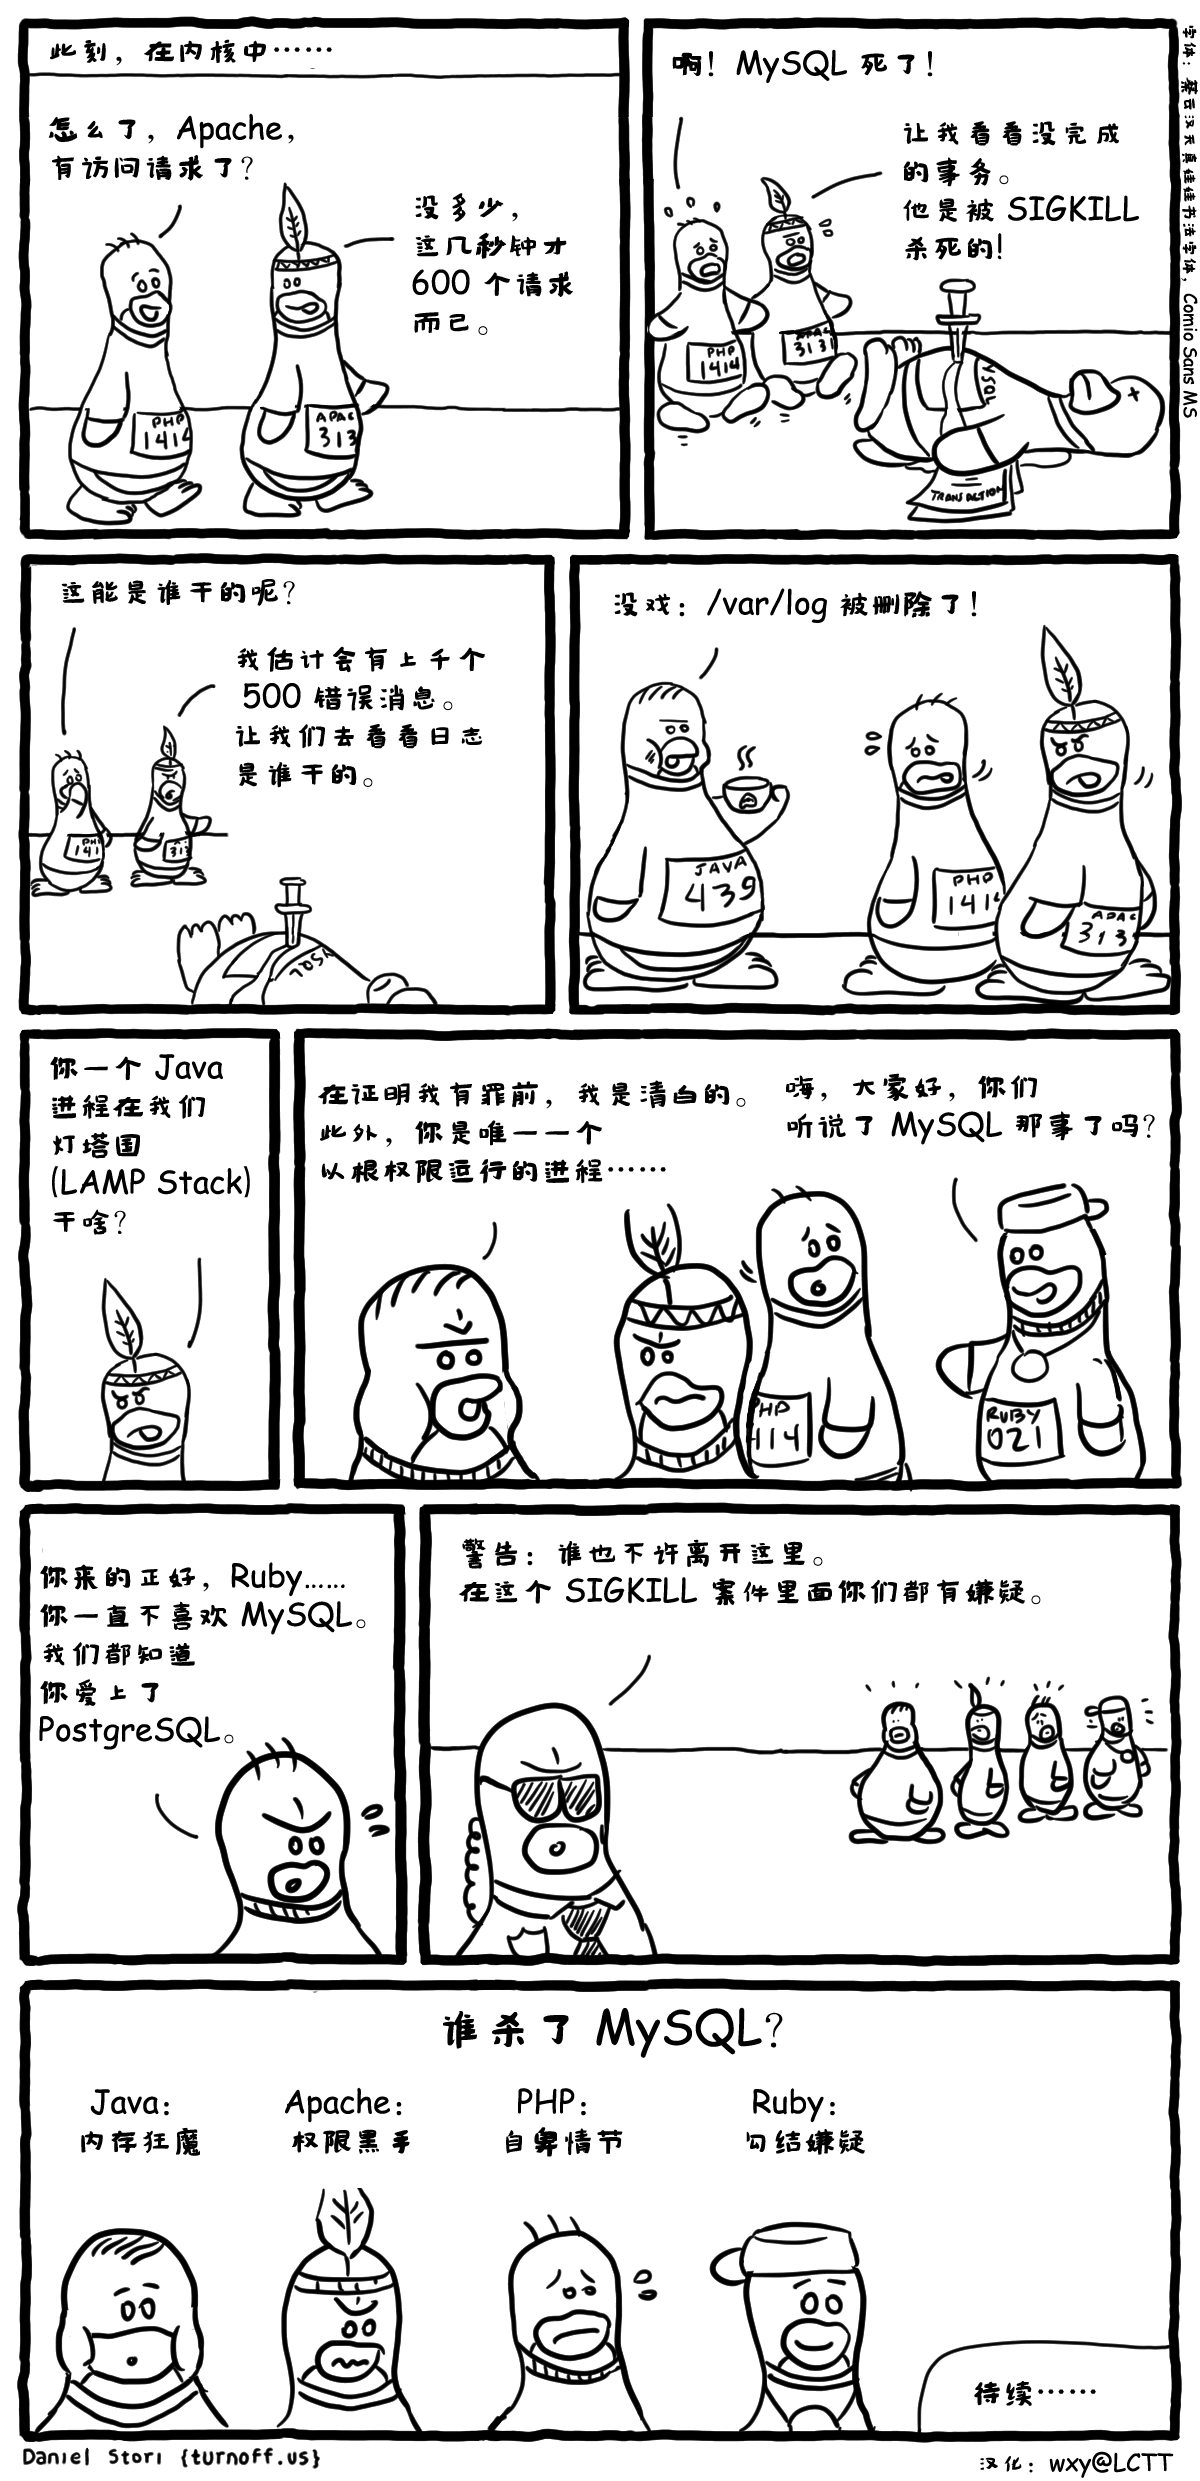
who-killed-mysql

LAMP 架构,指 Linux + Apache + MySQL + PHP 组合构成的一个完整的 Web 服务架构。这是一个经典而有点过时的架构,适合于小型的 Web 服务。

在这里 MySQL 意外被 SIGKILL 杀死了,没有留下任何遗言和痕迹(日志)。


via: http://turnoff.us/geek/who-killed-mysql/

作者:Daniel Stori 译者:wxy

本文由 LCTT 原创编译,Linux中国 荣誉推出

LAMP 方案是一系列自由和开源软件的集合,包含了 Linux、Web 服务器 (Apache)、 数据库服务器 (MySQL / MariaDB) 和 PHP (脚本语言)。LAMP 是那些需要安装和构建动态网页应用的基础平台,比如WordPress、Joomla、OpenCart 和 Drupal。

在这篇文章中,我将描述如何在 Ubuntu Server 16.04 LTS 上安装 LAMP,众所周知 Ubuntu 是一个基于 Linux 的操作系统,因此它构成了 LAMP 的第一个部分,在接下来的操作中,我将默认你已经安装了 Ubuntu Server 16.04。

Apache2 web 服务器的安装 :

在 Ubuntu linux 中,web 服务器是 Apache2,我们可以利用下面的命令来安装它:

linuxtechi@ubuntu:~$ sudo apt update
linuxtechi@ubuntu:~$ sudo apt install apache2 -y

当安装 Apache2 包之后,Apache2 相关的服务是启用的,并在重启后自动运行。在某些情况下,如果你的 Apache2 服务并没有自动运行和启用,你可以利用如下命令来启动和启用它。

linuxtechi@ubuntu:~$ sudo systemctl start apache2.service
linuxtechi@ubuntu:~$ sudo systemctl enable apache2.service
linuxtechi@ubuntu:~$ sudo systemctl status apache2.service

如果你开启了 Ubuntu 的防火墙(ufw),那么你可以使用如下的命令来解除 web 服务器的端口(80和443)限制

linuxtechi@ubuntu:~$ sudo ufw status
Status: active
linuxtechi@ubuntu:~$ sudo ufw allow in 'Apache Full'
Rule added
Rule added (v6)
linuxtechi@ubuntu:~$

现在开始访问你的 web 服务器 :

打开浏览器并输入服务器的IP地址或者主机名(http://IP\_Address\_OR\_Host\_Name),在我的例子中我的服务器 IP是‘192.168.1.13’

数据库服务器的安装 (MySQL Server 5.7) :

MySQL 和 MariaDB 都是 Ubuntu 16.04 中的数据库服务器。 MySQL Server 和 MariaDB Server的安装包都可以在Ubuntu 的默认软件源中找到,我们可以选择其中的一个来安装。通过下面的命令来在终端中安装mysql服务器。

linuxtechi@ubuntu:~$ sudo apt install mysql-server mysql-client

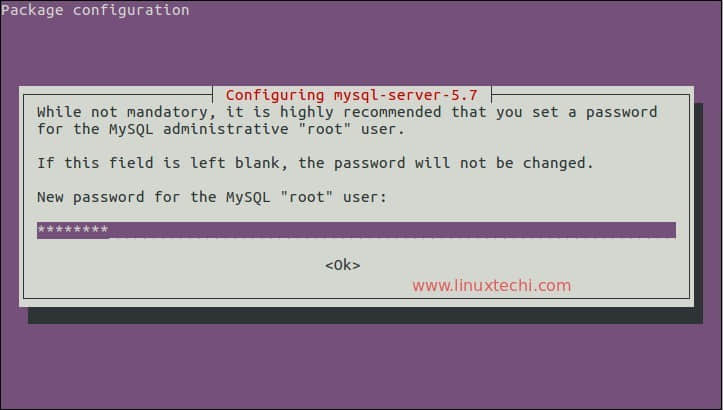
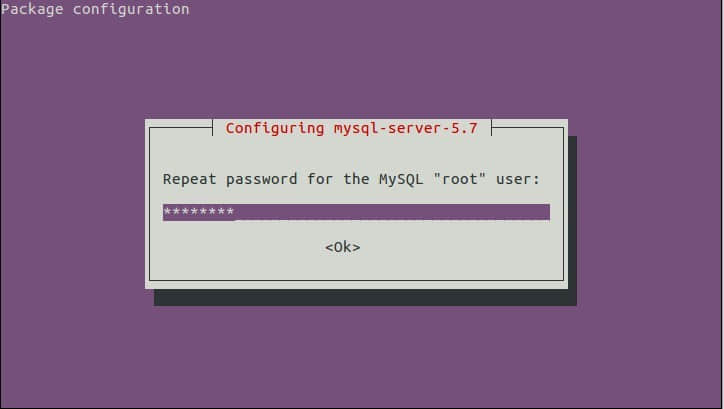
在安装过程中,它会要求你设置 mysql 服务器 root 帐户的密码。

确认 root 帐户的密码,并点击确定。

MySQL 服务器的安装到此已经结束了, MySQL 服务会自动启动并启用。我们可以通过如下的命令来校验 MySQL 服务的状态。

linuxtechi@ubuntu:~$ sudo systemctl status mysql.service

MariaDB Server的安装 :

在终端中使用如下的命令来安装 Mariadb 10.0 服务器。

linuxtechi@ubuntu:~$ sudo apt install mariadb-server

运行如下的命令来设置 MariaDB root 帐户的密码,还可以用来关闭某些选项,比如关闭远程登录功能。

linuxtechi@ubuntu:~$ sudo mysql_secure_installation

PHP 脚本语言的安装:

PHP 7 已经存在于 Ubuntu 的软件源中了,在终端中执行如下的命令来安装 PHP 7:

linuxtechi@ubuntu:~$ sudo apt install php7.0-mysql php7.0-curl php7.0-json php7.0-cgi php7.0 libapache2-mod-php7.0

创建一个简单的 php 页面,并且将它移动到 apache 的文档根目录下 (/var/www/html)

linuxtechi@ubuntu:~$ vi samplepage.php
<?php
phpinfo();
?>

在 vi 中编辑之后,保存并退出该文件。

linuxtechi@ubuntu:~$ sudo mv samplepage.php /var/www/html/

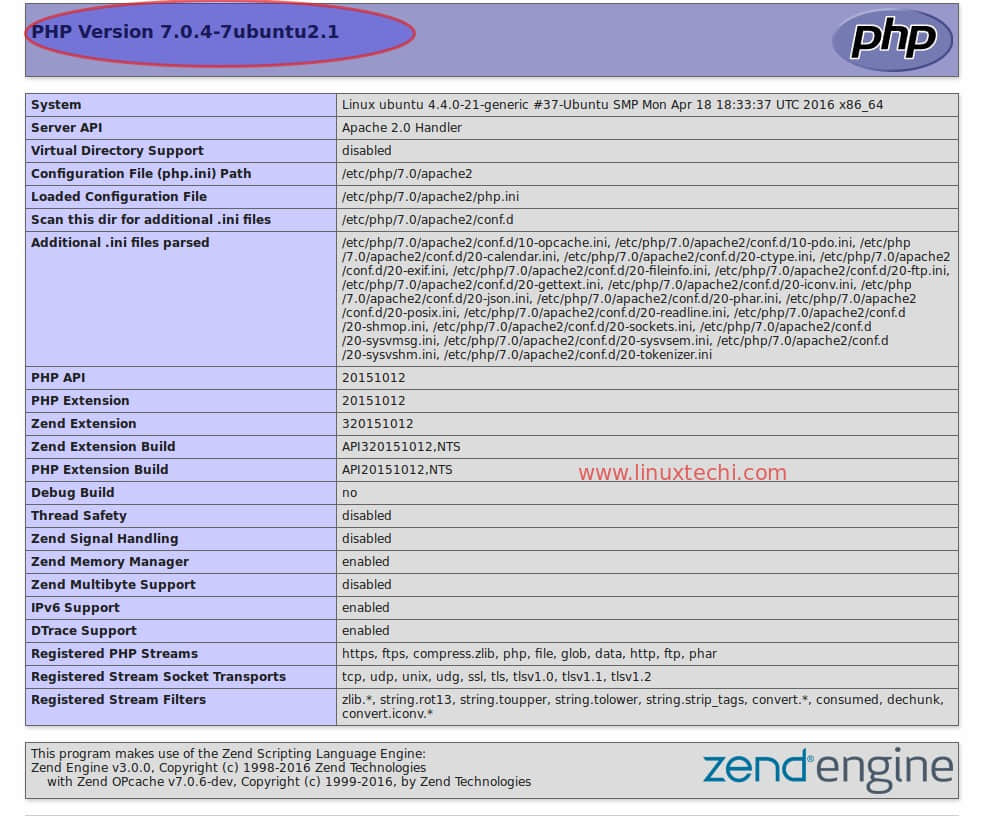
现在你可以从 web 浏览器中访问这个页面, 输入 : “http:///samplepage.php” ,你可以看到如下页面。

以上的页面向我们展示了 PHP 已经完全安装成功了。

phpMyAdmin 的安装:

phpMyAdmin 可以让我们通过它的 web 界面来执行所有与数据库管理和其他数据库操作相关的任务,这个安装包已经存在于 Ubuntu 的软件源中。

利用如下的命令来在 Ubuntu server 16.04 LTS 中安装 phpMyAdmin。

linuxtechi@ubuntu:~$ sudo apt install php-mbstring php7.0-mbstring php-gettext
linuxtechi@ubuntu:~$ sudo systemctl restart apache2.service
linuxtechi@ubuntu:~$ sudo apt install phpmyadmin

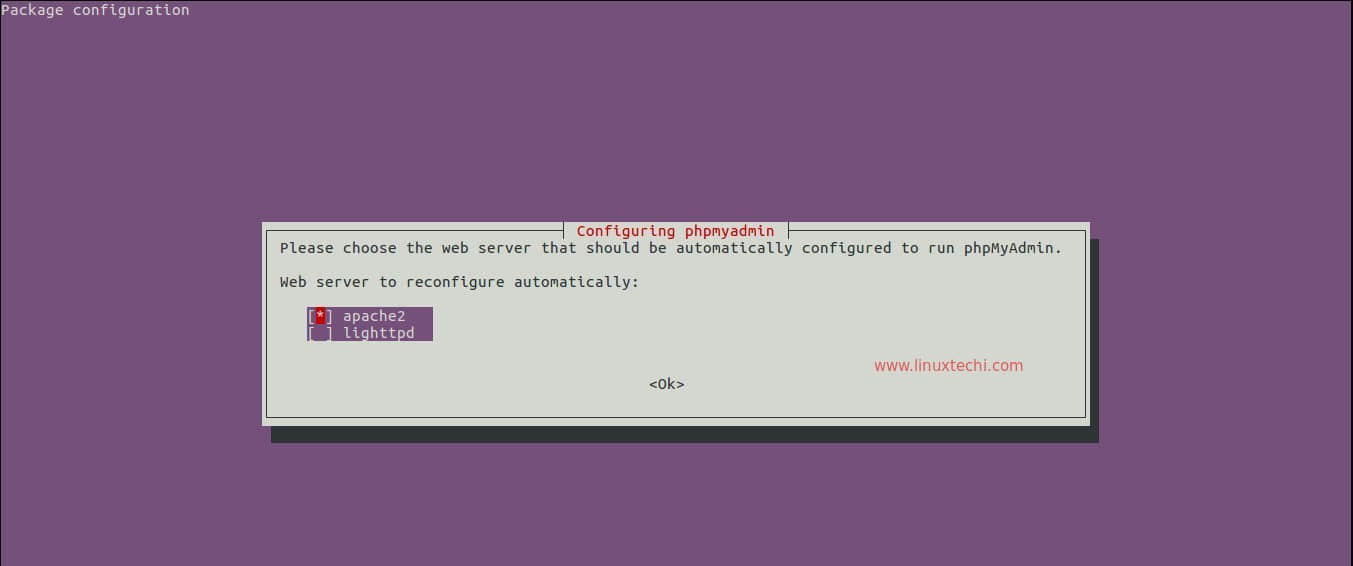
在以下的安装过程中,它会提示我们选择 phpMyAdmin 运行的目标服务器。

选择 Apache2 并点击确定。

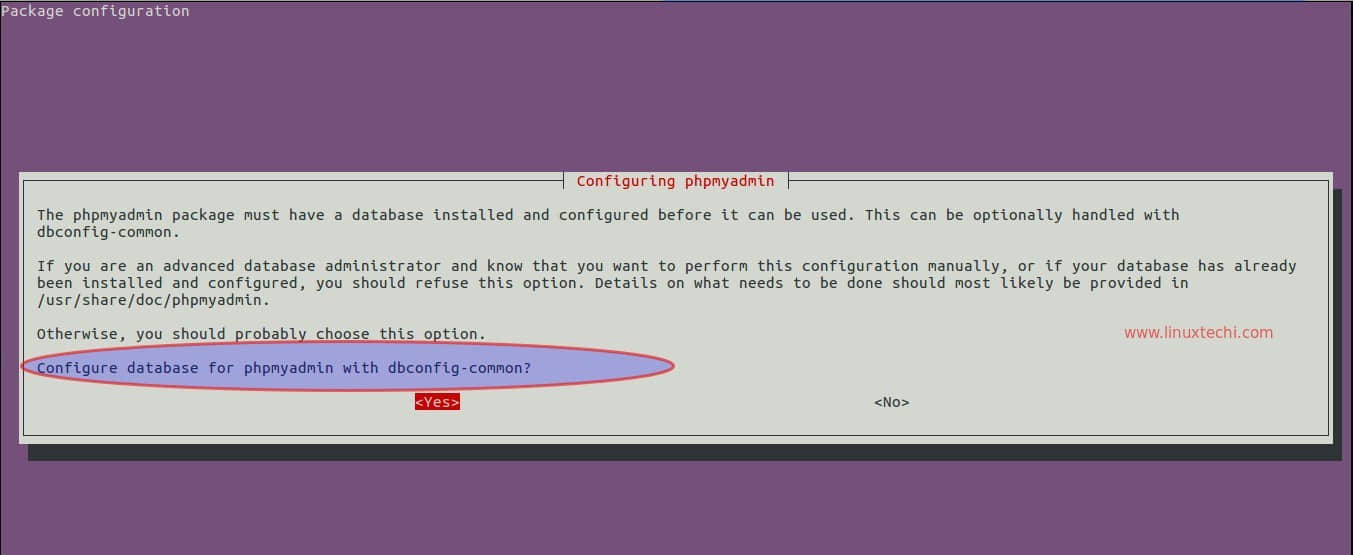
点击确定来配置 phpMyAdmin 管理的数据库。

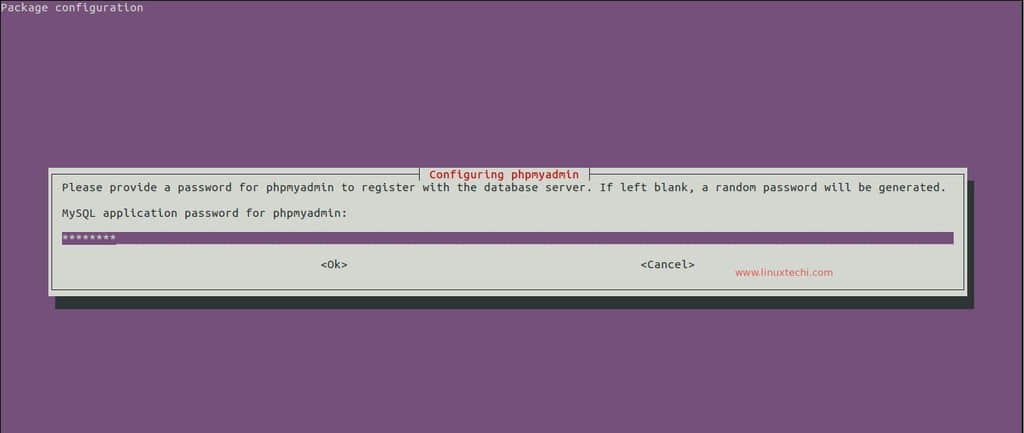
指定 phpMyAdmin 向数据库服务器注册时所用的密码。

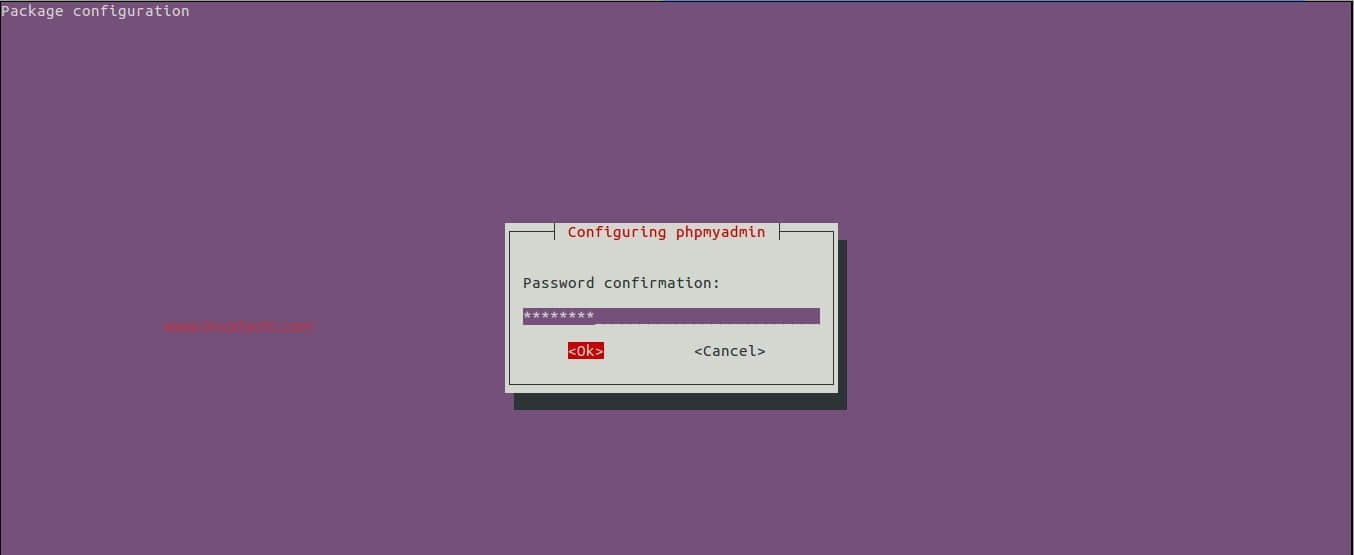
确认 phpMyAdmin 所需的密码,并点击确认。

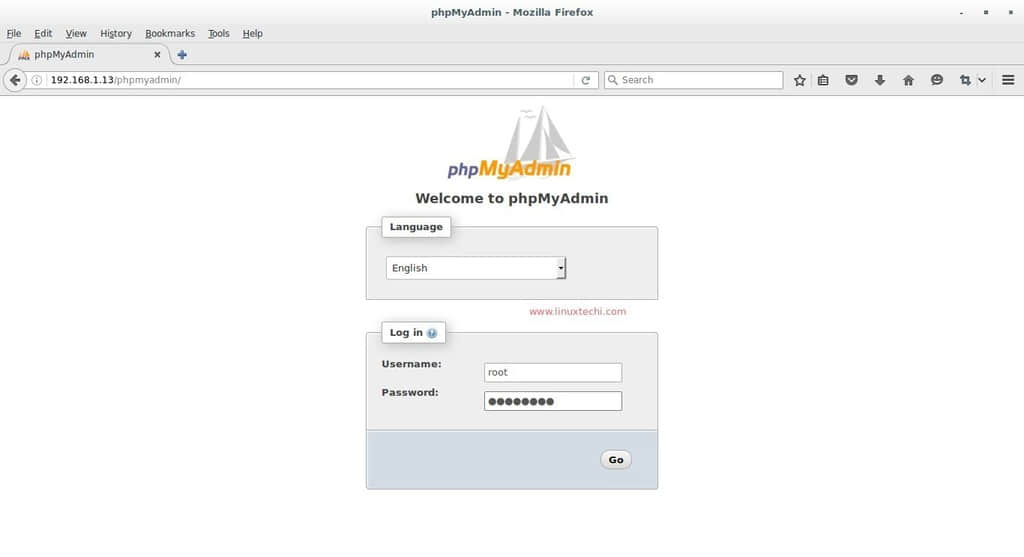
现在可以开始尝试访问 phpMyAdmin,打开浏览器并输入 : “http://Server\_IP\_OR\_Host\_Name/phpmyadmin”

使用我们安装时设置的 root 帐户和密码。

当我们点击“Go”的时候,将会重定向到如下所示的 ‘phpMyAdmin’ web界面。

到现在,LAMP 方案已经被成功安装并可以使用了,欢迎分享你的反馈和评论。


via: http://www.linuxtechi.com/lamp-stack-installation-on-ubuntu-server-16-04/

作者:Pradeep Kumar 译者:陆建波 校对:Caroline

本文由 LCTT 原创编译,Linux中国 荣誉推出

跳过 LAMP 的介绍,因为我认为你们大多数已经知道了。这个教程会集中在如何在升级到 Apache 2.4 的 Red Hat Enterprise Linux 7.0 和 CentOS 7.0 中安装和配置 LAMP:Linux、Apache、 MariaDB、 PHP/PhpMyAdmin。

Install LAMP in CentOS 7

在 RHEL/CentOS 7.0 中安装 LAMP

前置要求

根据使用的发行版是 RHEL 还是 CentOS 7.0,按照下面的链接来进行最小化的系统安装,网络使用静态 IP。

对于 RHEL 7.0

对于 CentOS 7.0

第一步:使用基本配置安装apache

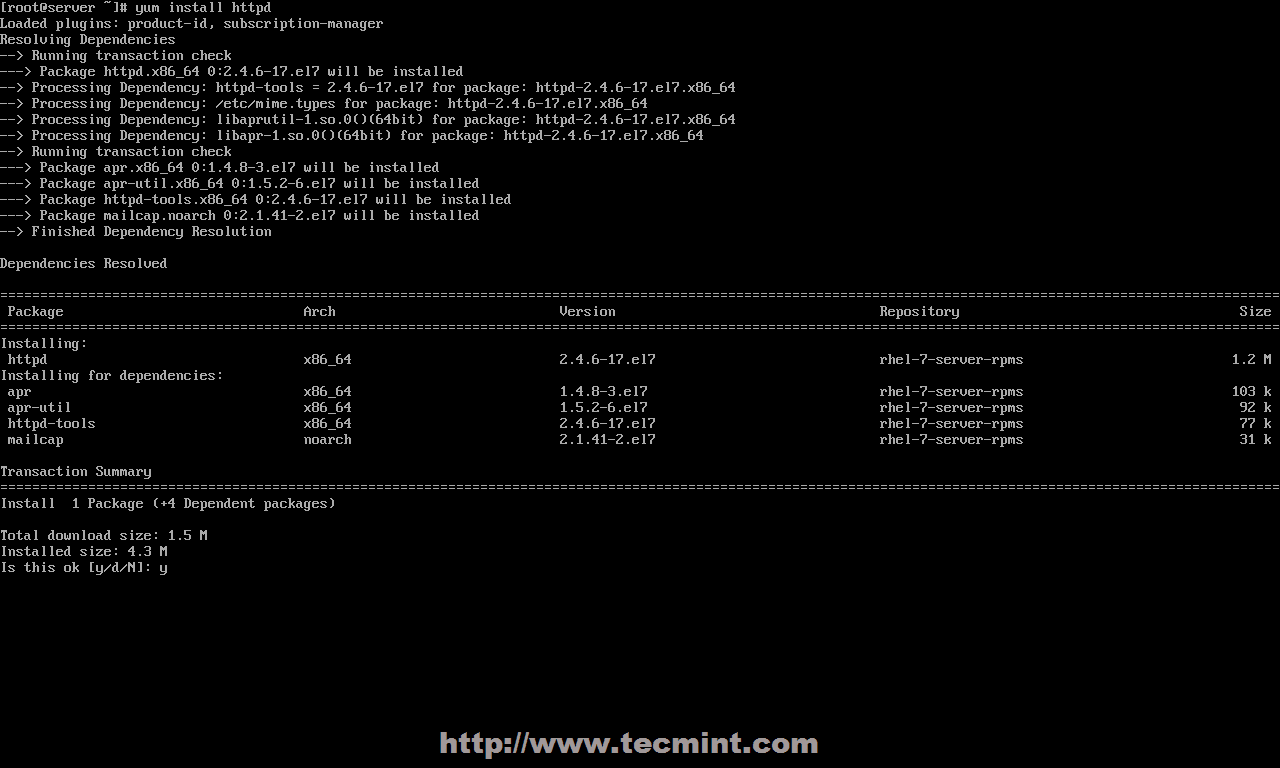
1、在完成最小化系统安装,并在 RHEL/CentOS 7.0 上配置静态 IP 后,就可以使用下面的命令从官方仓库安装最新的 Apache 2.4 httpd 服务了。

# yum install httpd

Install Apache in CentOS 7

安装 apache 服务

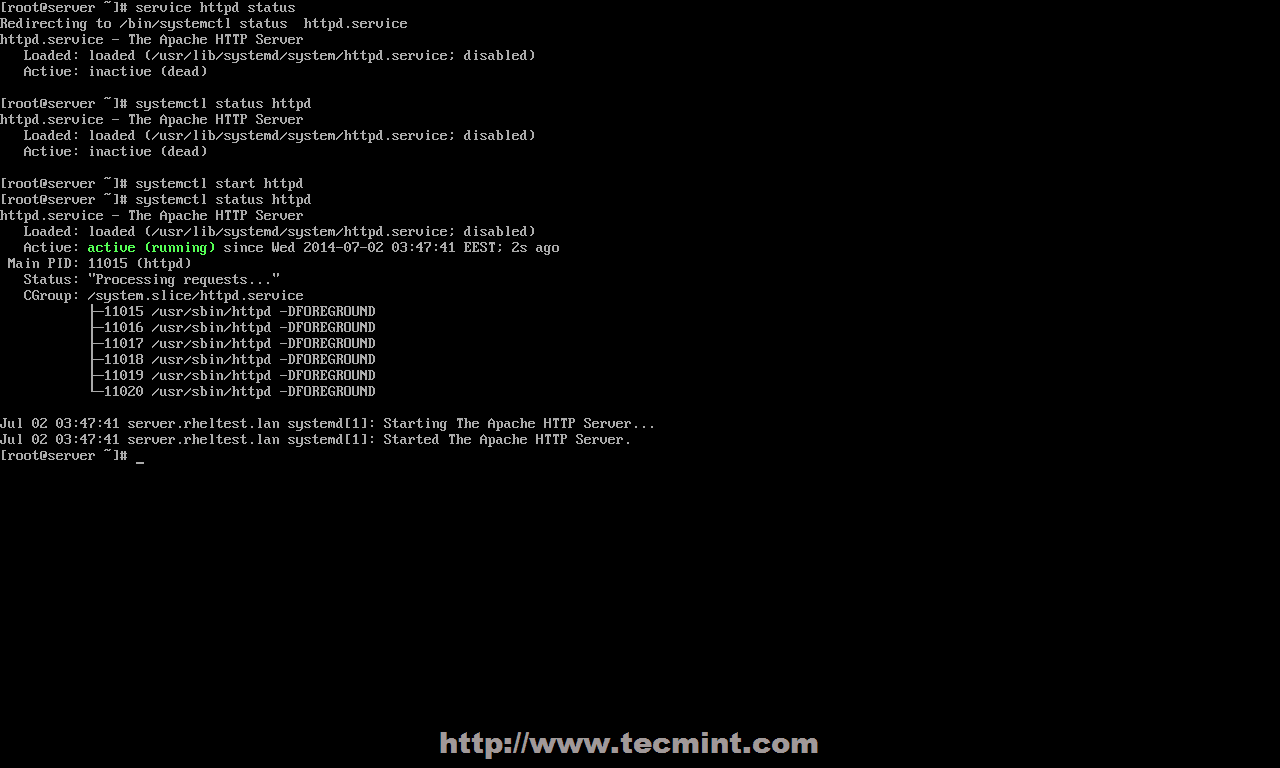
2、安装完成后,使用下面的命令来管理apache守护进程,因为 RHEL 和 CentOS 7.0 都将 init 脚本从 SysV 升级到了systemd,所以同时你还可以使用 SysV 脚本和 Apache 脚本来管理服务。

# systemctl status|start|stop|restart|reload httpd
或者 
# service httpd status|start|stop|restart|reload
或者 
# apachectl configtest| graceful

Start Apache in CentOS 7

启动apache服务

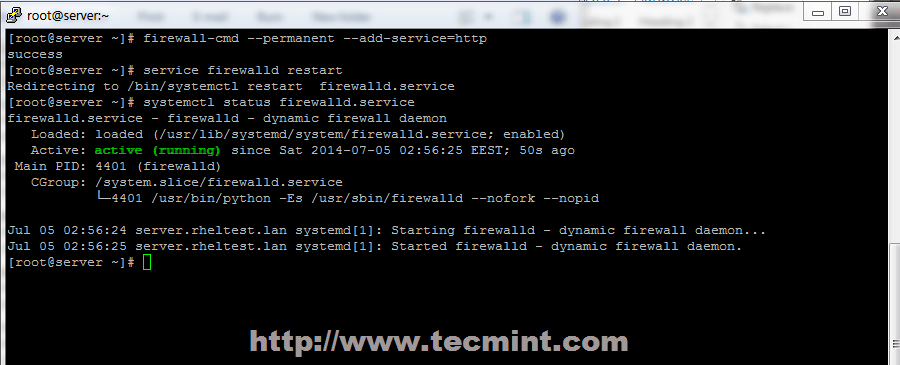
3、在使用 systemd 初始化脚本来启动 apache 服务后,要用 firewall-cmd 打开 RHEL/CentOS 7.0 防火墙规则, 这是通过 firewalld 守护进程管理 iptables 的默认命令。**

# firewall-cmd --add-service=http

注意:上面的命令会在系统重启或者 firewalld 服务重启后失效,因为它是即时的规则,它不会永久生效。要使 iptables 规则在 fiewalld 中持久化,使用 --permanent 选项并重启 firewalld 服务来生效。(LCTT 译注:也可以不重启 firewalld 服务,而是再执行一遍不带 --permanent 选项的命令。)

# firewall-cmd --permanent --add-service=http
# systemctl restart firewalld

Enable Firewall in CentOS 7

在 CentOS 7 中启用防火墙

下面是 firewalld 其他的重要选项:

# firewall-cmd --state
# firewall-cmd --list-all
# firewall-cmd --list-interfaces
# firewall-cmd --get-service
# firewall-cmd --query-service service_name
# firewall-cmd --add-port=8080/tcp

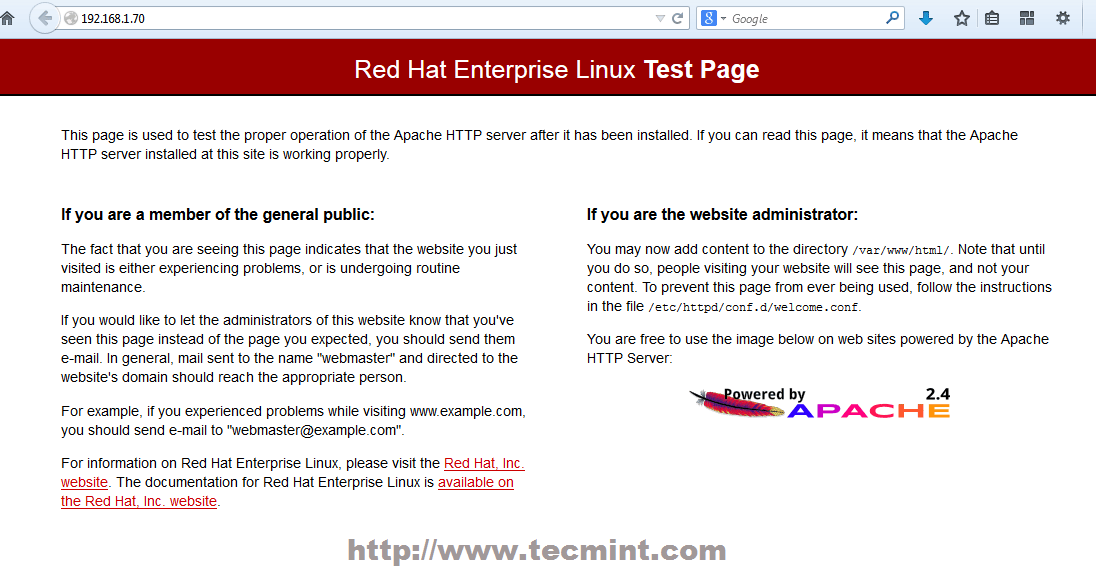
4、要验证 apache 的功能,打开一个远程浏览器并使用 http 协议访问你服务器的 IP 地址(http://server\_IP), 应该会显示下图中的默认页面。

Apache Default Page

Apache 默认页

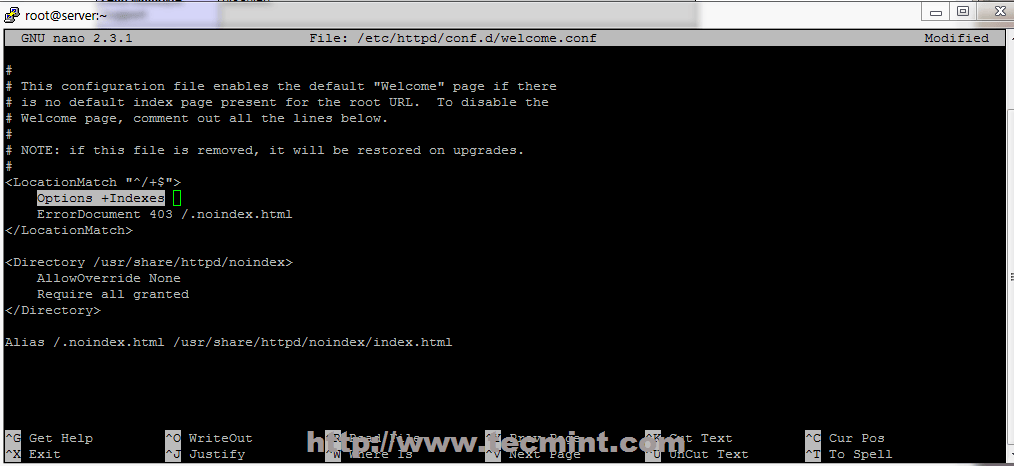
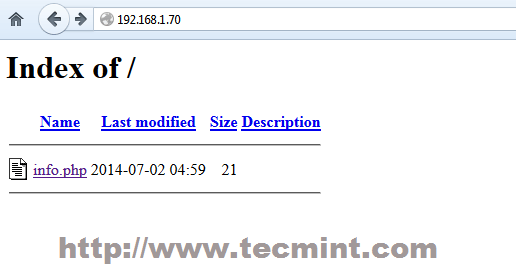
5、现在 apache 的根地址在 /var/www/html,该目录中没有提供任何索引文件。如果你想要看见根目录下的文件夹列表,打开 apache 欢迎配置文件并设置 <LocationMach>Indexes 前的状态从-+,下面的截图就是一个例子。

# nano /etc/httpd/conf.d/welcome.conf

Apache Directory Listing

Apache 目录列出

6、关闭文件,重启 apache 服务来使设置生效,重载页面来看最终效果。

# systemctl restart httpd

Apache Index File

Apache 索引文件

第二步:为 Apache 安装 php5 支持

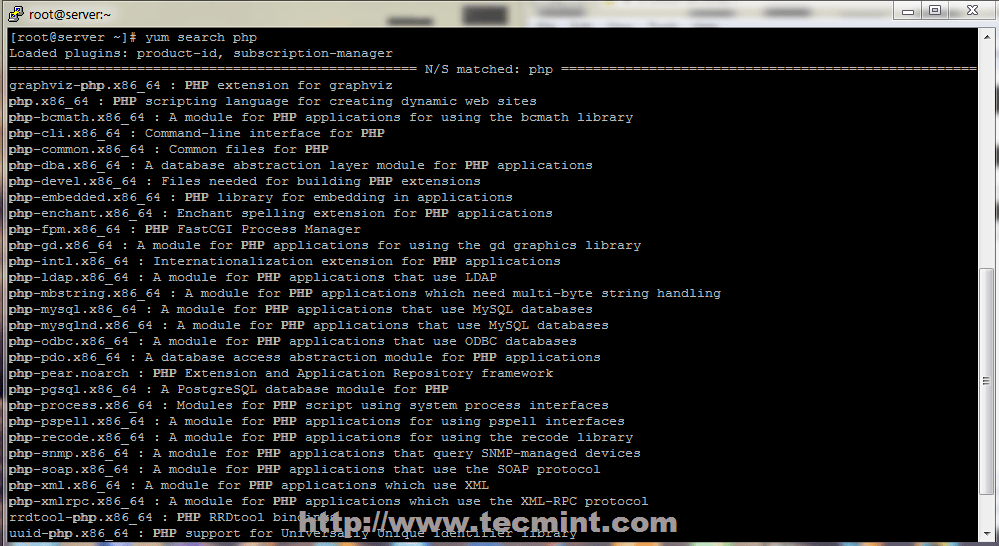
7、在为 apache 安装 php 支持之前,使用下面的命令的得到所有可用的php模块和扩展。

# yum search php

Install PHP in CentOS 7

在 CentOS 7 上安装 PHP*

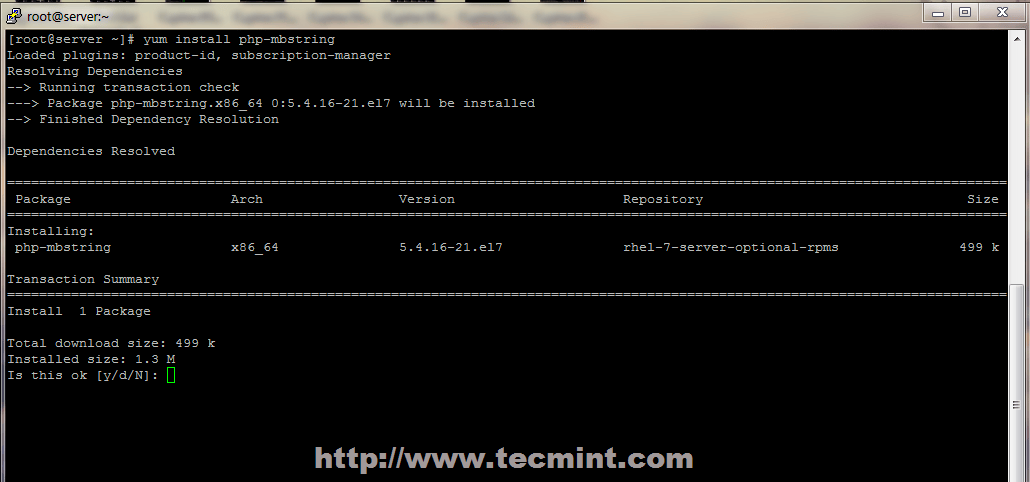
8、根据你所要使用的应用类型,安装上述列表中所需的 PHP 模块。对于 PHP 中的基本的 MariaDB 支持和 PhpMyAdmin,你需要安装如下模块。

# yum install php php-mysql php-pdo php-gd php-mbstring

Install PHP Modules in CentOS 7

安装 PHP 模块

Install PHP mbstring Module

安装 PHP mbstring 模块

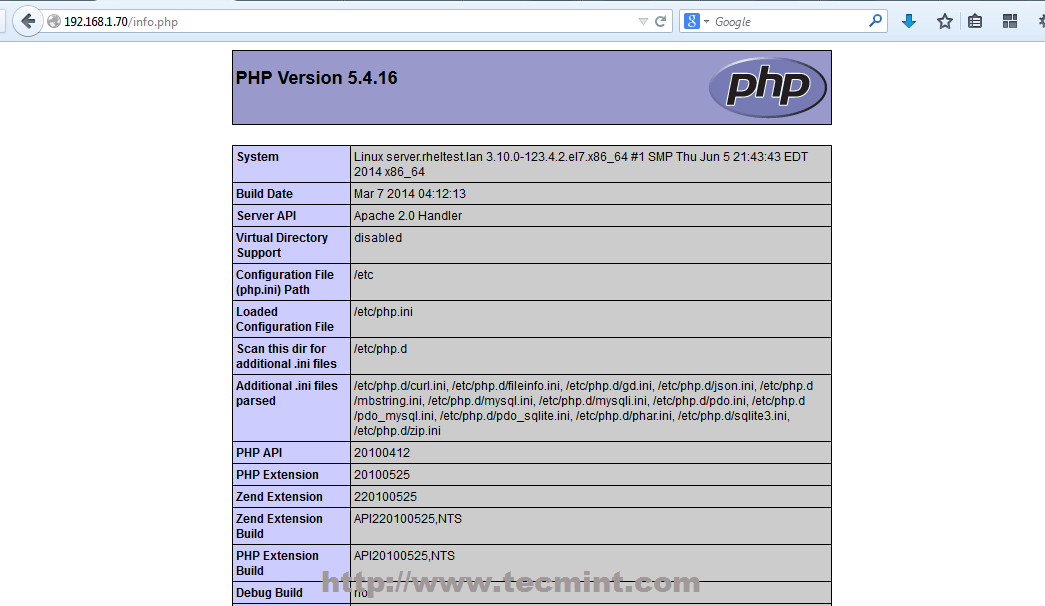
9、 要在你的浏览器上显示 PHP 的全部信息,用 root 账号执行如下命令在 Apache 的文档根目录下创建一个 info.php 文件,然后重启 httpd 服务,并在你的浏览器里面访问 http://server\_IP/info.php 。

# echo "<?php phpinfo(); ?>" > /var/www/html/info.php
# systemctl restart httpd

Check PHP Info in CentOS 7

查看 CentOS 7 上的 PHP 信息

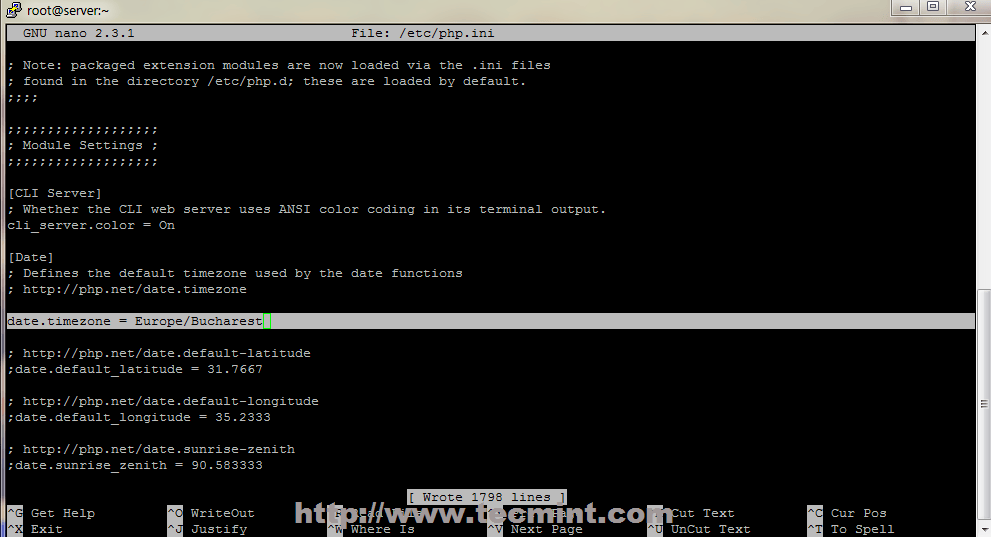
10、如果你得到一个 PHP 的日期和时区错误,打开配置文件 php.ini,取消 date.timezone 语句的注释,加上你的实际时区参数,然后重启 Apache 守护进程。

# nano /etc/php.ini

找到并如下修改date.timezone,参考 PHP 支持的时区列表。(LCTT 译注:对于中国,可以使用 Asia/Shanghai、Asia/Chongqing 等,但是不建议使用向后兼容而保留的 PRC。)

date.timezone = Continent/City

Set Timezone in PHP

设置 PHP 的时区

第三步:安装和配置 MariaDB 数据库

11、 Red Hat Enterprise Linux/CentOS 7.0 使用 MariaDB 替换 MySQL 为默认数据库管理系统。使用如下命令安装 MariaDB 数据库。

# yum install mariadb-server mariadb

Install MariaDB in CentOS 7

在 CentOS 7中安装 MariaDB

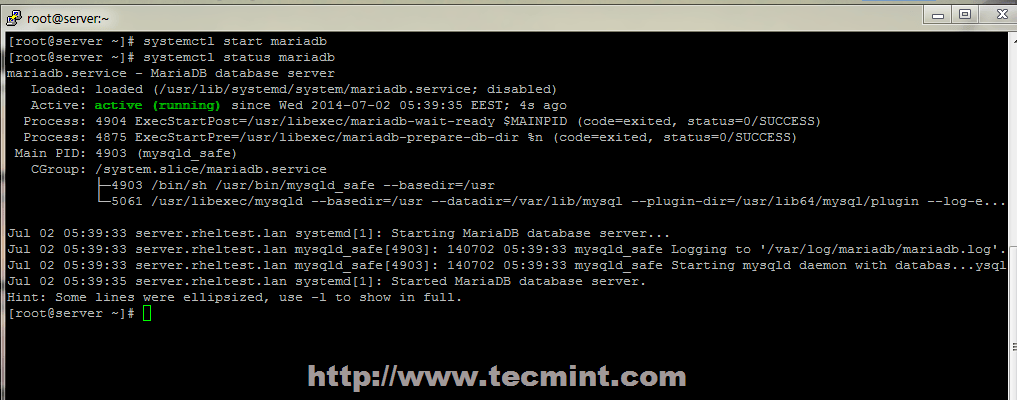
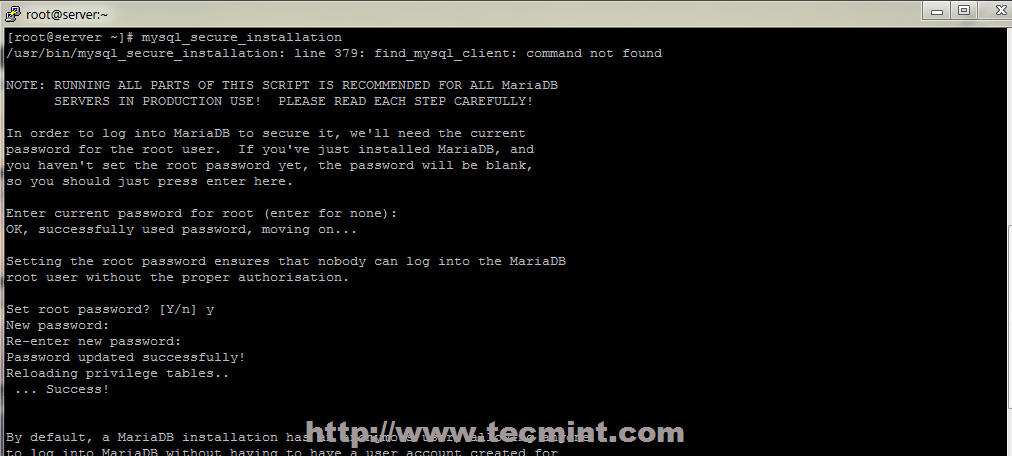
12、安装 MariaDB 后,启动数据库守护进程并使用 mysqlsecureinstallation 脚本来保护数据库(设置数据库的 root 密码、禁止远程 root 登录、移除测试数据库、移除匿名用户等)。

# systemctl start mariadb
# mysql_secure_installation

Start MariaDB Database

启动 MariaDB 数据库

Secure MySQL Installation

MariaDB 安全设置

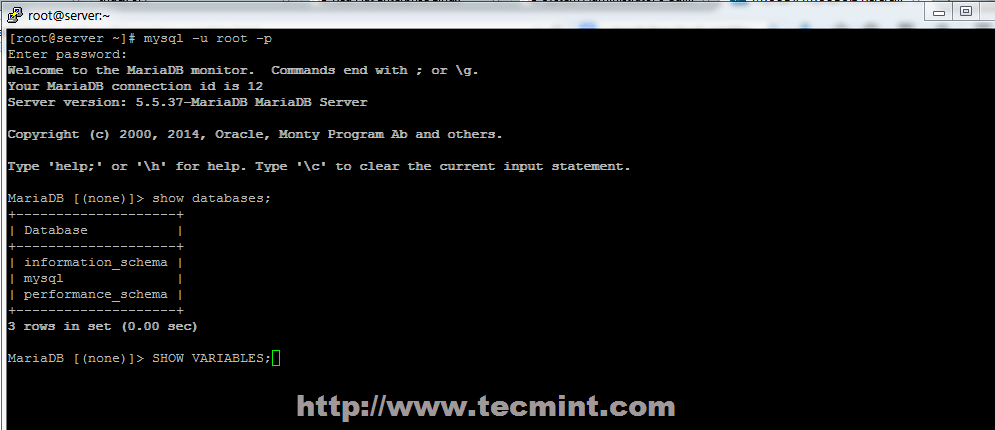
13、要测试数据库功能,使用 root 账户登录 MariaDB 并用 quit 退出。

mysql -u root -p
MariaDB > SHOW VARIABLES;
MariaDB > quit

Connect MySQL Database in CentOS

连接 MariaDB 数据库

第四步:安装 PhpMyAdmin

14、 RHEL 7.0 或者 CentOS 7.0 仓库默认没有提供 PhpMyAdmin 二进制安装包。如果你不适应使用 MySQL 命令行来管理你的数据库,你可以通过下面的命令启用 CentOS 7.0 rpmforge 仓库来安装 PhpMyAdmin。

# yum install http://pkgs.repoforge.org/rpmforge-release/rpmforge-release-0.5.3-1.el7.rf.x86_64.rpm

启用 rpmforge 仓库后,下面安装 PhpMyAdmin。

# yum install phpmyadmin

Enable RPMForge in CentOS 7

启用 RPMForge 仓库

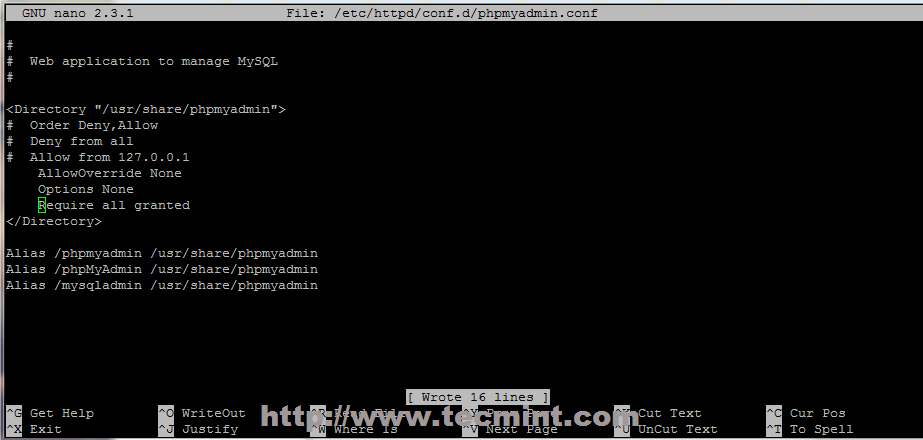
15、下面配置 PhpMyAdmin 的 phpmyadmin.conf 来允许远程连接,它位于 Apache 的 conf.d 目录下,并注释掉下面的行。

# nano /etc/httpd/conf.d/phpmyadmin.conf

使用#来注释掉下列行。

# Order Deny,Allow
# Deny from all
# Allow from 127.0.0.1

Allow Remote PhpMyAdmin Access

允许远程 PhpMyAdmin 访问

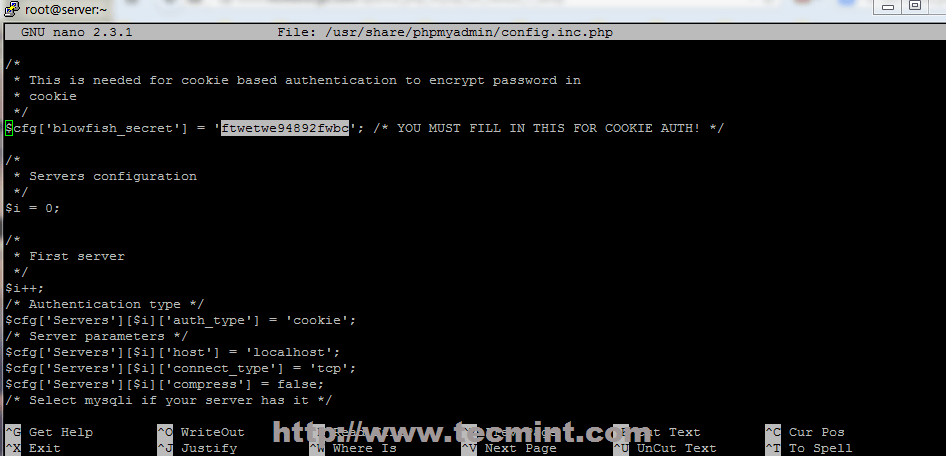
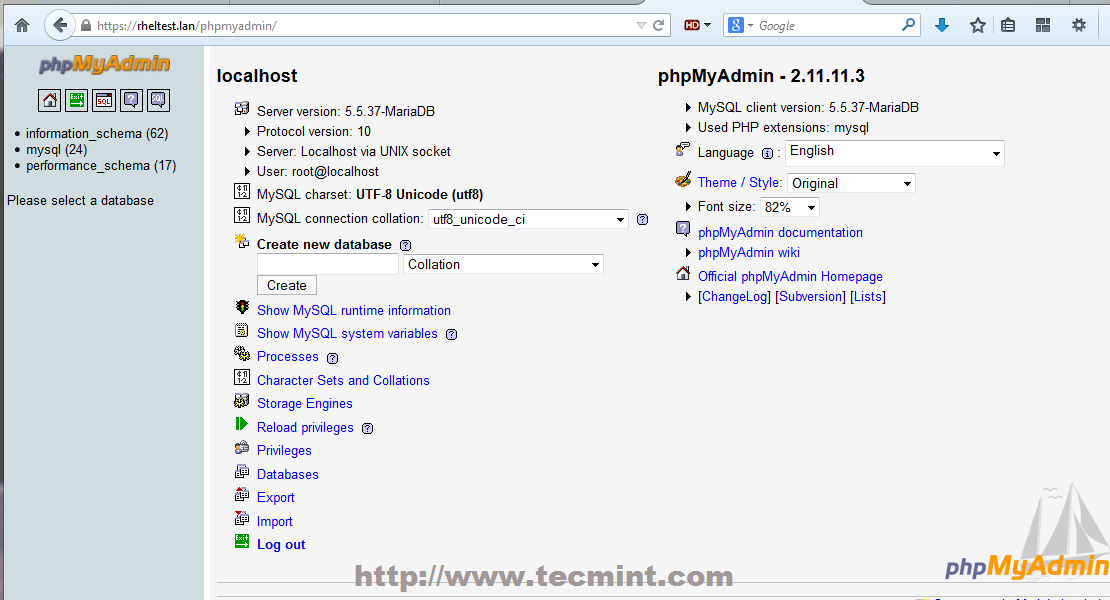
16、 要使用 cookie 验证来登录 PhpMyAdmin,像下面的截图那样使用生成的秘密字符串来添加一个 blowfish 字符串到 config.inc.php 文件中,重启 apache 服务并打开 URL:http://server\_IP/phpmyadmin/。

# nano /etc/httpd/conf.d/phpmyadmin.conf
# systemctl restart httpd

Add Blowfish in PhpMyAdmin

在 PhpMyAdmin 中添加 Blowfish

PhpMyAdmin Dashboard

PhpMyAdmin 面板

第五步:在系统范围内启用 LAMP

17、 如果你需要在重启后自动运行 MariaDB 和 Apache 服务,你需要在系统级地启用它们。

# systemctl enable mariadb
# systemctl enable httpd

Enable Services System Wide

系统级启用服务

这就是在 Red Hat Enterprise 7.0 或者 CentOS 7.0 中安装 LAMP 的过程。在 CentOS/RHEL 7.0 上关于 LAMP 的系列文章接下来将会讨论在 Apache 中创建虚拟主机,生成 SSL 证书、密钥和添加 SSL 事务支持。


via: http://www.tecmint.com/install-lamp-in-centos-7/

作者:Matei Cezar 译者:geekpi 校对:wxy

本文由 LCTT 原创翻译,Linux中国 荣誉推出

LAMP 是服务器系统中开源软件的一个完美组合。它是 Linux 、Apache HTTP 服务器、MySQL 数据库、PHP(或者 Perl、Python)的第一个字母的缩写代码。对于很多系统管理员来说安装 LAMP 除了是必备的技能外,都已经具有驾轻就熟的操作他们的能力了。不过新手们通常希望有没完没了的这方面的教程来告诉自己怎么做,下面我就和大家说说我的方法步骤。

LAMP 是服务器系统中开源软件的一个完美组合。它是 Linux 、Apache HTTP 服务器、MySQL 数据库、PHP(或者 Perl、Python)的第一个字母的缩写代码。对于很多系统管理员来说安装 LAMP 除了是必备的技能外,都已经具有驾轻就熟的操作他们的能力了。不过新手们通常希望有没完没了的这方面的教程来告诉自己怎么做,下面我就和大家说说我的方法步骤。

现在,很多时候我们需要用 MariaDB 来代替 MySQL 了。在这里我会告诉大家 MariaDB 的安装过程。

我的测试主机名为:server.linux.cn,测试 IP 地址为:192.168.1.200/24

安装 Apache

Apache 是​​一个开源的跨平台的 Web 服务器。它提供了一个全方位的 Web 服务器功能,包括CGI,SSL 和virtual domains (虚拟域)。

安装命令非常简单,只需要打开一个终端,在终端中输入如下命令:

[root@server ~]# yum install httpd -y

安装完毕后,需要设置让 Apache 服务启动,并且在每次服务器重启的时候都自动启动,输入如下命令来完成:

[root@server ~]# /etc/init.d/httpd start
[root@server ~]# chkconfig httpd on

如果您想通过您的防火墙活路由器来远程连接,那么需要允许 Apache 服务接管服务器的 80 端口:

[root@server ~]# vi /etc/sysconfig/iptables
[...]
-A INPUT -p udp -m state --state NEW --dport 80 -j ACCEPT
-A INPUT -p tcp -m state --state NEW --dport 80 -j ACCEPT
[...]

重新启动 iptables :

[root@server ~]# /etc/init.d/iptables restart

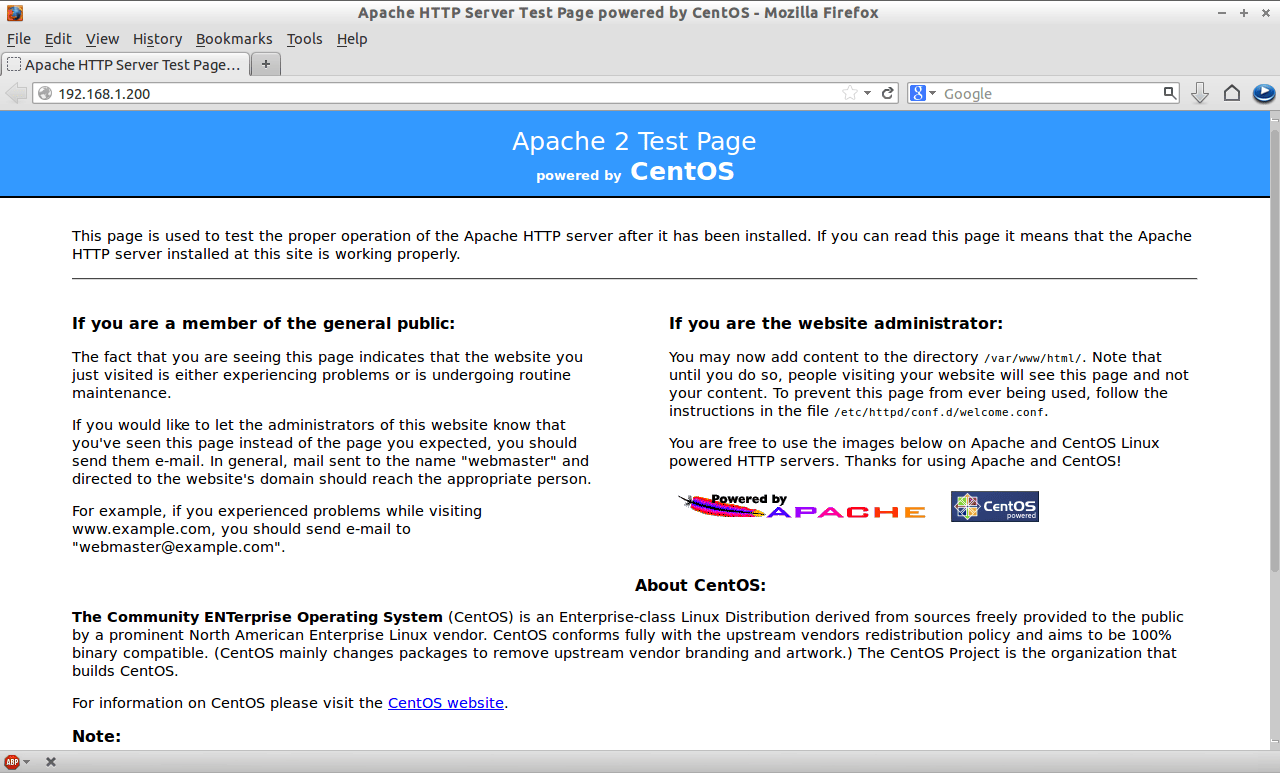
打开您的浏览器访问 http://localhost/ 或者 http://server-ip-address/ 测试 Apache 安装是否成功。

[
点击查看原始大图](https://img.linux.net.cn/data/attachment/album/201307/01/000741vj5w5u6lvmvz2m53.png)

安装 MariaDB

MariaDB 是一个替换 MySQL 的产品。功能强大而可靠。安装前,如果您的服务器中安装有 MySQL ,那么您需要删除它。删除命令:

[root@server ~]# yum remove mysql* mysql-server mysql-devel mysql-libs

为了让 MariaDB 同时兼容 MySQL,我们需要安装 REMI 库来解决兼容性和安装 MariaDB 时软件包依赖性问题。安装命令:

[root@server ~]# rpm -ivh http://rpms.famillecollet.com/enterprise/remi-release-6.rpm

安装兼容 mysql55 包命令:

[root@server ~]# yum --enablerepo=remi-test --disablerepo=remi install compat-mysql55

为 MariaDB 创建一个 repository 文件,并在其中输入如下代码:

32 位系统:

[root@server ~]# vi /etc/yum.repos.d/mariadb.repo

MariaDB 5.5 CentOS repository list - created 2013-06-06 07:42 UTC

http://mariadb.org/mariadb/repositories/

[mariadb]
name = MariaDB
baseurl = http://yum.mariadb.org/5.5/centos6-x86
gpgkey=https://yum.mariadb.org/RPM-GPG-KEY-MariaDB
gpgcheck=1

64 位系统:

[root@server ~]# vi /etc/yum.repos.d/mariadb.repo

MariaDB 5.5 CentOS repository list - created 2013-06-06 07:53 UTC

http://mariadb.org/mariadb/repositories/

[mariadb]
name = MariaDB
baseurl = http://yum.mariadb.org/5.5/centos6-amd64
gpgkey=https://yum.mariadb.org/RPM-GPG-KEY-MariaDB
gpgcheck=1

保存并退出该文件,并运行 yum update 命令:

[root@server ~]# yum update

现在开始安装 MariaDB :

[root@server ~]# yum install MariaDB-devel MariaDB-client MariaDB-server -y

安装完毕后,启动 MariaDB 服务,并让它在每次重启服务器后自动启动。

[root@server ~]# /etc/init.d/mysql start
Starting MySQL... SUCCESS!
[root@server ~]# chkconfig mysql on

为 MySQL 的 root 设置密码,默认情况下,MySWL root 密码是空的。为了防止未经授权的用户访问 MySQL 我们需要设置 root 用户密码:

[root@server ~]# /usr/bin/mysql\_secure\_installation
/usr/bin/mysql\_secure\_installation: line 379: find\_mysql\_client: command not found

NOTE: RUNNING ALL PARTS OF THIS SCRIPT IS RECOMMENDED FOR ALL MariaDB
SERVERS IN PRODUCTION USE! PLEASE READ EACH STEP CAREFULLY!

In order to log into MariaDB to secure it, we'll need the current
password for the root user. If you've just installed MariaDB, and
you haven't set the root password yet, the password will be blank,
so you should just press enter here.

Enter current password for root (enter for none):
OK, successfully used password, moving on...

Setting the root password ensures that nobody can log into the MariaDB
root user without the proper authorisation.

You already have a root password set, so you can safely answer 'n'.

Change the root password? [Y/n] y
New password:
Re-enter new password:
Password updated successfully!
Reloading privilege tables..
... Success!

By default, a MariaDB installation has an anonymous user, allowing anyone
to log into MariaDB without having to have a user account created for
them. This is intended only for testing, and to make the installation
go a bit smoother. You should remove them before moving into a
production environment.

Remove anonymous users? [Y/n]
... Success!

Normally, root should only be allowed to connect from 'localhost'. This
ensures that someone cannot guess at the root password from the network.

Disallow root login remotely? [Y/n]
... Success!

By default, MariaDB comes with a database named 'test' that anyone can
access. This is also intended only for testing, and should be removed
before moving into a production environment.

Remove test database and access to it? [Y/n]

  • Dropping test database...

ERROR 1008 (HY000) at line 1: Can't drop database 'test'; database doesn't exist
... Failed! Not critical, keep moving...

  • Removing privileges on test database...
    ... Success!

Reloading the privilege tables will ensure that all changes made so far
will take effect immediately.

Reload privilege tables now? [Y/n]
... Success!

Cleaning up...

All done! If you've completed all of the above steps, your MariaDB
installation should now be secure.

Thanks for using MariaDB!

安装 PHP

PHP(PHP 是:Hypertext Preprocessor 的缩写)是一种广泛使用的开放源码的通用脚本语言,适合于 Web 开发,可嵌入到 HTML 中。

安装 PHP 命令:

[root@server ~]# yum install php -y

创建一个的 “testphp.php” 的文件在 Apache 的文档根目录文件夹,在其中如入如下代码。命令:

[root@server ~]# vi /var/www/html/testphp.php
phpinfo();
?>

重新启动 httpd 服务:

[root@server ~]# /etc/init.d/httpd restart

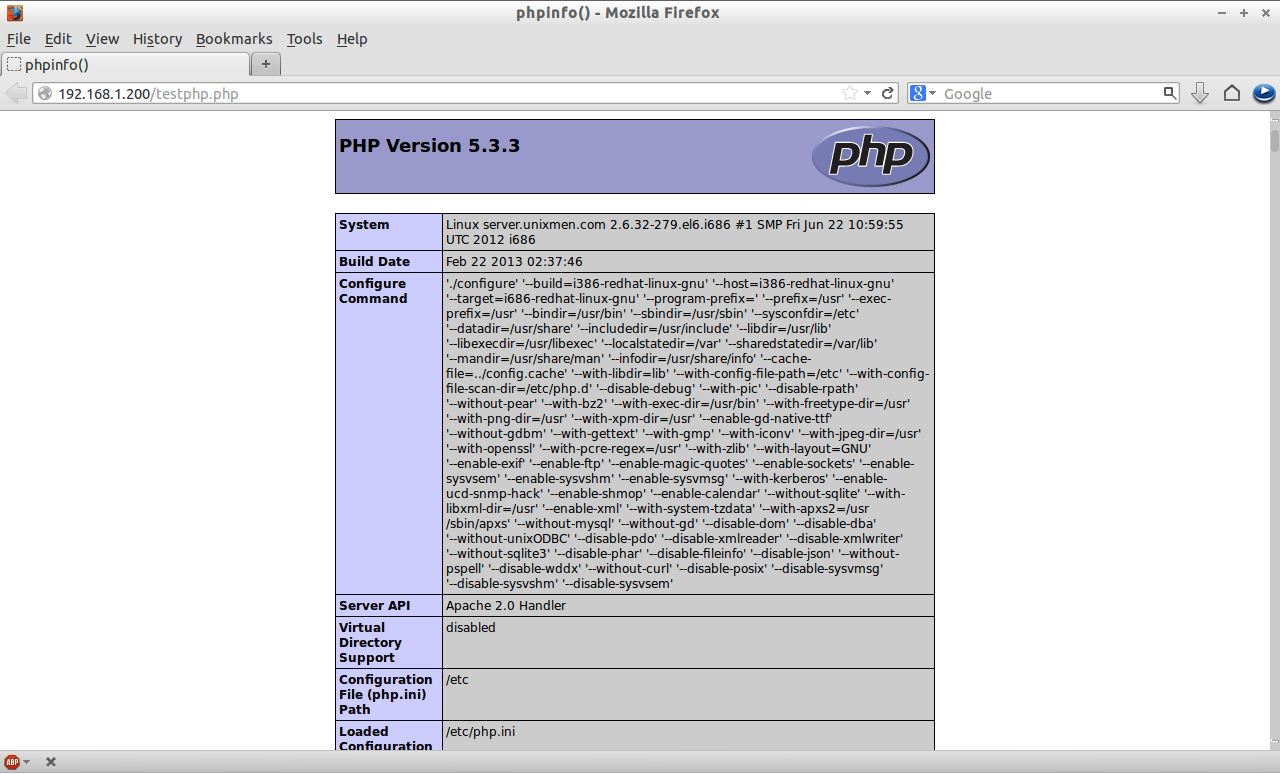
用浏览器打开 http://server-ip-address/testphp.php 。它会显示关于 PHP 的详细信息,比如版本,建立日期等。

[
点击查看原始大图](https://img.linux.net.cn/data/attachment/album/201307/01/000744ov9lcv692nb6ilui.png)

如果您需要安装所有的 PHP 模块,可以输入 yum install php* -y 来安装,安装完毕后重启 httpd 服务。重启服务后,您可以用浏览器打开 http://server-ip-address/testphp.php 来查看您刚才安装的模块情况。

安装 nstall phpMyAdmi

根据您的情况来选择是否安装 nstall phpMyAdmin 。

phpMyAdmin 是一个免费开源的 MySQL 管理工具。默认情况下 CentOS/RHEL/Scientific Linux 官方库中没有 phpMyAdmin。所以我们需要从 EPEL 库中安装。

首先,我们需要添加 EPEL 库:

[root@server ~]# rpm -ivh http://dl.fedoraproject.org/pub/epel/6/i386/epel-release-6-8.noarch.rpm

现在我们可以安装 phpMyAdmin 了。安装命令:

[root@server ~]# yum install phpmyadmin -y

安装完毕后,我们需要配置的 phpMyAdmin。打开 phpmyadmin.conf 的文件。查找以“<Directory” 开头到 包含的部分,如下命令所示:

[root@server ~]# vi /etc/httpd/conf.d/phpMyAdmin.conf

Alias /phpMyAdmin /usr/share/phpMyAdmin
Alias /phpmyadmin /usr/share/phpMyAdmin

Comment the following Section

Apache 2.4

Require ip 127.0.0.1

Require ip ::1

Apache 2.2

Order Deny,Allow

Deny from All

Allow from 127.0.0.1

Allow from ::1

打开 config.inc.php 文件,将 cookie 改为 http。

[root@server ~]# cp /usr/share/phpMyAdmin/config.sample.inc.php /usr/share/phpMyAdmin/config.inc.php
[root@server ~]# vi /usr/share/phpMyAdmin/config.inc.php
[...]
/* Authentication type */
$cfg['Servers'][$i]['auth\_type'] = 'http';
[...]

重新启动 Apache 服务:

[root@server ~]# /etc/init.d/httpd restart

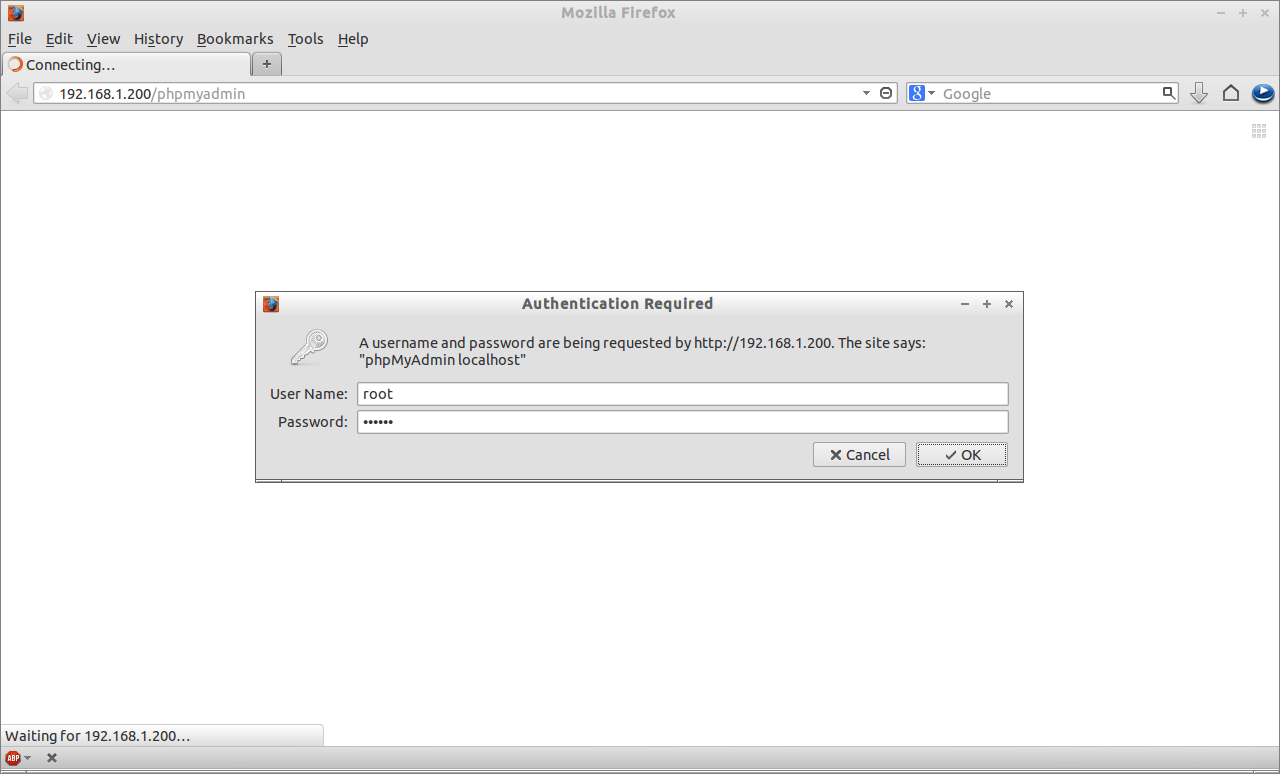
现在,您可以访问 phpmyadmin 控制太来管理 MySQL 了。打开一个浏览器,访问:http://server-ip-address/phpmyadmin/ 。需要输入您的 MySQL 用户名和密码,如果您按前面的步骤设置了密码的话。我设置的是 “root” 和 “centOS”。

[
点击查看原始大图](https://img.linux.net.cn/data/attachment/album/201307/01/000746ha6gi1gahyjygjeh.png)

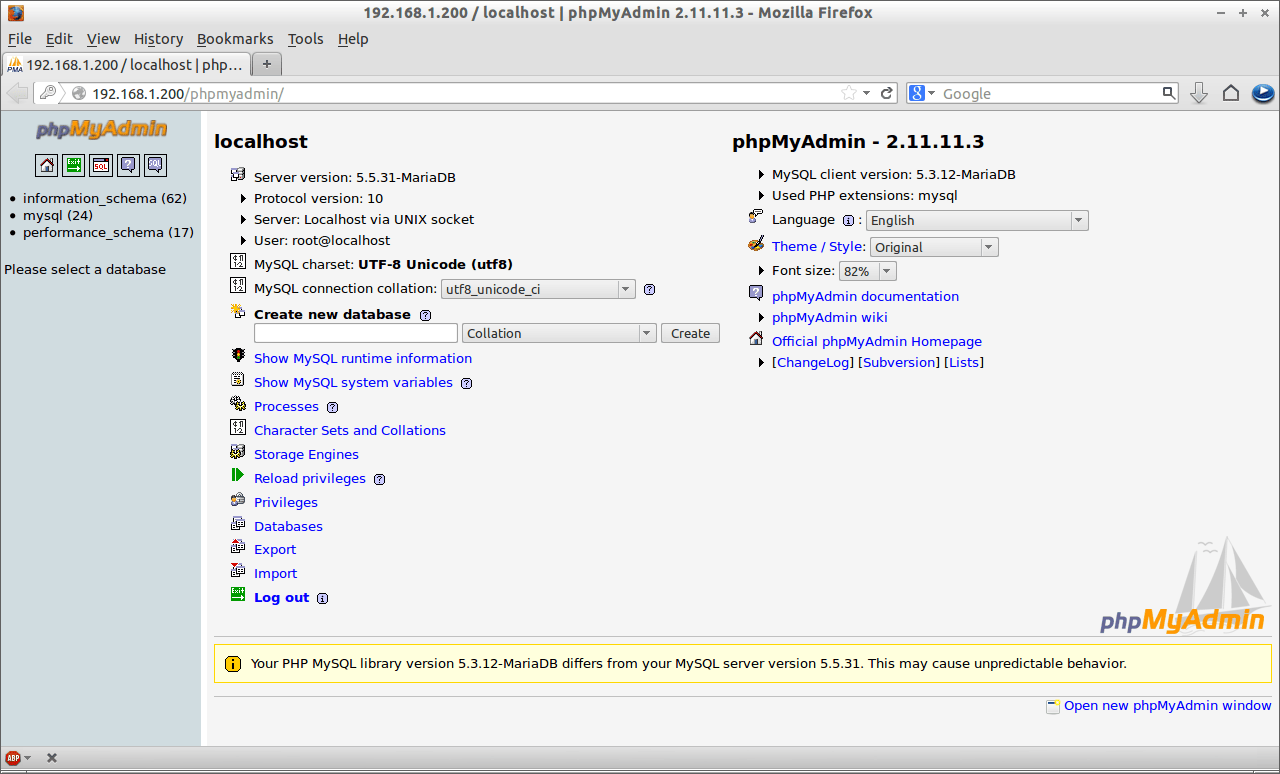
您将被重定向到 phpMyAdmin 的 Web 主界面:

[
点击查看原始大图](https://img.linux.net.cn/data/attachment/album/201307/01/000749sda7a7f6d6ujtdfj.png)

现在,您能够通过 phpMyAdmin 管理您的 MariaDB 数据库了。

好了,您的 LAMP 服务器已经安装完毕并运行起来了。