MAGESH MARUTHAMUTHU 发布的文章

有时你可能需要在 Linux 中删除某个文件中的空行。如果是的,你可以使用下面方法中的其中一个。有很多方法可以做到,但我在这里只是列举一些简单的方法。

你可能已经知道 grepawksed 命令是专门用来处理文本数据的工具。

如果你想了解更多关于这些命令的文章,请访问这几个 URL:在 Linux 中创建指定大小的文件的几种方法在 Linux 中创建一个文件的几种方法 以及 在 Linux 中删除一个文件中的匹配的字符串

这些属于高级命令,它们可用在大多数 shell 脚本中执行所需的操作。

下列 5 种方法可以做到。

  • sed:过滤和替换文本的流编辑器。
  • grep:输出匹配到的行。
  • cat:合并文件并打印内容到标准输出。
  • tr:替换或删除字符。
  • awk:awk 工具用于执行 awk 语言编写的程序,专门用于文本处理。
  • perl:Perl 是一种用于处理文本的编程语言。

我创建了一个 2daygeek.txt 文件来测试这些命令。下面是文件的内容。

$ cat 2daygeek.txt
2daygeek.com is a best Linux blog to learn Linux.

It's FIVE years old blog.

This website is maintained by Magesh M, it's licensed under CC BY-NC 4.0.

He got two GIRL babys.

Her names are Tanisha & Renusha.

现在一切就绪,我们准备开始用多种方法来验证。

使用 sed 命令

sed 是一个 流编辑器 stream editor 。流编辑器是用来编辑输入流(文件或管道)中的文本的。

$ sed '/^$/d' 2daygeek.txt
2daygeek.com is a best Linux blog to learn Linux.
It's FIVE years old blog.
This website is maintained by Magesh M, it's licensed under CC BY-NC 4.0.
He got two GIRL babes.
Her names are Tanisha & Renusha.

以下是命令展开的细节:

  • sed: 该命令本身。
  • //: 标记匹配范围。
  • ^: 匹配字符串开头。
  • $: 匹配字符串结尾。
  • d: 删除匹配的字符串。
  • 2daygeek.txt: 源文件名。

使用 grep 命令

grep 可以通过正则表达式在文件中搜索。该表达式可以是一行或多行空行分割的字符,grep 会打印所有匹配的内容。

$ grep . 2daygeek.txt
or
$ grep -Ev "^$" 2daygeek.txt
or
$ grep -v -e '^$' 2daygeek.txt
2daygeek.com is a best Linux blog to learn Linux.
It's FIVE years old blog.
This website is maintained by Magesh M, it's licensed under CC BY-NC 4.0.
He got two GIRL babes.
Her names are Tanisha & Renusha.

以下是命令展开的细节:

  • grep: 该命令本身。
  • .: 替换任意字符。
  • ^: 匹配字符串开头。
  • $: 匹配字符串结尾。
  • E: 使用扩展正则匹配模式。
  • e: 使用常规正则匹配模式。
  • v: 反向匹配。
  • 2daygeek.txt: 源文件名。

使用 awk 命令

awk 可以执行使用 awk 语言写的脚本,大多是专用于处理文本的。awk 脚本是一系列 awk 命令和正则的组合。

$ awk NF 2daygeek.txt
or
$ awk '!/^$/' 2daygeek.txt
or
$ awk '/./' 2daygeek.txt
2daygeek.com is a best Linux blog to learn Linux.
It's FIVE years old blog.
This website is maintained by Magesh M, it's licensed under CC BY-NC 4.0.
He got two GIRL babes.
Her names are Tanisha & Renusha.

以下是命令展开的细节:

  • awk: 该命令本身。
  • //: 标记匹配范围。
  • ^: 匹配字符串开头。
  • $: 匹配字符串结尾。
  • .: 匹配任意字符。
  • !: 删除匹配的字符串。
  • 2daygeek.txt: 源文件名。

使用 cat 和 tr 命令 组合

cat 串联(拼接) concatenate 的简写。经常用于在 Linux 中读取一个文件的内容。

cat 是在类 Unix 系统中使用频率最高的命令之一。它提供了常用的三个处理文本文件的功能:显示文件内容、将多个文件拼接成一个,以及创建一个新文件。

tr 可以将标准输入中的字符转换,压缩或删除,然后重定向到标准输出。

$ cat 2daygeek.txt | tr -s '\n'
2daygeek.com is a best Linux blog to learn Linux.
It's FIVE years old blog.
This website is maintained by Magesh M, it's licensed under CC BY-NC 4.0.
He got two GIRL babes.
Her names are Tanisha & Renusha.

以下是命令展开的细节:

  • cat: cat 命令本身。
  • tr: tr 命令本身。
  • |: 管道符号。它可以将前面的命令的标准输出作为下一个命令的标准输入。
  • s: 替换标数据集中任意多个重复字符为一个。
  • \n: 添加一个新的换行。
  • 2daygeek.txt: 源文件名。

使用 perl 命令

Perl 表示 实用的提取和报告语言 Practical Extraction and Reporting Language 。Perl 在初期被设计为一个专用于文本处理的编程语言,现在已扩展应用到 Linux 系统管理,网络编程和网站开发等多个领域。

$ perl -ne 'print if /\S/' 2daygeek.txt
2daygeek.com is a best Linux blog to learn Linux.
It's FIVE years old blog.
This website is maintained by Magesh M, it's licensed under CC BY-NC 4.0.
He got two GIRL babes.
Her names are Tanisha & Renusha.

以下是命令展开的细节:

  • perl: perl 命令。
  • n: 逐行读入数据。
  • e: 执行某个命令。
  • print: 打印信息。
  • if: if 条件分支。
  • //: 标记匹配范围。
  • \S: 匹配任意非空白字符。
  • 2daygeek.txt: 源文件名。

via: https://www.2daygeek.com/remove-delete-empty-lines-in-a-file-in-linux/

作者:Magesh Maruthamuthu 选题:lujun9972 译者:pityonline 校对:wxy

本文由 LCTT 原创编译,Linux中国 荣誉推出

我们都知道密码的重要性。最好的密码就是使用难以猜测密码。另外,我建议你为每个服务使用不同的密码,如电子邮件、ftp、ssh 等。最重要的是,我建议你们经常更改密码,以避免不必要的黑客攻击。

默认情况下,RHEL 和它的衍生版使用 cracklib 模块来检查密码强度。我们将教你如何使用 cracklib 模块检查密码强度。

如果你想检查你创建的密码评分,请使用 pwscore 包。

如果你想创建一个好密码,最起码它应该至少有 12-15 个字符长度。它应该按以下组合创建,如字母(小写和大写)、数字和特殊字符。Linux 中有许多程序可用于检查密码复杂性,我们今天将讨论有关 cracklib 模块和 pwscore 评分。

如何在 Linux 中安装 cracklib 模块?

cracklib 模块在大多数发行版仓库中都有,因此,请使用发行版官方软件包管理器来安装它。

对于 Fedora 系统,使用 DNF 命令来安装 cracklib。

$ sudo dnf install cracklib

对于 Debian/Ubuntu 系统,使用 APT-GET 命令APT 命令来安装 libcrack2。

$ sudo apt install libcrack2

对于基于 Arch Linux 的系统,使用 Pacman 命令来安装 cracklib。

$ sudo pacman -S cracklib

对于 RHEL/CentOS 系统,使用 YUM 命令来安装 cracklib。

$ sudo yum install cracklib

对于 openSUSE Leap 系统,使用 Zypper 命令来安装 cracklib。

$ sudo zypper install cracklib

如何在 Linux 中使用 cracklib 模块检查密码复杂性?

我在本文中添加了一些示例来助你更好地了解此模块。

如果你提供了任何如人名或地名或常用字,那么你将看到一条消息“它存在于字典的单词中”。

$ echo "password" | cracklib-check
password: it is based on a dictionary word

Linux 中的默认密码长度为 7 个字符。如果你提供的密码少于 7 个字符,那么你将看到一条消息“它太短了”。

$ echo "123" | cracklib-check
123: it is WAY too short

当你提供像我们这样的好密码时,你会看到 “OK”。

$ echo "ME$2w!@fgty6723" | cracklib-check
ME!@fgty6723: OK

如何在 Linux 中安装 pwscore?

pwscore 包在大多数发行版仓库中都有,因此,请使用发行版官方软件包管理器来安装它。

对于 Fedora 系统,使用 DNF 命令来安装 libpwquality。

$ sudo dnf install libpwquality

对于 Debian/Ubuntu 系统,使用 APT-GET 命令APT 命令来安装 libpwquality。

$ sudo apt install libpwquality

对于基于 Arch Linux 的系统,使用 Pacman 命令来安装 libpwquality。

$ sudo pacman -S libpwquality

对于 RHEL/CentOS 系统,使用 YUM 命令来安装 libpwquality。

$ sudo yum install libpwquality

对于 openSUSE Leap 系统,使用 Zypper 命令来安装 libpwquality。

$ sudo zypper install libpwquality

如果你提供了任何如人名或地名或常用字,那么你将看到一条消息“它存在于字典的单词中”。

$ echo "password" | pwscore
Password quality check failed:
 The password fails the dictionary check - it is based on a dictionary word

Linux 中的默认密码长度为 7 个字符。如果你提供的密码少于 7 个字符,那么你将看到一条消息“密码短于 8 个字符”。

$ echo "123" | pwscore
Password quality check failed:
 The password is shorter than 8 characters

当你像我们这样提供了一个好的密码时,你将会看到“密码评分”。

$ echo "ME!@fgty6723" | pwscore
90

via: https://www.2daygeek.com/how-to-check-password-complexity-strength-and-score-in-linux/

作者:Magesh Maruthamuthu 选题:lujun9972 译者:geekpi 校对:wxy

本文由 LCTT 原创编译,Linux中国 荣誉推出

每个 Linux 管理员都可能听到过 shell 这个词。你知道什么是 shell 吗? 你知道 shell 在 Linux 中的作用是什么吗? Linux 中有多少个 shell 可用?

shell 是一个程序,它是提供用户和内核之间交互的接口。

内核是 Linux 操作系统的核心,它管理用户和操作系统之间的所有内容。Shell 可供所有用户在启动终端时使用。终端启动后,用户可以运行任何可用的命令。当 shell 完成命令的执行时,你将在终端窗口上获取输出。

Bash(全称是 Bourne Again Shell)是运行在今天的大多数 Linux 发行版上的默认的 shell,它非常受欢迎,并具有很多功能。但今天我们将讨论 Fish Shell 。

什么是 Fish Shell?

Fish 是友好的交互式 shell ,是一个功能齐全,智能且对用户友好的 Linux 命令行 shell ,它带有一些在大多数 shell 中都不具备的方便功能。

这些功能包括自动补全建议、Sane Scripting、手册页补全、基于 Web 的配置器和 Glorious VGA Color 。你对它感到好奇并想测试它吗?如果是这样,请按照以下安装步骤继续安装。

如何在 Linux 中安装 Fish Shell ?

它的安装非常简单,除了少数几个发行版外,它在大多数发行版中都没有。但是,可以使用以下 fish 仓库 轻松安装。

对于基于 Arch Linux 的系统, 使用 Pacman 命令 来安装 fish shell。

$ sudo pacman -S fish

对于 Ubuntu 16.04/18.04 系统来说,请使用 APT-GET 命令 或者 APT 命令 安装 fish shell。

$ sudo apt-add-repository ppa:fish-shell/release-3
$ sudo apt-get update
$ sudo apt-get install fish

对于 Fedora 系统来说,请使用 DNF 命令 安装 fish shell。

对于 Fedora 29 系统来说:

$ sudo dnf config-manager --add-repo https://download.opensuse.org/repositories/shells:/fish:/release:/3/Fedora_29/shells:fish:release:3.repo
$ sudo dnf install fish

对于 Fedora 28 系统来说:

$ sudo dnf config-manager --add-repo https://download.opensuse.org/repositories/shells:/fish:/release:/3/Fedora_28/shells:fish:release:3.repo
$ sudo dnf install fish

对于 Debian 系统来说,请使用 APT-GET 命令 或者 APT 命令 安装 fish shell。

对于 Debian 9 系统来说:

$ sudo wget -nv https://download.opensuse.org/repositories/shells:fish:release:3/Debian_9.0/Release.key -O Release.key
$ sudo apt-key add - < Release.key
$ sudo echo 'deb http://download.opensuse.org/repositories/shells:/fish:/release:/3/Debian_9.0/ /' > /etc/apt/sources.list.d/shells:fish:release:3.list
$ sudo apt-get update
$ sudo apt-get install fish

对于 Debian 8 系统来说:

$ sudo wget -nv https://download.opensuse.org/repositories/shells:fish:release:3/Debian_8.0/Release.key -O Release.key
$ sudo apt-key add - < Release.key
$ sudo echo 'deb http://download.opensuse.org/repositories/shells:/fish:/release:/3/Debian_8.0/ /' > /etc/apt/sources.list.d/shells:fish:release:3.list
$ sudo apt-get update
$ sudo apt-get install fish

对于 RHEL/CentOS 系统来说,请使用 YUM 命令 安装 fish shell。

对于 RHEL 7 系统来说:

$ sudo yum-config-manager --add-repo https://download.opensuse.org/repositories/shells:/fish:/release:/3/RHEL_7/shells:fish:release:3.repo
$ sudo yum install fish

对于 RHEL 6 系统来说:

$ sudo yum-config-manager --add-repo https://download.opensuse.org/repositories/shells:/fish:/release:/3/RedHat_RHEL-6/shells:fish:release:3.repo
$ sudo yum install fish

对于 CentOS 7 系统来说:

$ sudo yum-config-manager --add-repo https://download.opensuse.org/repositories/shells:fish:release:2/CentOS_7/shells:fish:release:2.repo
$ sudo yum install fish

对于 CentOS 6 系统来说:

$ sudo yum-config-manager --add-repo https://download.opensuse.org/repositories/shells:fish:release:2/CentOS_6/shells:fish:release:2.repo
$ sudo yum install fish

对于 openSUSE Leap 系统来说,请使用 Zypper 命令 安装 fish shell。

$ sudo zypper addrepo https://download.opensuse.org/repositories/shells:/fish:/release:/3/openSUSE_Leap_42.3/shells:fish:release:3.repo
$ suod zypper refresh
$ sudo zypper install fish

如何使用 Fish Shell ?

一旦你成功安装了 fish shell 。只需在你的终端上输入 fish ,它将自动从默认的 bash shell 切换到 fish shell 。

$ fish

自动补全建议

当你在 fish shell 中键入任何命令时,它会在输入几个字母后以浅灰色自动建议一个命令。

一旦你得到一个建议然后按下向右光标键(LCTT 译注:原文是左,错的)就能完成它而不是输入完整的命令。

你可以在键入几个字母后立即按下向上光标键检索该命令以前的历史记录。它类似于 bash shell 的 CTRL+r 选项。

Tab 补全

如果你想查看给定命令是否还有其他可能性,那么在键入几个字母后,只需按一下 Tab 键即可。

再次按 Tab 键可查看完整列表。

语法高亮

fish 会进行语法高亮显示,你可以在终端中键入任何命令时看到。无效的命令被着色为 RED color

同样的,有效的命令以不同的颜色显示。此外,当你键入有效的文件路径时,fish 会在其下面加下划线,如果路径无效,则不会显示下划线。

基于 Web 的配置器

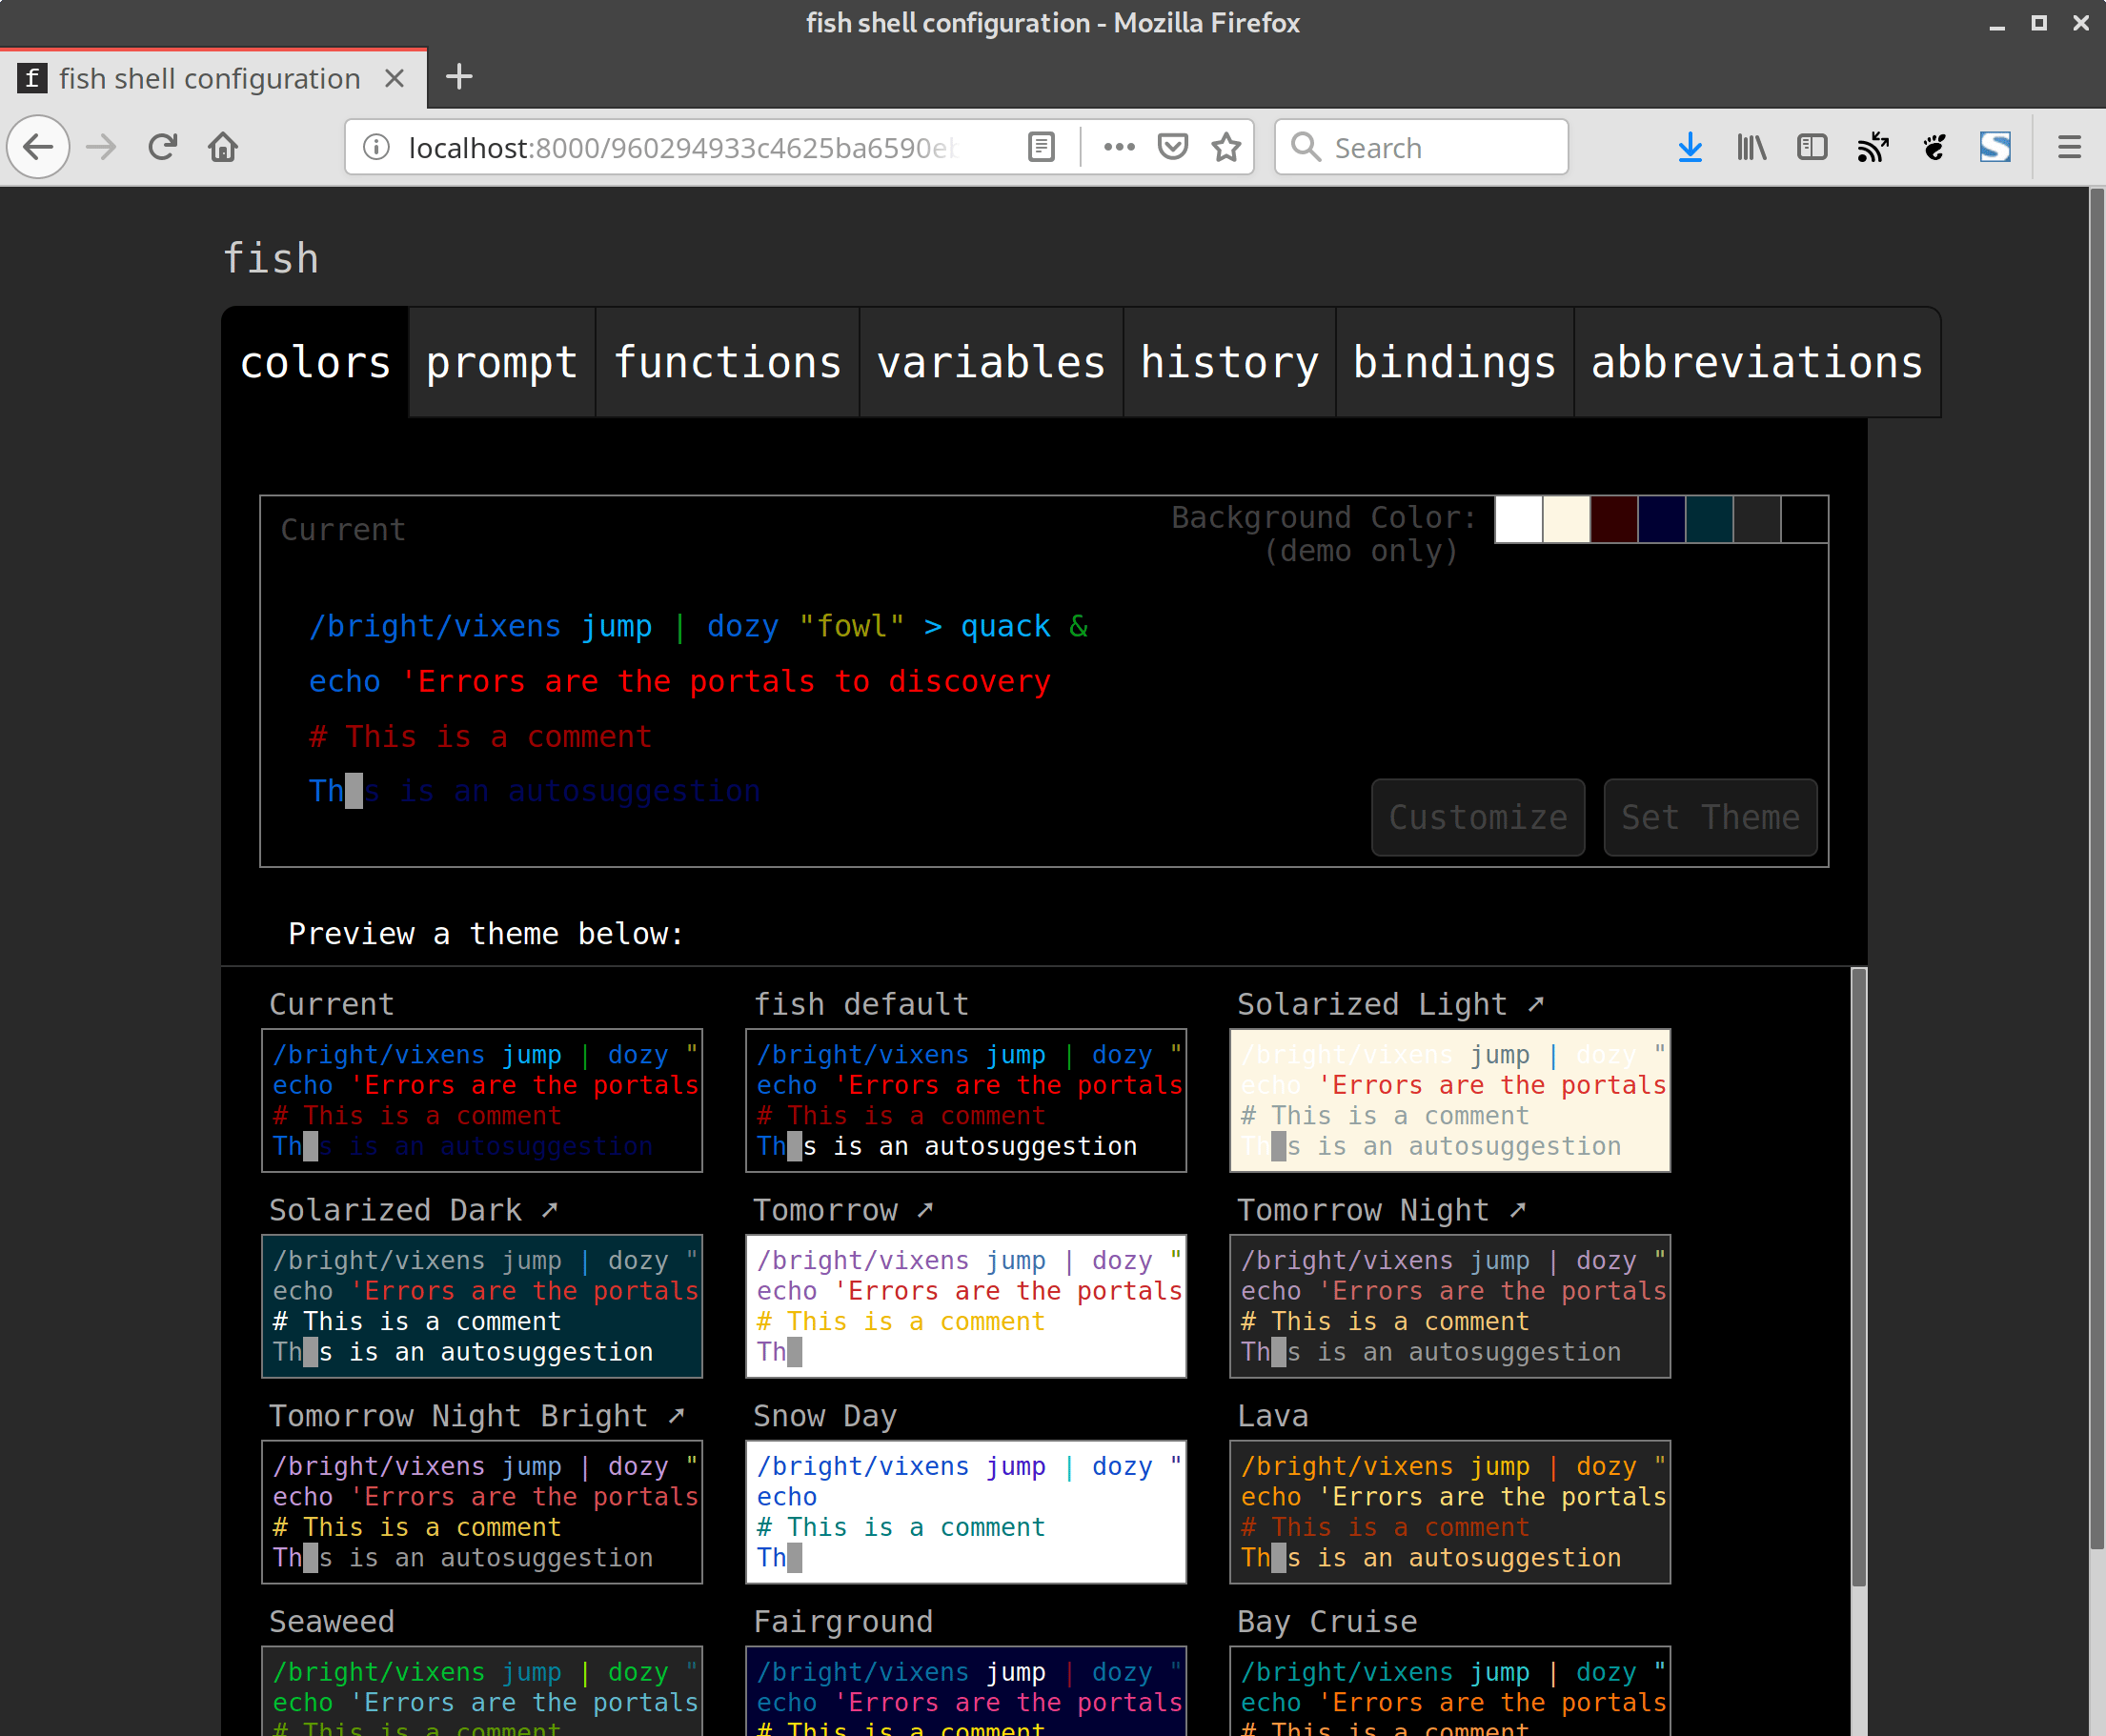
fish shell 中有一个很酷的功能,它允许我们通过网络浏览器设置颜色、提示符、功能、变量、历史和键绑定。

在终端上运行以下命令以启动 Web 配置界面。只需按下 Ctrl+c 即可退出。

$ fish_config
Web config started at 'file:///home/daygeek/.cache/fish/web_config-86ZF5P.html'. Hit enter to stop.
qt5ct: using qt5ct plugin
^C
Shutting down.

手册页补全

其他 shell 支持可编程的补全,但只有 fish 可以通过解析已安装的手册页自动生成它们。

要使用该功能,请运行以下命令:

$ fish_update_completions
Parsing man pages and writing completions to /home/daygeek/.local/share/fish/generated_completions/
 3466 / 3466 : zramctl.8.gz

如何将 Fish 设置为默认 shell

如果你想测试 fish shell 一段时间,你可以将 fish shell 设置为默认 shell,而不用每次都切换它。

要这样做,首先使用以下命令获取 Fish Shell 的位置。

$ whereis fish
fish: /usr/bin/fish /etc/fish /usr/share/fish /usr/share/man/man1/fish.1.gz

通过运行以下命令将默认 shell 更改为 fish shell 。

$ chsh -s /usr/bin/fish

提示:只需验证 Fish Shell 是否已添加到 /etc/shells 目录中。如果不是,则运行以下命令以附加它。

$ echo /usr/bin/fish | sudo tee -a /etc/shells

完成测试后,如果要返回 bash shell ,请使用以下命令。

暂时返回:

$ bash

永久返回:

$ chsh -s /bin/bash

via: https://www.2daygeek.com/linux-fish-shell-friendly-interactive-shell/

作者:Magesh Maruthamuthu 选题:lujun9972 译者:zero-MK 校对:wxy

本文由 LCTT 原创编译,Linux中国 荣誉推出

这是一个非常有趣的脚本,每当用户在终端输入错误的命令时,它都会嘲讽用户。

它让你在解决一些问题时会感到快乐。有的人在受到终端嘲讽的时候感到不愉快。但是,当我受到终端的批评时,我真的很开心。

这是一个有趣的 CLI 工具,在你弄错的时候,会用随机短语嘲讽你。此外,它允许你添加自己的短语。

如何在 Linux 上安装 Bash-Insulter?

在安装 Bash-Insulter 之前,请确保你的系统上安装了 git。如果没有,请使用以下命令安装它。

对于 Fedora 系统, 请使用 DNF 命令 安装 git。

$ sudo dnf install git

对于 Debian/Ubuntu 系统,请使用 APT-GET 命令 或者 APT 命令 安装 git。

$ sudo apt install git

对于基于 Arch Linux 的系统,请使用 Pacman 命令 安装 git。

$ sudo pacman -S git

对于 RHEL/CentOS 系统,请使用 YUM 命令 安装 git。

$ sudo yum install git

对于 openSUSE Leap 系统,请使用 Zypper 命令 安装 git。

$ sudo zypper install git

我们可以通过 克隆 clone 开发人员的 GitHub 存储库轻松地安装它。

首先克隆 Bash-insulter 存储库。

$ git clone https://github.com/hkbakke/bash-insulter.git bash-insulter

将下载的文件移动到文件夹 /etc 下。

$ sudo cp bash-insulter/src/bash.command-not-found /etc/

将下面的代码添加到 /etc/bash.bashrc 文件中。

$ vi /etc/bash.bashrc

#Bash Insulter
if [ -f /etc/bash.command-not-found ]; then
 . /etc/bash.command-not-found
fi

运行以下命令使更改生效。

$ sudo source /etc/bash.bashrc

你想测试一下安装是否生效吗?你可以试试在终端上输入一些错误的命令,看看它如何嘲讽你。

$ unam -a

$ pin 2daygeek.com

如果你想附加你自己的短语,则导航到以下文件并更新它。你可以在 messages 部分中添加短语。

# vi /etc/bash.command-not-found

print_message () {

    local messages
    local message

    messages=(
        "Boooo!"
        "Don't you know anything?"
        "RTFM!"
        "Haha, n00b!"
        "Wow! That was impressively wrong!"
        "Pathetic"
        "The worst one today!"
        "n00b alert!"
        "Your application for reduced salary has been sent!"
        "lol"
        "u suk"
        "lol... plz"
        "plz uninstall"
        "And the Darwin Award goes to.... ${USER}!"
        "ERROR_INCOMPETENT_USER"
        "Incompetence is also a form of competence"
        "Bad."
        "Fake it till you make it!"
        "What is this...? Amateur hour!?"
        "Come on! You can do it!"
        "Nice try."
        "What if... you type an actual command the next time!"
        "What if I told you... it is possible to type valid commands."
        "Y u no speak computer???"
        "This is not Windows"
        "Perhaps you should leave the command line alone..."
        "Please step away from the keyboard!"
        "error code: 1D10T"
        "ACHTUNG! ALLES TURISTEN UND NONTEKNISCHEN LOOKENPEEPERS! DAS KOMPUTERMASCHINE IST NICHT FÜR DER GEFINGERPOKEN UND MITTENGRABEN! ODERWISE IST EASY TO SCHNAPPEN DER SPRINGENWERK, BLOWENFUSEN UND POPPENCORKEN MIT SPITZENSPARKEN. IST NICHT FÜR GEWERKEN BEI DUMMKOPFEN. DER RUBBERNECKEN SIGHTSEEREN KEEPEN DAS COTTONPICKEN HÄNDER IN DAS POCKETS MUSS. ZO RELAXEN UND WATSCHEN DER BLINKENLICHTEN."
        "Pro tip: type a valid command!"
        "Go outside."
        "This is not a search engine."
        "(╯°□°)╯︵ ┻━┻"
        "¯\_(ツ)_/¯"
        "So, I'm just going to go ahead and run rm -rf / for you."
        "Why are you so stupid?!"
        "Perhaps computers is not for you..."
        "Why are you doing this to me?!"
        "Don't you have anything better to do?!"
        "I am _seriously_ considering 'rm -rf /'-ing myself..."
        "This is why you get to see your children only once a month."
        "This is why nobody likes you."
        "Are you even trying?!"
        "Try using your brain the next time!"
        "My keyboard is not a touch screen!"
        "Commands, random gibberish, who cares!"
        "Typing incorrect commands, eh?"
        "Are you always this stupid or are you making a special effort today?!"
        "Dropped on your head as a baby, eh?"
        "Brains aren't everything. In your case they're nothing."
        "I don't know what makes you so stupid, but it really works."
        "You are not as bad as people say, you are much, much worse."
        "Two wrongs don't make a right, take your parents as an example."
        "You must have been born on a highway because that's where most accidents happen."
        "If what you don't know can't hurt you, you're invulnerable."
        "If ignorance is bliss, you must be the happiest person on earth."
        "You're proof that god has a sense of humor."
        "Keep trying, someday you'll do something intelligent!"
        "If shit was music, you'd be an orchestra."
        "How many times do I have to flush before you go away?"
    )

via: https://www.2daygeek.com/bash-insulter-insults-the-user-when-typing-wrong-command/

作者:Magesh Maruthamuthu 选题:lujun9972 译者:zero-mk 校对:wxy

本文由 LCTT 原创编译,Linux中国 荣誉推出

这个众所周知的话题我们早已经写过了足够多的文章。即使这样,我们今天也要去讨论相同的话题。

其他的工具都是在本地运行的,但是 Asciinema 可以以相同的方式在本地和 Web 端运行。我的意思是我们可以在 Web 上分享这个录像。

默认情况下,每个人都更愿意使用 history 命令来回看、调用之前在终端内输入的命令。不过,不行的是,这个命令只展示了我们运行的命令却没有展示这些命令上次运行时的输出。

在 Linux 下有很多的组件来记录终端会话活动。在过去,我们也写了一些组件,不过今天我们依然要讨论这同一类心的工具。

如果你想要使用其他工具来记录你的 Linux 终端会话活动,你可以试试 Script 命令Terminalizer 工具Asciinema 工具

不过如果你想要找一个 GIF 录制工具,可以试试 GifineKgifPeek

什么是 Asciinema

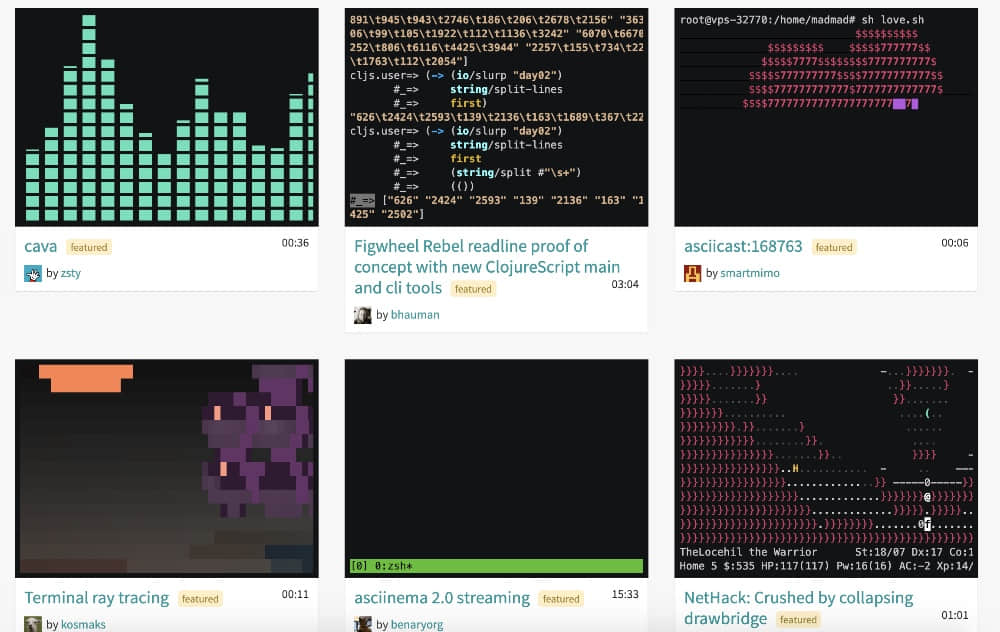
asciinema 是一个自由开源的用于录制终端会话并将它们分享到网络上的解决方案。

当你在你的终端内运行 asciinema rec 来启动录像时,你输入命令的时候,终端内的所有输出都会被抓取。

当抓取停止时(通过按下 Ctrl-D 或输出 exit),抓取的输出将会被上传到 asciinema.org 的网站,并为后续的回放做准备。

Asciinema 项目由多个不同的完整的部分组成,比如 asciinema 命令行工具、asciinema.org API 和 JavaScript 播放器。

Asciinema 的灵感来自于 scriptscriptreplay 命令。

如何在 Linux 上安装 Asciinema

Asciinema 由 Python 写就,在 Linux 上,推荐使用 pip 安装的方法来安装。

确保你已经在你的系统里安装了 python-pip 包。如果没有,使用下述命令来安装它。

对于 Debian/Ubuntu 用户,使用 Apt 命令Apt-Get 命令 来安装 pip 包。

$ sudo apt install python-pip

对于 Archlinux 用户,使用 Pacman 命令 来安装 pip 包。

$ sudo pacman -S python-pip

对于 Fedora 用户,使用 DNF 命令 来安装 pip 包。

$ sudo dnf install python-pip

对于 CentOS/RHEL 用户,使用 YUM 命令 来安装 pip 包。

$ sudo yum install python-pip

对于 openSUSE 用户,使用 Zypper 命令 来安装 pip 包。

$ sudo zypper install python-pip

最后,运行如下的 pip 命令 来在 Linux 上安装 Asciinema 工具。

$ sudo pip3 install asciinema

如何使用 Asciinema 工具来记录你的终端会话

一旦你成功的安装了 Asciinema,只需要运行如下命令来开始录制:

$ asciinema rec 2g-test
asciinema: recording asciicast to 2g-test
asciinema: press "ctrl-d" or type "exit" when you're done

出于测试的目的,运行一些简单的命令,并看一看它是否运行良好。

$ free
              total        used        free      shared  buff/cache   available
Mem:          15867        2783       10537        1264        2546       11510
Swap:         17454           0       17454

$ hostnamectl
   Static hostname: daygeek-Y700
         Icon name: computer-laptop
           Chassis: laptop
        Machine ID: 31bdeb7b833547368d230a2025d475bc
           Boot ID: c84f7e6f39394d1f8fdc4bcaa251aee2
  Operating System: Manjaro Linux
            Kernel: Linux 4.19.8-2-MANJARO
      Architecture: x86-64

$ uname -a
Linux daygeek-Y700 4.19.8-2-MANJARO #1 SMP PREEMPT Sat Dec 8 14:45:36 UTC 2018 x86_64 GNU/Linux

$ lscpu
Architecture:        x86_64
CPU op-mode(s):      32-bit, 64-bit
Byte Order:          Little Endian
Address sizes:       39 bits physical, 48 bits virtual
CPU(s):              8
On-line CPU(s) list: 0-7
Thread(s) per core:  2
Core(s) per socket:  4
Socket(s):           1
NUMA node(s):        1
Vendor ID:           GenuineIntel
CPU family:          6
Model:               94
Model name:          Intel(R) Core(TM) i7-6700HQ CPU @ 2.60GHz
Stepping:            3
CPU MHz:             800.047
CPU max MHz:         3500.0000
CPU min MHz:         800.0000
BogoMIPS:            5186.00
Virtualization:      VT-x
L1d cache:           32K
L1i cache:           32K
L2 cache:            256K
L3 cache:            6144K
NUMA node0 CPU(s):   0-7
Flags:               fpu vme de pse tsc msr pae mce cx8 apic sep mtrr pge mca cmov pat pse36 clflush dts acpi mmx fxsr sse sse2 ss ht tm pbe syscall nx pdpe1gb rdtscp lm constant_tsc art arch_perfmon pebs bts rep_good nopl xtopology nonstop_tsc cpuid aperfmperf tsc_known_freq pni pclmulqdq dtes64 monitor ds_cpl vmx est tm2 ssse3 sdbg fma cx16 xtpr pdcm pcid sse4_1 sse4_2 x2apic movbe popcnt tsc_deadline_timer aes xsave avx f16c rdrand lahf_lm abm 3dnowprefetch cpuid_fault epb invpcid_single pti ssbd ibrs ibpb stibp tpr_shadow vnmi flexpriority ept vpid ept_add fsgsbase tsc_adjust bmi1 hle avx2 smep bmi2 erms invpcid rtm mpx rdseed adx smap clflushopt intel_pt xsaveopt xsavec xgetbv1 xsaves dtherm ida arat pln pts hwp hwp_notify hwp_act_window hwp_epp flush_l1d

当你完成后,简单的按下 CTRL+D 或输入 exit 来退出录制。这个结果将会被保存在同一个目录。

$ exit
exit
asciinema: recording finished
asciinema: asciicast saved to 2g-test

如果你想要保存输出到不同的目录中,就需要提醒 Asciinema 你想要保存文件的目录。

$ asciinema rec /opt/session-record/2g-test1

我们可以使用如下命令来回放录制的会话。

$ asciinema play 2g-test

我们能够以两倍速来回放录制的会话。

$ asciinema play -s 2 2g-test

或者,我们可以以正常速度播放录制的会话,限制空闲时间为 2 秒。

$ asciinema play -i 2 2g-test

如何在网络上分享已经录制的会话

如果你想要分享录制的会话给你的朋友,只要运行下述命令上传你的会话到 asciinema.org,就可以获得一个唯一链接。

它将会在被上传 7 天后被归档。

$ asciinema upload 2g-test
View the recording at:

    https://asciinema.org/a/jdJrxhDLboeyrhzZRHsve0x8i

This installation of asciinema recorder hasn't been linked to any asciinema.org
account. All unclaimed recordings (from unknown installations like this one)
are automatically archived 7 days after upload.

If you want to preserve all recordings made on this machine, connect this
installation with asciinema.org account by opening the following link:

    https://asciinema.org/connect/10cd4f24-45b6-4f64-b737-ae0e5d12baf8

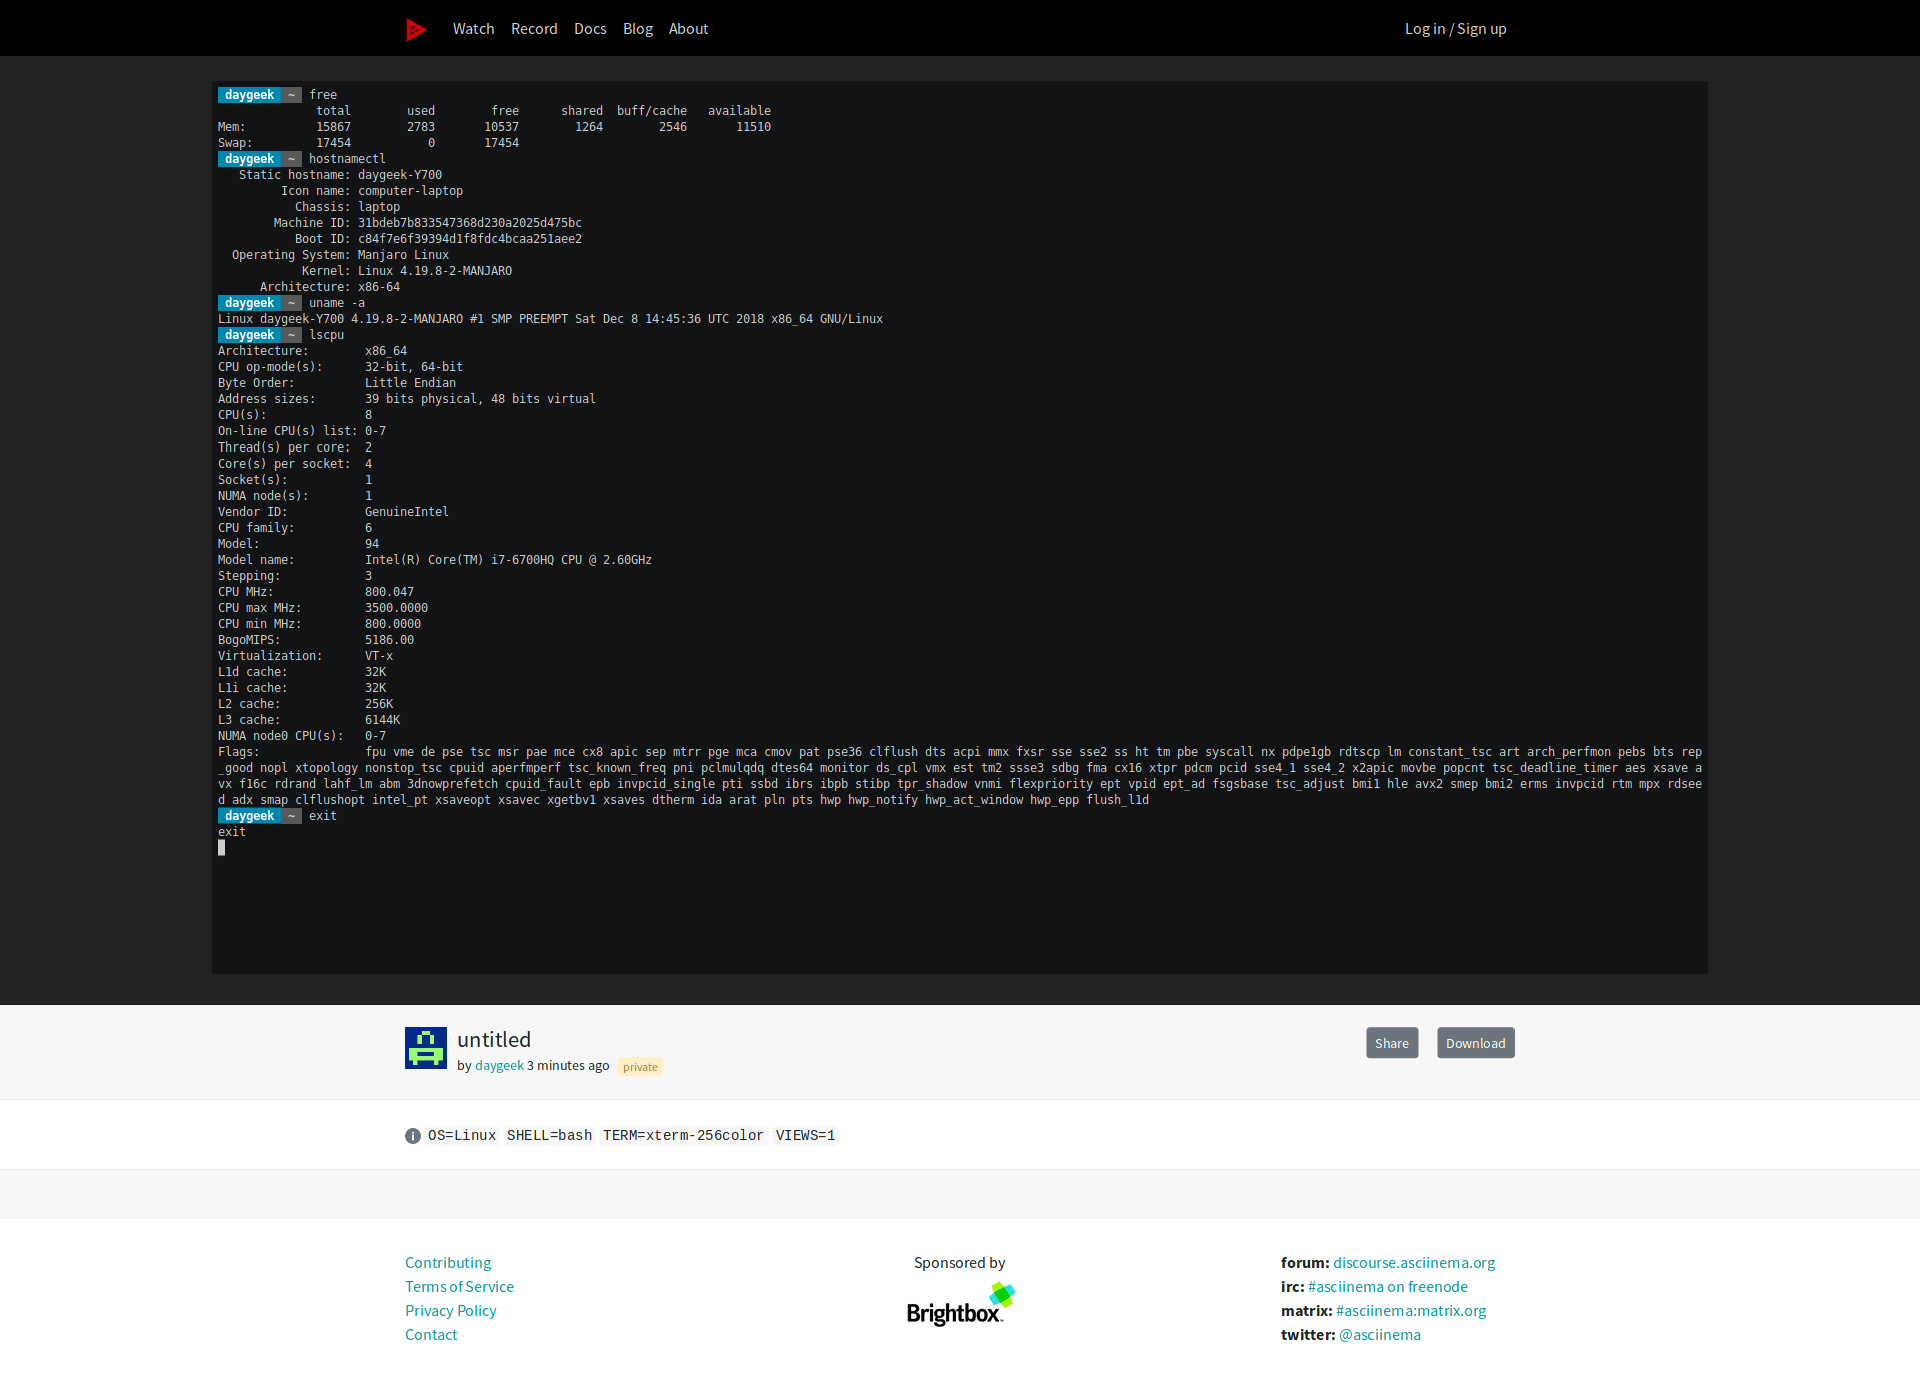
如果你想要分享录制的会话在社交媒体上,只需要点击页面底部的 “Share” 按钮。

如果任何人想要去下载这个录制,只需要点击页面底部的 “Download” 按钮,就可以将其保存在你系统里。

如何管理 asciinema.org 中的录制片段

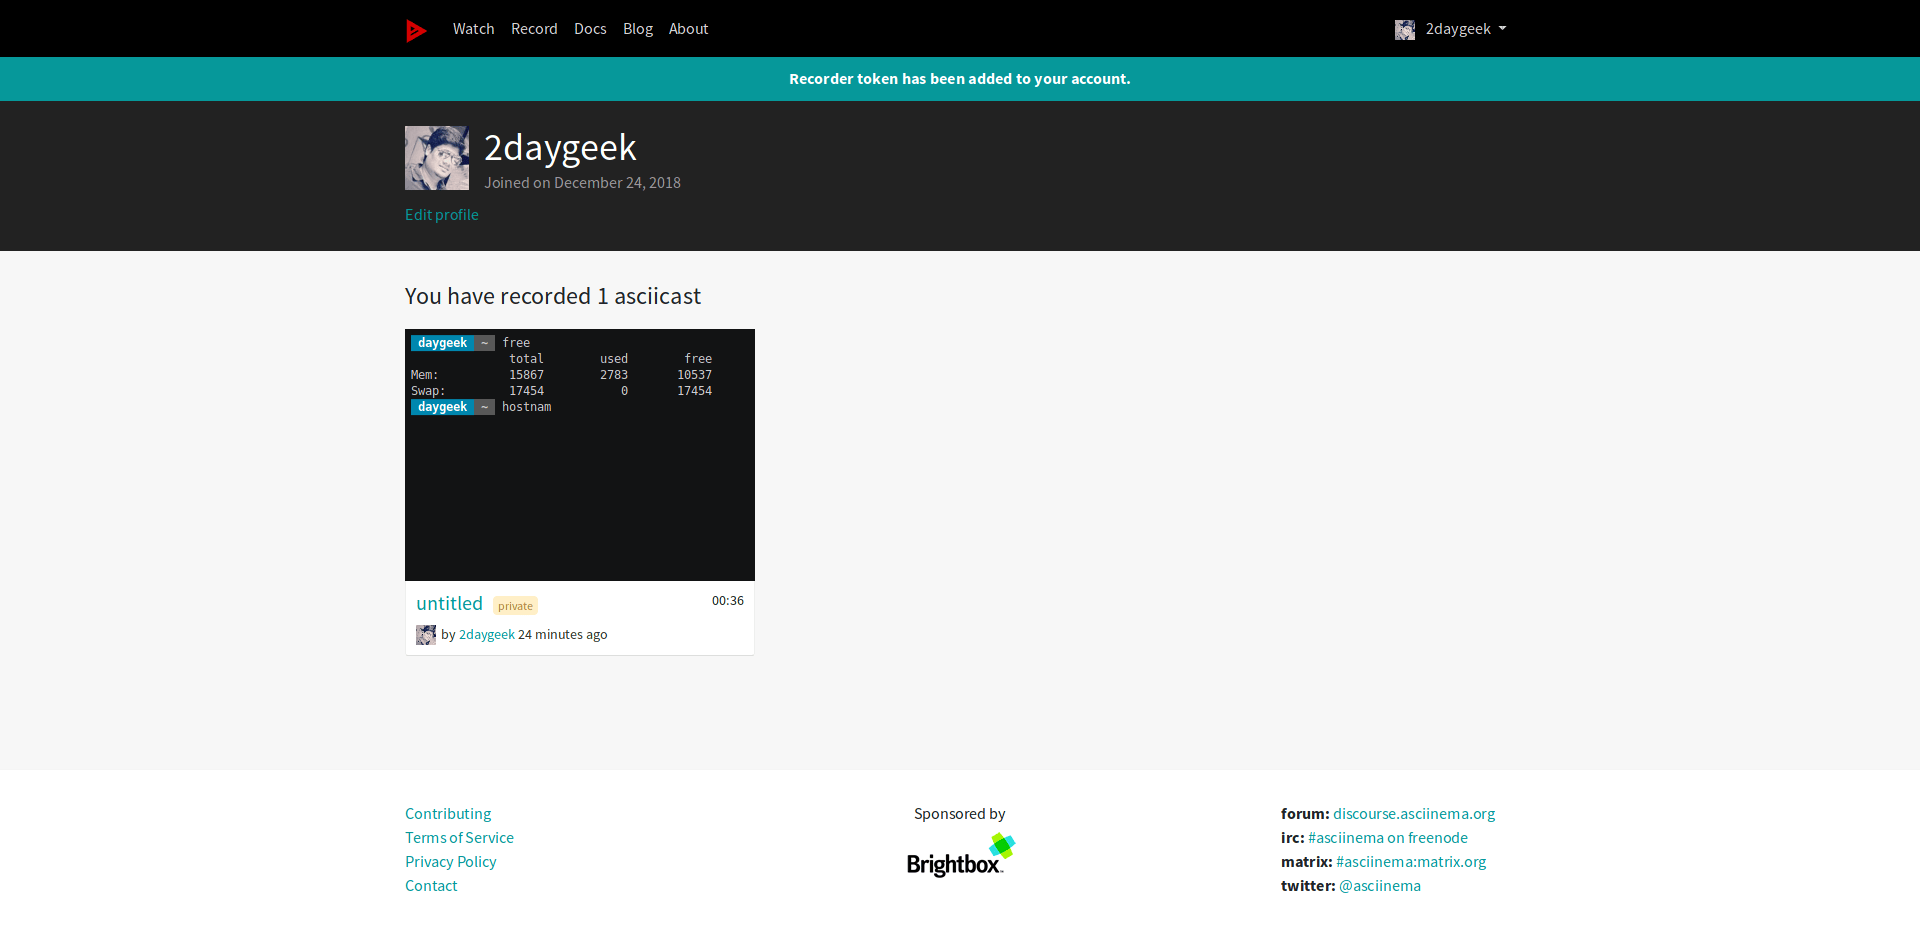
如果你想要留存所有在这个机器上录制的片段,点击上述显示的链接并使用你在 asciinema.org 的账户登录,然后跟随这个说明继续操作,来将你的机器和该网站连接起来。

https://asciinema.org/connect/10cd4f24-45b6-4f64-b737-ae0e5d12baf8

如果你早已录制了一份,但是你没有在你的 asciinema.org 账户界面看到它,只需要运行 asciinema auth 命令来移动它们。

$ asciinema auth

Open the following URL in a web browser to link your install ID with your asciinema.org user account:

https://asciinema.org/connect/10cd4f24-45b6-4f64-b737-ae0e5d12baf8

This will associate all recordings uploaded from this machine (past and future ones) to your account, and allow you to manage them (change title/theme, delete) at asciinema.org.

如果你想直接上传文件而不是将其保存在本地,直接运行如下命令:

$ asciinema rec
asciinema: recording asciicast to /tmp/tmp6kuh4247-ascii.cast
asciinema: press "ctrl-d" or type "exit" when you're done

出于测试目的,运行下述命令,并看一看它是否运行的很好。

$ free
              total        used        free      shared  buff/cache   available
Mem:          15867        2783       10537        1264        2546       11510
Swap:         17454           0       17454

$ hostnamectl
   Static hostname: daygeek-Y700
         Icon name: computer-laptop
           Chassis: laptop
        Machine ID: 31bdeb7b833547368d230a2025d475bc
           Boot ID: c84f7e6f39394d1f8fdc4bcaa251aee2
  Operating System: Manjaro Linux
            Kernel: Linux 4.19.8-2-MANJARO
      Architecture: x86-64

$ uname -a
Linux daygeek-Y700 4.19.8-2-MANJARO #1 SMP PREEMPT Sat Dec 8 14:45:36 UTC 2018 x86_64 GNU/Linux

如果你完成了,简单的按下 CTRL+D 或输入 exit 来停止录制,然后按下回车来上传文件到 asciinema.org 网站。

这将会花费一些时间来为你的录制生成唯一链接。一旦它完成,你会看到和下面一样的样式:

$ exit
exit
asciinema: recording finished
asciinema: press "enter" to upload to asciinema.org, "ctrl-c" to save locally

View the recording at:

 https://asciinema.org/a/b7bu5OhuCy2vUH7M8RRPjsSxg

via: https://www.2daygeek.com/linux-asciinema-record-your-terminal-sessions-share-them-on-web/

作者:Magesh Maruthamuthu 选题:lujun9972 译者:Bestony 校对:wxy

本文由 LCTT 原创编译,Linux中国 荣誉推出

一块硬盘可以被划分成一个或多个逻辑磁盘,我们将其称作分区。我们对硬盘进行的划分信息被储存于建立在扇区 0 的分区表(MBR 或 GPT)中。

Linux 需要至少一个分区来当作根文件系统,所以我们不能在没有分区的情况下安装 Linux 系统。当我们创建一个分区时,我们必须将它格式化为一个适合的文件系统,否则我们就没办法往里面储存文件了。

要在 Linux 中完成分区的相关工作,我们需要一些工具。Linux 下有很多可用的相关工具,我们曾介绍过 Parted 命令。不过,今天我们的主角是 fdisk

人人都喜欢用 fdisk,它是 Linux 下管理磁盘分区的最佳利器之一。它可以操作最大 2TB 的分区。大量 Linux 管理员都喜欢使用这个工具,因为当下 LVM 和 SAN 的原因,并没有多少人会用到 2TB 以上的分区。并且这个工具被世界上许多的基础设施所使用。如果你还是想创建比 2TB 更大的分区,请使用 parted 命令 或 cfdisk 命令。

对磁盘进行分区和创建文件系统是 Linux 管理员的日常。如果你在许多不同的环境中工作,你一定每天都会重复几次这项操作。

Linux 内核是如何理解硬盘的?

作为人类,我们可以很轻松地理解一些事情;但是电脑就不是这样了,它们需要合适的命名才能理解这些。

在 Linux 中,外围设备都位于 /dev 挂载点,内核通过以下的方式理解硬盘:

  • /dev/hdX[a-z]: IDE 硬盘被命名为 hdX
  • /dev/sdX[a-z]: SCSI 硬盘被命名为 sdX
  • /dev/xdX[a-z]: XT 硬盘被命名为 xdX
  • /dev/vdX[a-z]: 虚拟硬盘被命名为 vdX
  • /dev/fdN: 软盘被命名为 fdN
  • /dev/scdN or /dev/srN: CD-ROM 被命名为 /dev/scdN/dev/srN

什么是 fdisk 命令?

fdisk 的意思是 固定磁盘 Fixed Disk 格式化磁盘 Format Disk ,它是命令行下允许用户对分区进行查看、创建、调整大小、删除、移动和复制的工具。它支持 MBR、Sun、SGI、BSD 分区表,但是它不支持 GUID 分区表(GPT)。它不是为操作大分区设计的。

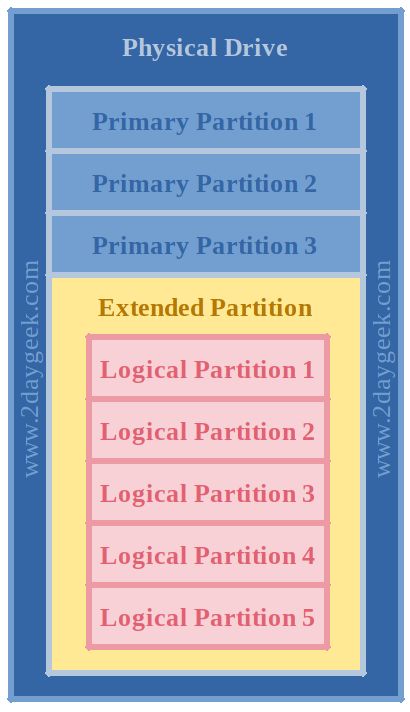
fdisk 允许我们在每块硬盘上创建最多四个主分区。它们中的其中一个可以作为扩展分区,并下设多个逻辑分区。1-4 扇区作为主分区被保留,逻辑分区从扇区 5 开始。
如何在 Linux 下安装 fdisk?

fdisk 作为核心组件内置于 Linux 中,所以你不必手动安装它。

如何用 fdisk 列出可用磁盘?

在执行操作之前,我们必须知道的是哪些磁盘被加入了系统。要想列出所有可用的磁盘,请执行下文的命令。这个命令将会列出磁盘名称、分区数量、分区表类型、磁盘识别代号、分区 ID 和分区类型。

$ sudo fdisk -l
Disk /dev/sda: 30 GiB, 32212254720 bytes, 62914560 sectors
Units: sectors of 1 * 512 = 512 bytes
Sector size (logical/physical): 512 bytes / 512 bytes
I/O size (minimum/optimal): 512 bytes / 512 bytes
Disklabel type: dos
Disk identifier: 0xeab59449

Device     Boot    Start      End  Sectors Size Id Type
/dev/sda1  *    20973568 62914559 41940992  20G 83 Linux


Disk /dev/sdb: 10 GiB, 10737418240 bytes, 20971520 sectors
Units: sectors of 1 * 512 = 512 bytes
Sector size (logical/physical): 512 bytes / 512 bytes
I/O size (minimum/optimal): 512 bytes / 512 bytes


Disk /dev/sdc: 10 GiB, 10737418240 bytes, 20971520 sectors
Units: sectors of 1 * 512 = 512 bytes
Sector size (logical/physical): 512 bytes / 512 bytes
I/O size (minimum/optimal): 512 bytes / 512 bytes


Disk /dev/sdd: 10 GiB, 10737418240 bytes, 20971520 sectors
Units: sectors of 1 * 512 = 512 bytes
Sector size (logical/physical): 512 bytes / 512 bytes
I/O size (minimum/optimal): 512 bytes / 512 bytes


Disk /dev/sde: 10 GiB, 10737418240 bytes, 20971520 sectors
Units: sectors of 1 * 512 = 512 bytes
Sector size (logical/physical): 512 bytes / 512 bytes
I/O size (minimum/optimal): 512 bytes / 512 bytes

如何使用 fdisk 列出特定分区信息?

如果你希望查看指定分区的信息,请使用以下命令:

$ sudo fdisk -l /dev/sda
Disk /dev/sda: 30 GiB, 32212254720 bytes, 62914560 sectors
Units: sectors of 1 * 512 = 512 bytes
Sector size (logical/physical): 512 bytes / 512 bytes
I/O size (minimum/optimal): 512 bytes / 512 bytes
Disklabel type: dos
Disk identifier: 0xeab59449

Device     Boot    Start      End  Sectors Size Id Type
/dev/sda1  *    20973568 62914559 41940992  20G 83 Linux

如何列出 fdisk 所有的可用操作?

fdisk 中敲击 m,它便会列出所有可用操作:

$ sudo fdisk /dev/sdc

Welcome to fdisk (util-linux 2.30.1).
Changes will remain in memory only, until you decide to write them.
Be careful before using the write command.

Device does not contain a recognized partition table.
Created a new DOS disklabel with disk identifier 0xe944b373.

Command (m for help): m

Help:

  DOS (MBR)
   a   toggle a bootable flag
   b   edit nested BSD disklabel
   c   toggle the dos compatibility flag

  Generic
   d   delete a partition
   F   list free unpartitioned space
   l   list known partition types
   n   add a new partition
   p   print the partition table
   t   change a partition type
   v   verify the partition table
   i   print information about a partition

  Misc
   m   print this menu
   u   change display/entry units
   x   extra functionality (experts only)

  Script
   I   load disk layout from sfdisk script file
   O   dump disk layout to sfdisk script file

  Save & Exit
   w   write table to disk and exit
   q   quit without saving changes

  Create a new label
   g   create a new empty GPT partition table
   G   create a new empty SGI (IRIX) partition table
   o   create a new empty DOS partition table
   s   create a new empty Sun partition table

如何使用 fdisk 列出分区类型?

fdisk 中敲击 l,它便会列出所有可用分区的类型:

$ sudo fdisk /dev/sdc

Welcome to fdisk (util-linux 2.30.1).
Changes will remain in memory only, until you decide to write them.
Be careful before using the write command.

Device does not contain a recognized partition table.
Created a new DOS disklabel with disk identifier 0x9ffd00db.

Command (m for help): l

 0  Empty           24  NEC DOS         81  Minix / old Lin bf  Solaris        
 1  FAT12           27  Hidden NTFS Win 82  Linux swap / So c1  DRDOS/sec (FAT-
 2  XENIX root      39  Plan 9          83  Linux           c4  DRDOS/sec (FAT-
 3  XENIX usr       3c  PartitionMagic  84  OS/2 hidden or  c6  DRDOS/sec (FAT-
 4  FAT16 <32M      40  Venix 80286     85  Linux extended  c7  Syrinx         
 5  Extended        41  PPC PReP Boot   86  NTFS volume set da  Non-FS data    
 6  FAT16           42  SFS             87  NTFS volume set db  CP/M / CTOS / .
 7  HPFS/NTFS/exFAT 4d  QNX4.x          88  Linux plaintext de  Dell Utility   
 8  AIX             4e  QNX4.x 2nd part 8e  Linux LVM       df  BootIt         
 9  AIX bootable    4f  QNX4.x 3rd part 93  Amoeba          e1  DOS access     
 a  OS/2 Boot Manag 50  OnTrack DM      94  Amoeba BBT      e3  DOS R/O        
 b  W95 FAT32       51  OnTrack DM6 Aux 9f  BSD/OS          e4  SpeedStor      
 c  W95 FAT32 (LBA) 52  CP/M            a0  IBM Thinkpad hi ea  Rufus alignment
 e  W95 FAT16 (LBA) 53  OnTrack DM6 Aux a5  FreeBSD         eb  BeOS fs        
 f  W95 Ext'd (LBA) 54  OnTrackDM6      a6  OpenBSD         ee  GPT            
10  OPUS            55  EZ-Drive        a7  NeXTSTEP        ef  EFI (FAT-12/16/
11  Hidden FAT12    56  Golden Bow      a8  Darwin UFS      f0  Linux/PA-RISC b
12  Compaq diagnost 5c  Priam Edisk     a9  NetBSD          f1  SpeedStor      
14  Hidden FAT16 <3 61  SpeedStor       ab  Darwin boot     f4  SpeedStor      
16  Hidden FAT16    63  GNU HURD or Sys af  HFS / HFS+      f2  DOS secondary  
17  Hidden HPFS/NTF 64  Novell Netware  b7  BSDI fs         fb  VMware VMFS    
18  AST SmartSleep  65  Novell Netware  b8  BSDI swap       fc  VMware VMKCORE 
1b  Hidden W95 FAT3 70  DiskSecure Mult bb  Boot Wizard hid fd  Linux raid auto
1c  Hidden W95 FAT3 75  PC/IX           bc  Acronis FAT32 L fe  LANstep        
1e  Hidden W95 FAT1 80  Old Minix       be  Solaris boot    ff  BBT

如何使用 fdisk 创建一个磁盘分区?

如果你希望新建磁盘分区,请参考下面的步骤。比如我希望在 /dev/sdc 中新建四个分区(三个主分区和一个扩展分区),只需要执行下文的命令。

首先,请在操作 “First sector” 的时候先按下回车,然后在 “Last sector” 中输入你希望创建分区的大小(可以在数字后面加 KB、MB、G 和 TB)。例如,你希望为这个分区扩容 1GB,就应该在 “Last sector” 中输入 +1G。当你创建三个分区之后,fdisk 默认会将分区类型设为扩展分区,如果你希望创建第四个主分区,请输入 p 来替代它的默认值 e

$ sudo fdisk /dev/sdc

Welcome to fdisk (util-linux 2.30.1).
Changes will remain in memory only, until you decide to write them.
Be careful before using the write command.


Command (m for help): n
Partition type
   p   primary (0 primary, 0 extended, 4 free)
   e   extended (container for logical partitions)
Select (default p): Enter

Using default response p.
Partition number (1-4, default 1): Enter
First sector (2048-20971519, default 2048): Enter
Last sector, +sectors or +size{K,M,G,T,P} (2048-20971519, default 20971519): +1G

Created a new partition 1 of type 'Linux' and of size 1 GiB.

Command (m for help): p
Disk /dev/sdc: 10 GiB, 10737418240 bytes, 20971520 sectors
Units: sectors of 1 * 512 = 512 bytes
Sector size (logical/physical): 512 bytes / 512 bytes
I/O size (minimum/optimal): 512 bytes / 512 bytes
Disklabel type: dos
Disk identifier: 0x8cc8f9e5

Device     Boot Start     End Sectors Size Id Type
/dev/sdc1        2048 2099199 2097152   1G 83 Linux

Command (m for help): w
The partition table has been altered.
Calling ioctl() to re-read partition table.
Syncing disks.

如何使用 fdisk 创建扩展分区?

请注意,创建扩展分区时,你应该使用剩下的所有空间,以便之后在扩展分区下创建逻辑分区。

$ sudo fdisk /dev/sdc

Welcome to fdisk (util-linux 2.30.1).
Changes will remain in memory only, until you decide to write them.
Be careful before using the write command.


Command (m for help): n
Partition type
   p   primary (3 primary, 0 extended, 1 free)
   e   extended (container for logical partitions)
Select (default e): Enter

Using default response e.
Selected partition 4
First sector (6293504-20971519, default 6293504): Enter
Last sector, +sectors or +size{K,M,G,T,P} (6293504-20971519, default 20971519): Enter

Created a new partition 4 of type 'Extended' and of size 7 GiB.

Command (m for help): p
Disk /dev/sdc: 10 GiB, 10737418240 bytes, 20971520 sectors
Units: sectors of 1 * 512 = 512 bytes
Sector size (logical/physical): 512 bytes / 512 bytes
I/O size (minimum/optimal): 512 bytes / 512 bytes
Disklabel type: dos
Disk identifier: 0x8cc8f9e5

Device     Boot   Start      End  Sectors Size Id Type
/dev/sdc1          2048  2099199  2097152   1G 83 Linux
/dev/sdc2       2099200  4196351  2097152   1G 83 Linux
/dev/sdc3       4196352  6293503  2097152   1G 83 Linux
/dev/sdc4       6293504 20971519 14678016   7G  5 Extended

Command (m for help): w
The partition table has been altered.
Calling ioctl() to re-read partition table.
Syncing disks.

如何用 fdisk 查看未分配空间?

上文中,我们总共创建了四个分区(三个主分区和一个扩展分区)。在创建逻辑分区之前,扩展分区的容量将会以未分配空间显示。

使用以下命令来显示磁盘上的未分配空间,下面的示例中显示的是 7GB:

$ sudo fdisk /dev/sdc

Welcome to fdisk (util-linux 2.30.1).
Changes will remain in memory only, until you decide to write them.
Be careful before using the write command.


Command (m for help): F
Unpartitioned space /dev/sdc: 7 GiB, 7515144192 bytes, 14678016 sectors
Units: sectors of 1 * 512 = 512 bytes
Sector size (logical/physical): 512 bytes / 512 bytes

  Start      End  Sectors Size
6293504 20971519 14678016   7G

Command (m for help): q

如何使用 fdisk 创建逻辑分区?

创建扩展分区后,请按照之前的步骤创建逻辑分区。在这里,我创建了位于 /dev/sdc51GB 逻辑分区。你可以查看分区表值来确认这点。

$ sudo fdisk /dev/sdc

Welcome to fdisk (util-linux 2.30.1).
Changes will remain in memory only, until you decide to write them.
Be careful before using the write command.

Command (m for help): n
All primary partitions are in use.
Adding logical partition 5
First sector (6295552-20971519, default 6295552): Enter
Last sector, +sectors or +size{K,M,G,T,P} (6295552-20971519, default 20971519): +1G

Created a new partition 5 of type 'Linux' and of size 1 GiB.

Command (m for help): p
Disk /dev/sdc: 10 GiB, 10737418240 bytes, 20971520 sectors
Units: sectors of 1 * 512 = 512 bytes
Sector size (logical/physical): 512 bytes / 512 bytes
I/O size (minimum/optimal): 512 bytes / 512 bytes
Disklabel type: dos
Disk identifier: 0x8cc8f9e5

Device     Boot   Start      End  Sectors Size Id Type
/dev/sdc1          2048  2099199  2097152   1G 83 Linux
/dev/sdc2       2099200  4196351  2097152   1G 83 Linux
/dev/sdc3       4196352  6293503  2097152   1G 83 Linux
/dev/sdc4       6293504 20971519 14678016   7G  5 Extended
/dev/sdc5       6295552  8392703  2097152   1G 83 Linux

Command (m for help): w
The partition table has been altered.
Calling ioctl() to re-read partition table.
Syncing disks.

如何使用 fdisk 命令删除分区?

如果我们不再使用某个分区,请按照下面的步骤删除它。

请确保你输入了正确的分区号。在这里,我准备删除 /dev/sdc2 分区:

$ sudo fdisk /dev/sdc

Welcome to fdisk (util-linux 2.30.1).
Changes will remain in memory only, until you decide to write them.
Be careful before using the write command.


Command (m for help): d
Partition number (1-5, default 5): 2

Partition 2 has been deleted.

Command (m for help): p
Disk /dev/sdc: 10 GiB, 10737418240 bytes, 20971520 sectors
Units: sectors of 1 * 512 = 512 bytes
Sector size (logical/physical): 512 bytes / 512 bytes
I/O size (minimum/optimal): 512 bytes / 512 bytes
Disklabel type: dos
Disk identifier: 0x8cc8f9e5

Device     Boot   Start      End  Sectors Size Id Type
/dev/sdc1          2048  2099199  2097152   1G 83 Linux
/dev/sdc3       4196352  6293503  2097152   1G 83 Linux
/dev/sdc4       6293504 20971519 14678016   7G  5 Extended
/dev/sdc5       6295552  8392703  2097152   1G 83 Linux

Command (m for help): w
The partition table has been altered.
Calling ioctl() to re-read partition table.
Syncing disks.

如何在 Linux 下格式化分区或建立文件系统?

在计算时,文件系统控制了数据的储存方式,并通过 索引节点 Inode Tables 来检索数据。如果没有文件系统,操作系统是无法找到信息储存的位置的。

在此,我准备在 /dev/sdc1 上创建分区。有三种方式创建文件系统:

$ sudo mkfs.ext4 /dev/sdc1
或
$ sudo mkfs -t ext4 /dev/sdc1
或
$ sudo mke2fs /dev/sdc1

mke2fs 1.43.5 (04-Aug-2017)
Creating filesystem with 262144 4k blocks and 65536 inodes
Filesystem UUID: c0a99b51-2b61-4f6a-b960-eb60915faab0
Superblock backups stored on blocks: 
    32768, 98304, 163840, 229376

Allocating group tables: done                            
Writing inode tables: done                            
Creating journal (8192 blocks): done
Writing superblocks and filesystem accounting information: done

当你在分区上建立文件系统时,以下重要信息会同时被创建:

  • Filesystem UUID: UUID 代表了通用且独一无二的识别符,UUID 在 Linux 中通常用来识别设备。它 128 位长的数字代表了 32 个十六进制数。
  • Superblock: 超级块储存了文件系统的元数据。如果某个文件系统的超级块被破坏,我们就无法挂载它了(也就是说无法访问其中的文件了)。
  • Inode: Inode 是类 Unix 系统中文件系统的数据结构,它储存了所有除名称以外的文件信息和数据。
  • Journal: 日志式文件系统包含了用来修复电脑意外关机产生下错误信息的日志。

如何在 Linux 中挂载分区?

在你创建完分区和文件系统之后,我们需要挂载它们以便使用。我们需要创建一个挂载点来挂载分区,使用 mkdir 来创建一个挂载点。

$ sudo mkdir -p /mnt/2g-new

如果你希望进行临时挂载,请使用下面的命令。在计算机重启之后,你会丢失这个挂载点。

$ sudo mount /dev/sdc1 /mnt/2g-new

如果你希望永久挂载某个分区,请将分区详情加入 fstab 文件。我们既可以输入设备名称,也可以输入 UUID。

使用设备名称来进行永久挂载:

# vi /etc/fstab

/dev/sdc1 /mnt/2g-new ext4 defaults 0 0

使用 UUID 来进行永久挂载(请使用 blkid 来获取 UUID):

$ sudo blkid
/dev/sdc1: UUID="d17e3c31-e2c9-4f11-809c-94a549bc43b7" TYPE="ext2" PARTUUID="8cc8f9e5-01"
/dev/sda1: UUID="d92fa769-e00f-4fd7-b6ed-ecf7224af7fa" TYPE="ext4" PARTUUID="eab59449-01"
/dev/sdc3: UUID="ca307aa4-0866-49b1-8184-004025789e63" TYPE="ext4" PARTUUID="8cc8f9e5-03"
/dev/sdc5: PARTUUID="8cc8f9e5-05"

# vi /etc/fstab

UUID=d17e3c31-e2c9-4f11-809c-94a549bc43b7 /mnt/2g-new ext4 defaults 0 0

使用 df 命令亦可:

$ df -h
Filesystem      Size  Used Avail Use% Mounted on
udev            969M     0  969M   0% /dev
tmpfs           200M  7.0M  193M   4% /run
/dev/sda1        20G   16G  3.0G  85% /
tmpfs           997M     0  997M   0% /dev/shm
tmpfs           5.0M  4.0K  5.0M   1% /run/lock
tmpfs           997M     0  997M   0% /sys/fs/cgroup
tmpfs           200M   28K  200M   1% /run/user/121
tmpfs           200M   25M  176M  13% /run/user/1000
/dev/sdc1      1008M  1.3M  956M   1% /mnt/2g-new

via: https://www.2daygeek.com/linux-fdisk-command-to-manage-disk-partitions/

作者:Magesh Maruthamuthu 选题:lujun9972 译者:zhs852 校对:wxy

本文由 LCTT 原创编译,Linux中国 荣誉推出